9 Reasons Your Sewing Machine is Skipping Stitches
This post may contain affiliate links, which means I’ll receive a commission if you purchase through my links, at no extra cost to you. I sometimes receive free products for review. Please read disclosure for more information.
There’s nothing worse than a sewing machine that refuses to cooperate when you’re trying to meet a deadline or hoping for a relaxing crafting evening.
While there are many problems your sewing machine can give you, one of the more frustrating issues to encounter is a sewing machine that randomly skips stitches.
So, why is your sewing machine skipping stitches?
Follow along for common reasons and how to troubleshoot missed stitches so your sewing machine can get back to stitching as it should at every single seam!
Why Sewing Machines Skip Stitches
Sewing stitches are created when the top thread and lower bobbin thread meet and link together.
When these two threads fail to perfectly connect, a stitch doesn’t form as it should.
Since it takes both a top and bottom thread to tango, issues with either thread can cause a sewing machine to skip stitches.
Sometimes sewing machines will skip a stitch here or there, and other times, the machine refuses to catch the bobbin thread and will skip the entire line of stitches.
How to Fix Skipped Stitches on a Sewing Machine
Since every sewing stitch depends on many variables being perfectly controlled, you may need to troubleshoot several different areas of your sewing machine before finding the solution.
Here’s my go-to sequence for troubleshooting skipped sewing stitches!
1. Check Your Needle.
When my sewing machine starts skipping stitches, the culprit is frequently the needle.
First, I check that I’ve inserted the needle in the correct direction and pushed it snugly into its opening.
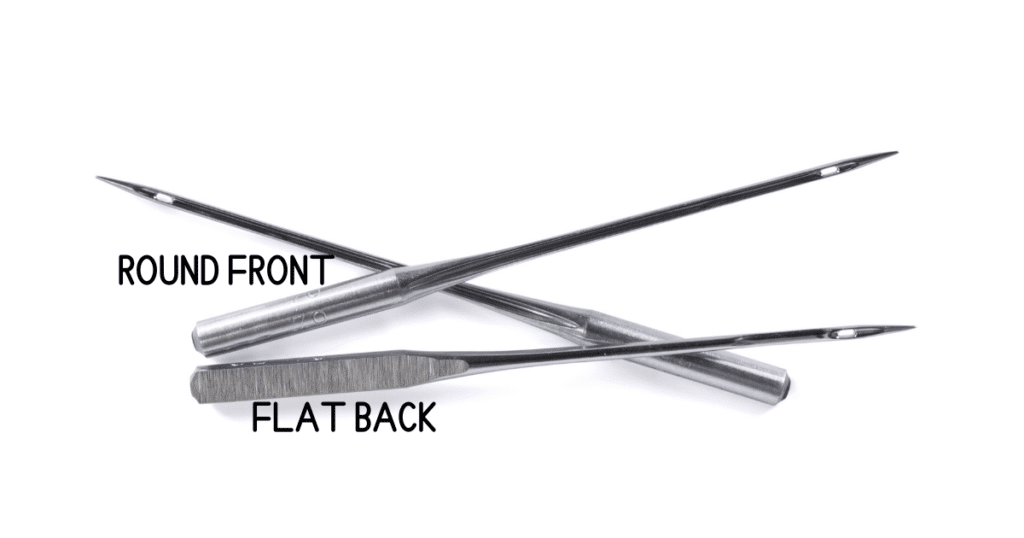
On a home sewing machine, the flat part of the needle should face the back of the machine.
Then, I make sure the needle is not bent, dull, scratched, or with a damaged needle point.
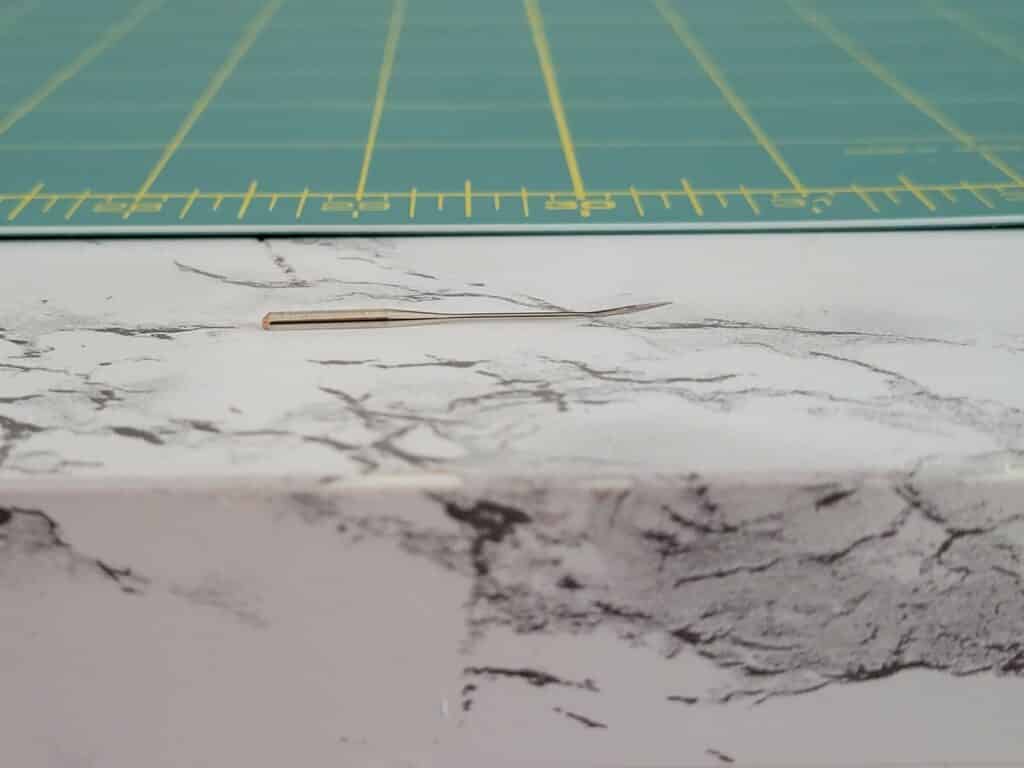
One way to assess if a needle is bent is to lay it on a flat surface and see if the needle runs parallel to the surface.
When in doubt about the state of your needle, just change your needle to rule these issues out!

Next, make sure you have the right sewing needle size and type (sharp, ballpoint, universal, specialty) for your fabric and thread selection.
Thick fabrics need a larger needle, and thin fabrics work best with a finer needle.
For thick fabrics, if your needle isn’t getting all the way through your fabric, the top thread can’t pick up the bobbin thread to actually form a stitch. And, thick threads and specialty threads like metallics need a needle with a bigger, more elongated eye while finer threads are better accommodated by a needle with a smaller eye.
Furthermore, a ballpoint needle will skip fewer stitches when sewing stretchy fabrics, while a sharp or universal needle will be better suited to woven fabrics like quilting cotton.
2. Inspect the Upper Thread Path.
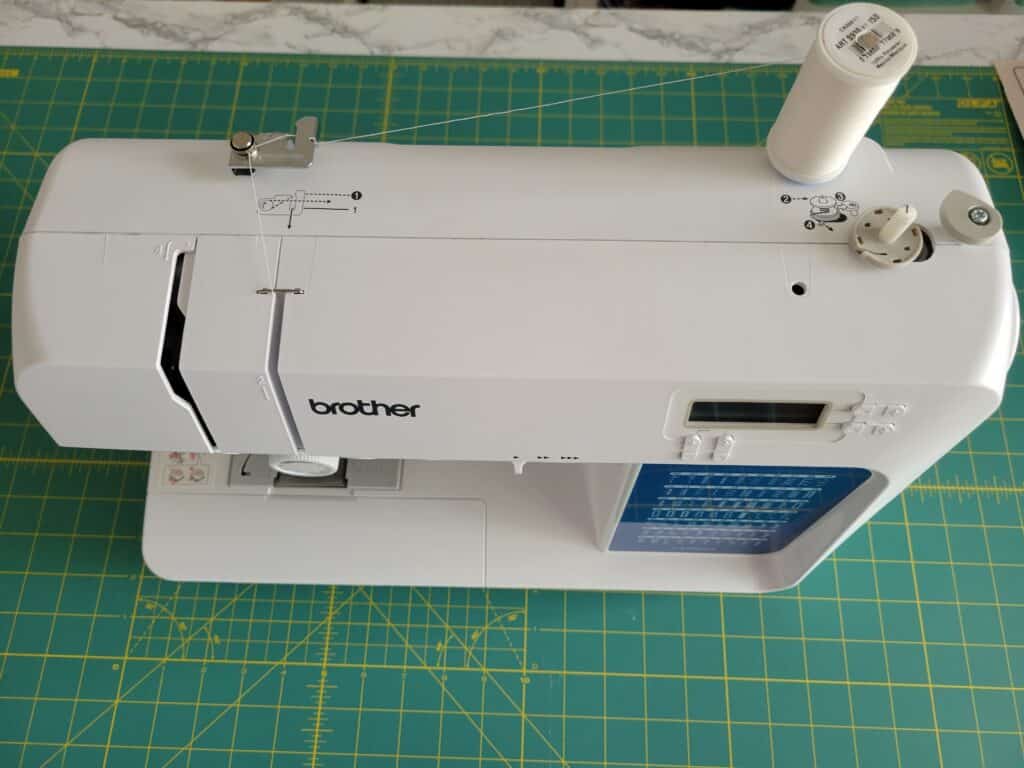
When the thread doesn’t pass as it should through the upper thread path, stitch integrity is affected, causing skipped stitches and thread breaking in the sewing machine.
Common ways the upper thread can cause problems and how to fix them include:
- Thread is getting caught in the upper thread path: Clean the thread guides and between tension discs to remove fuzz and stuck thread pieces. You can use a small brush and run UNWAXED dental floss through.
- The machine is threaded incorrectly: Rethread your machine, making sure the presser foot is raised while threading.
- The thread isn’t unwinding off the spool as it should: Check that the thread isn’t getting caught on the side of or underneath the spool, and make sure you’re using the correct size spool cap for even feeding.
Also, if you routinely change threads by pulling the thread back out of the sewing machine, stop doing this. It creates extra fuzz when the thread goes the wrong way through the tension discs.
Instead, snip threads near the spool and pull the excess thread out through the needle.
And, if you store your machine without a dust cover on it, dust can build up inside the machine and cause problems also.
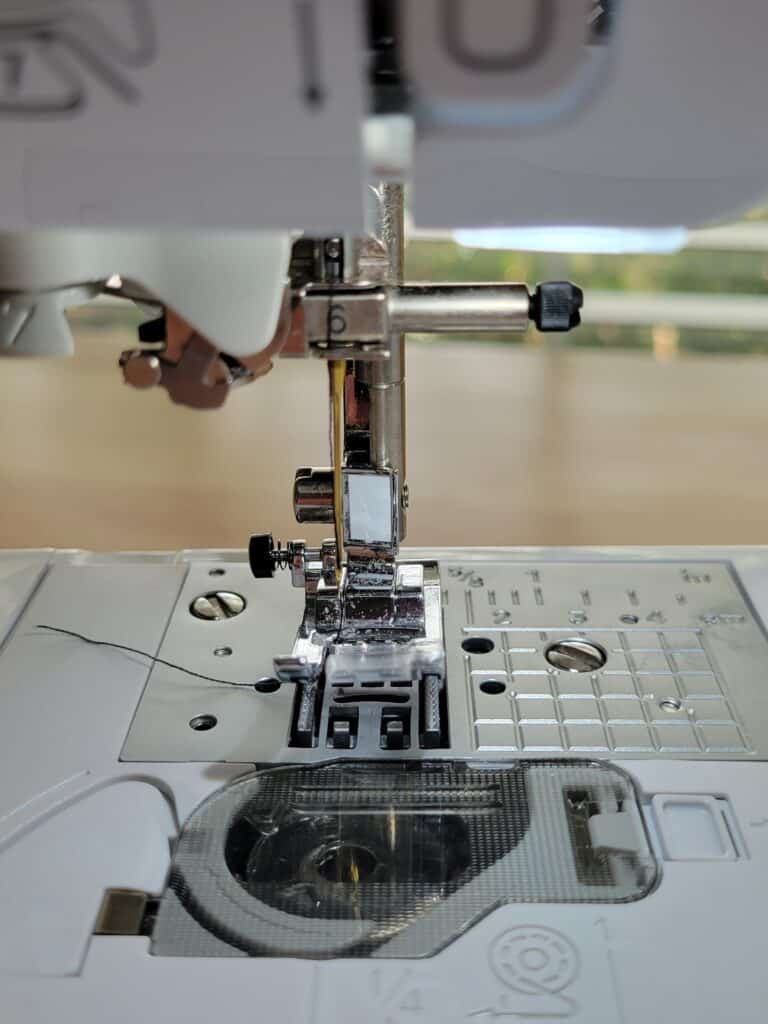
3. Rule Out Bobbin and Needle Plate Problems.
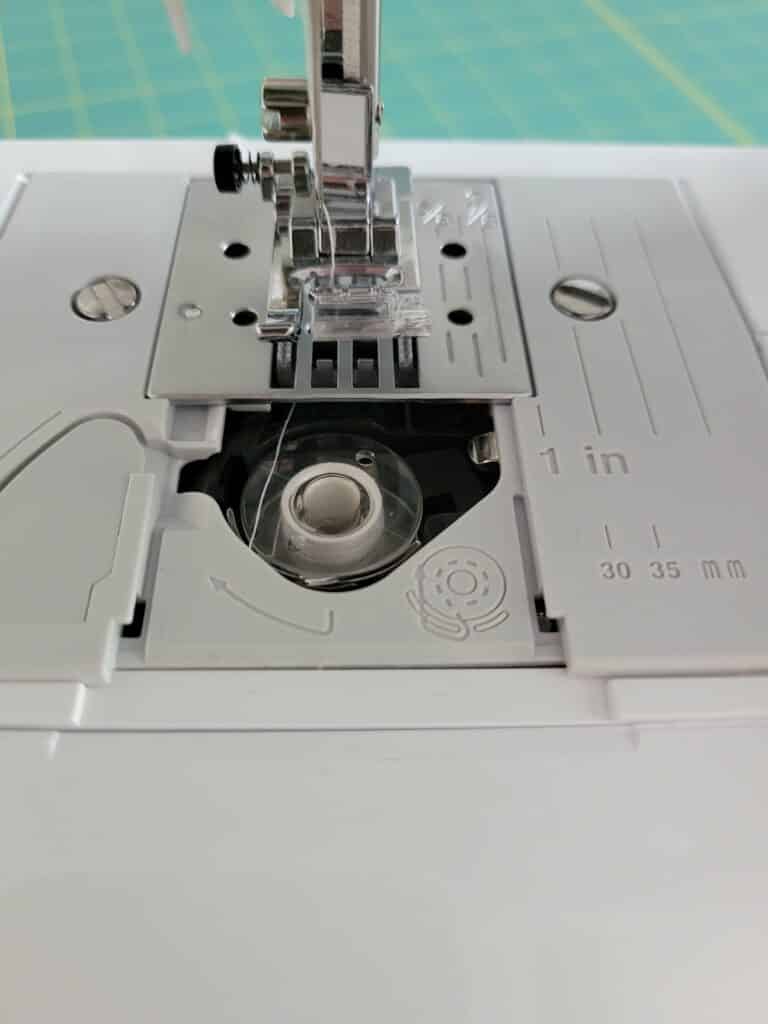
The next step in troubleshooting missed stitches on your sewing machine is ensuring the bobbin area is up to snuff.
First, sewing quite simply can be a dirty endeavor for your machine.
Certain fabrics and low-quality threads especially create an absolute mess of fuzz, lint, and tiny thread pieces in the area of your machine below the needle plate.
So, let’s do some cleaning!
First, remove the needle plate (this often unscrews) from your machine and take out the bobbin case (for my Brother sewing machine, it’s the little black case that holds the bobbin).
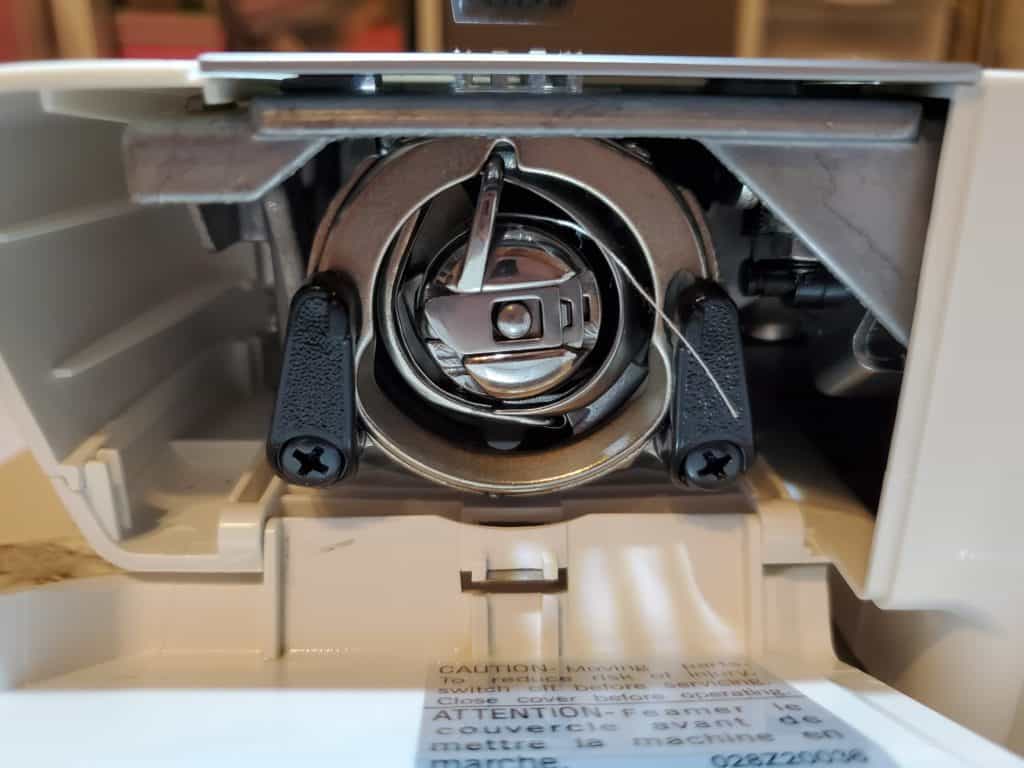
For my Singer, the bobbin case is the round, silver case with the arm on top.
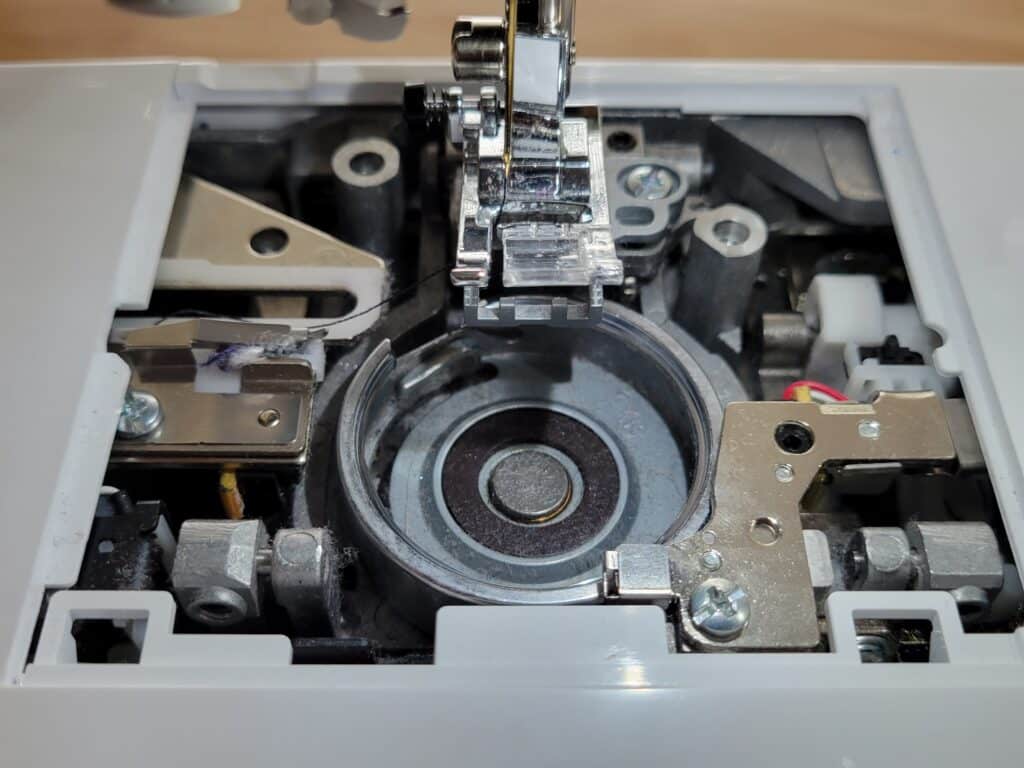
Then, give that space a good cleaning with a small brush (your machine may have included one, or you can use a clean makeup brush) and a tiny vacuum.
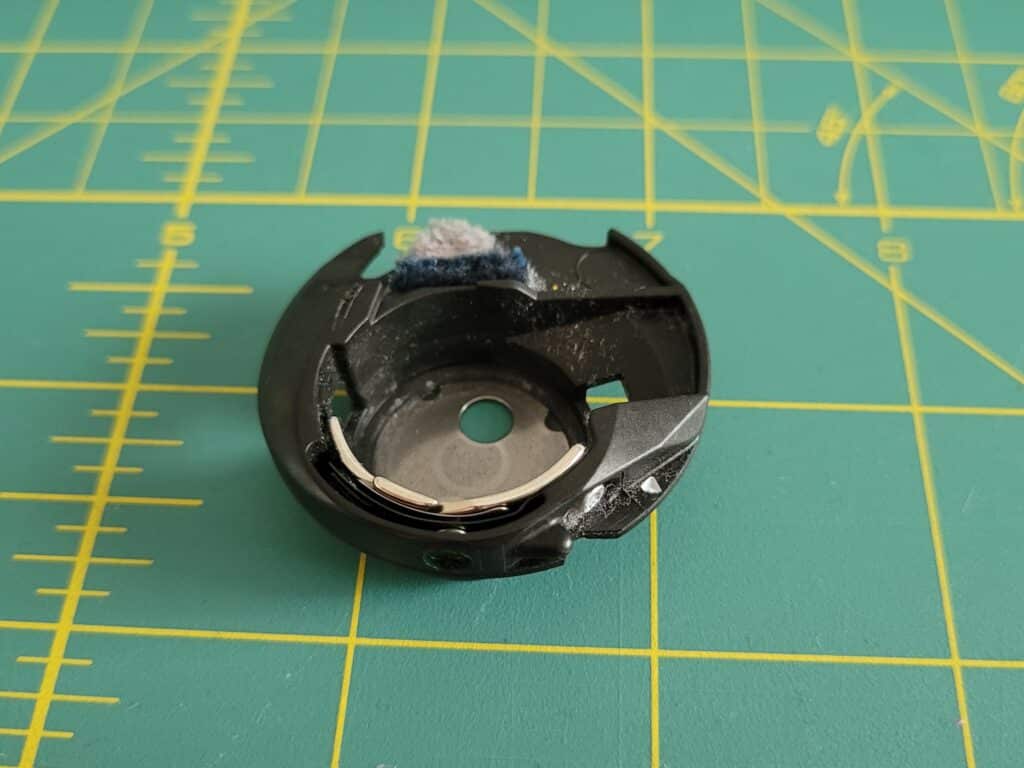
Next, take the bobbin itself out of the case and clean the nooks and crannies of the case.
Every once in a while, a little bit of fuzz will get itself stuck in the tension spring, and the bobbin thread won’t quite pass where it needs to, which means it won’t get pulled up to create a stitch. So, don’t forget to check this area also!
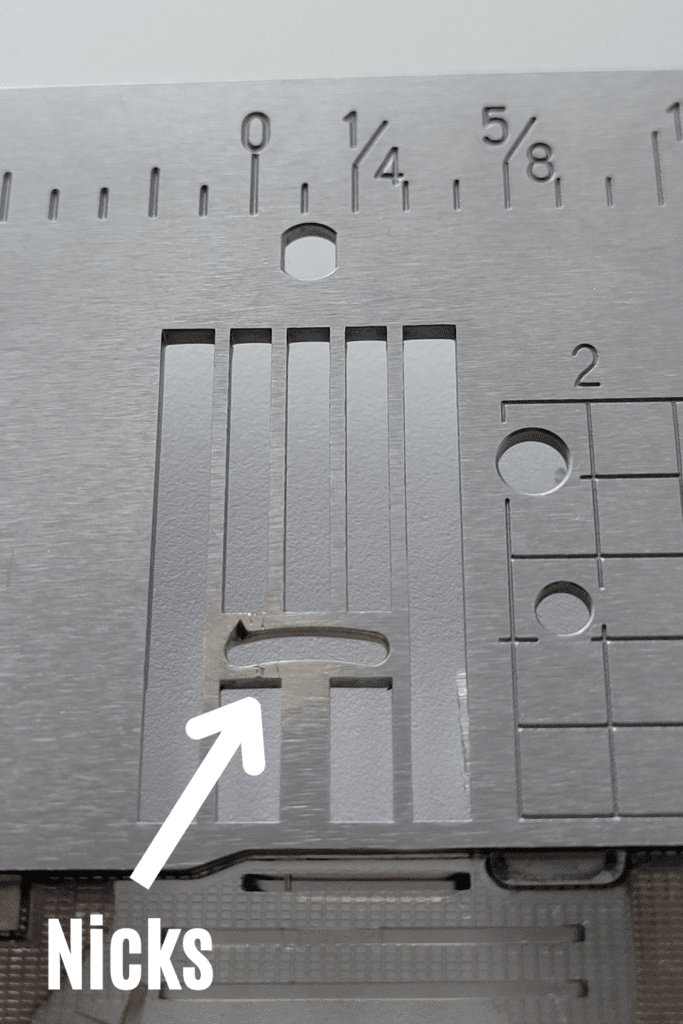
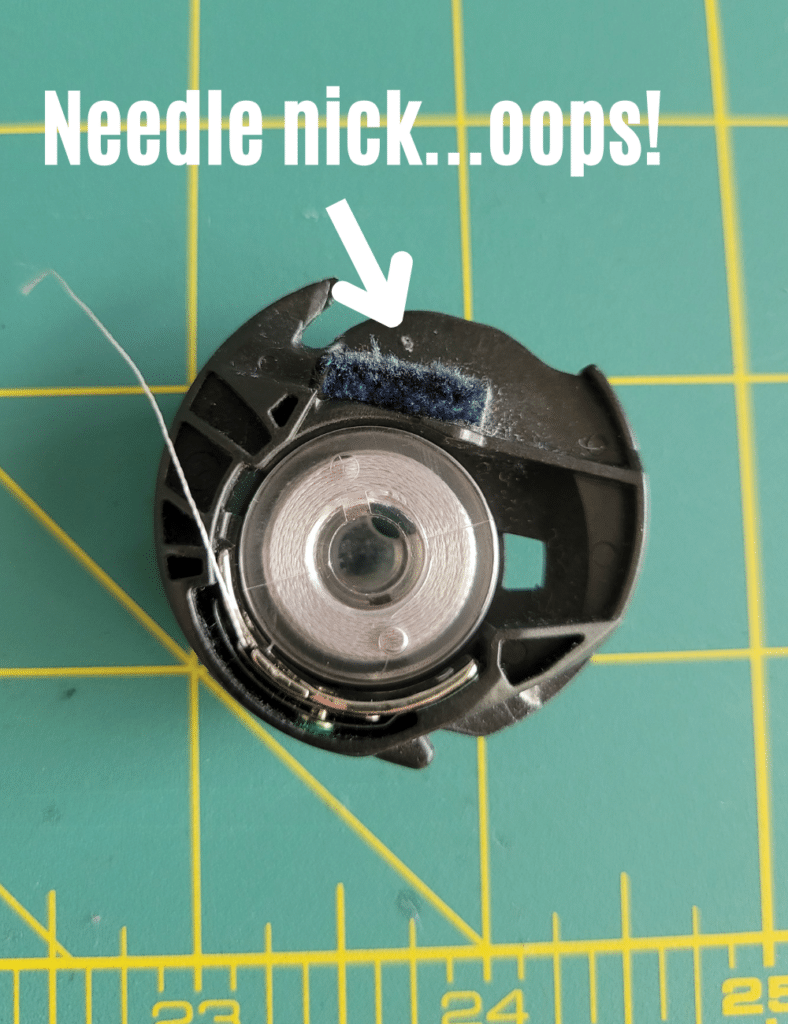
Next, as you clean, inspect all parts of the machine’s base for nicks and scratches.
For instance, the hook, bobbin case, bobbin itself, and needle plate can have small nicks, scratches, burrs, or holes on them that can affect how thread flows.
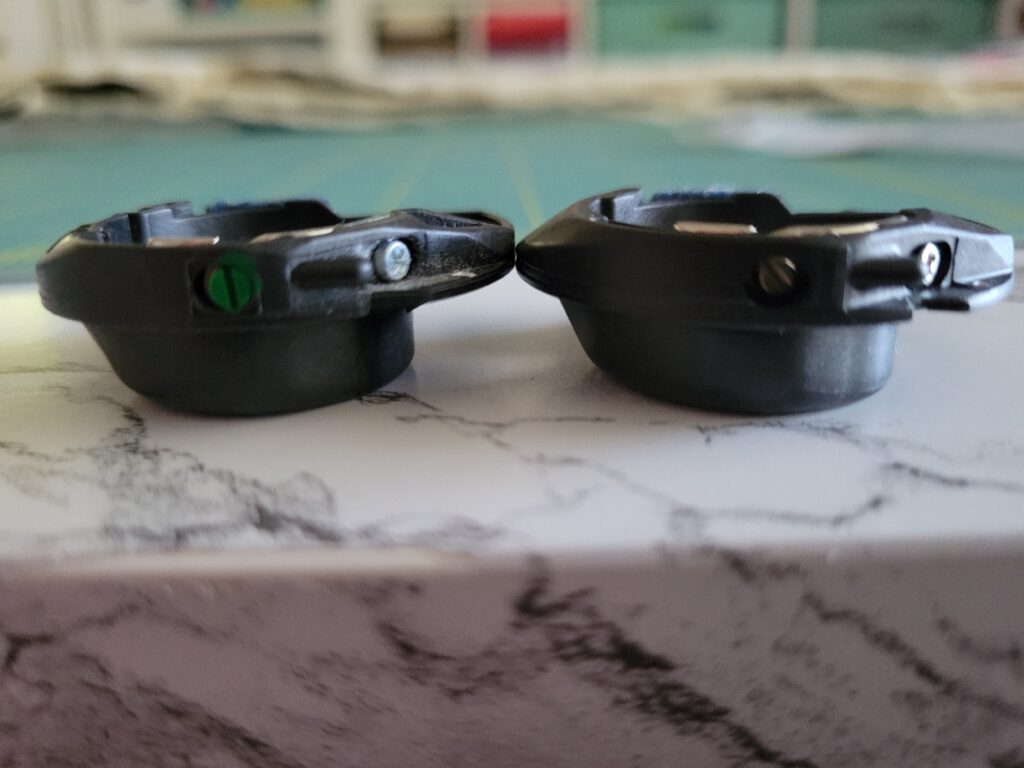
I always keep a new bobbin case on hand also so I can change the old one out to rule out problems with my bobbin case.
Lastly, as you set your machine back up again, pay attention to how you set up and thread the bobbin.
Ensure the bobbin is oriented in the correct direction and that the thread passes through any springs or thread guides required for proper setup.
4. Check The Thread Itself.
When sewing, I match the bobbin and upper thread weights unless I have a good reason not to.
So, if you have a horrible mismatch of thread weights (thin thread on the bottom, heavy on top, for example), try threading the machine with the same thread on the top and bottom.
And, is your thread really old? Is it poor quality, and does it snap easily when you pull it with your hands?
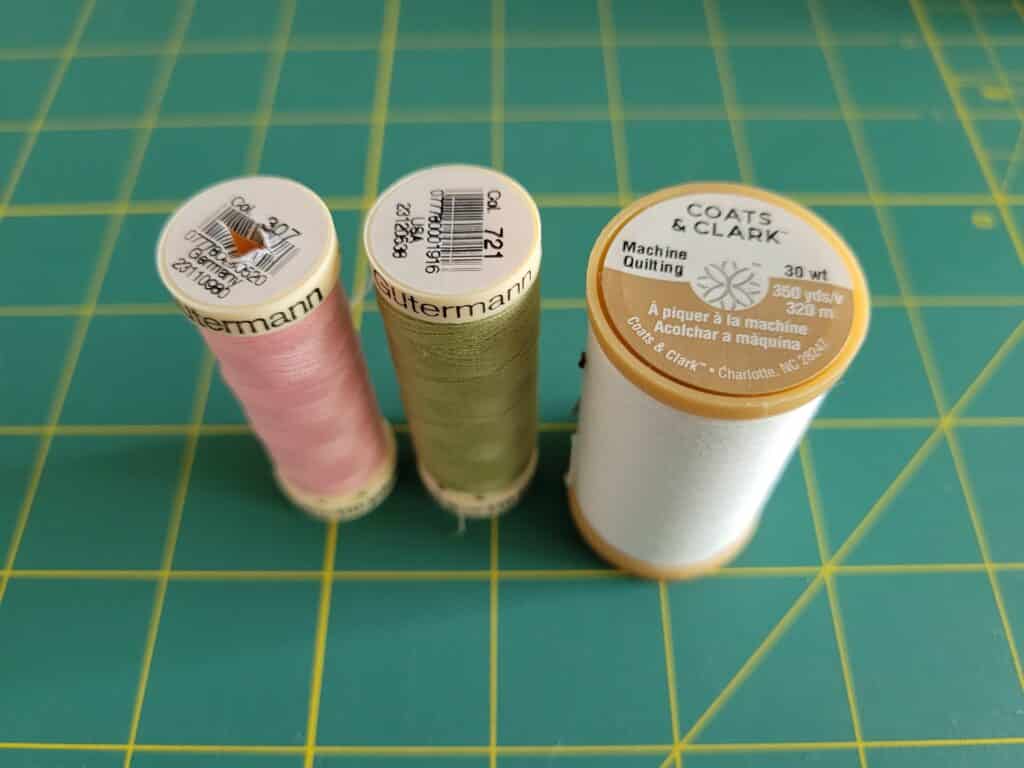
If so, change to a newer thread spool that you know has worked in your sewing machine in the past.
I also recommend staying clear of unbranded thread and instead sticking with major brands that have withstood the test of time like Coats & Clark or Gutermann.
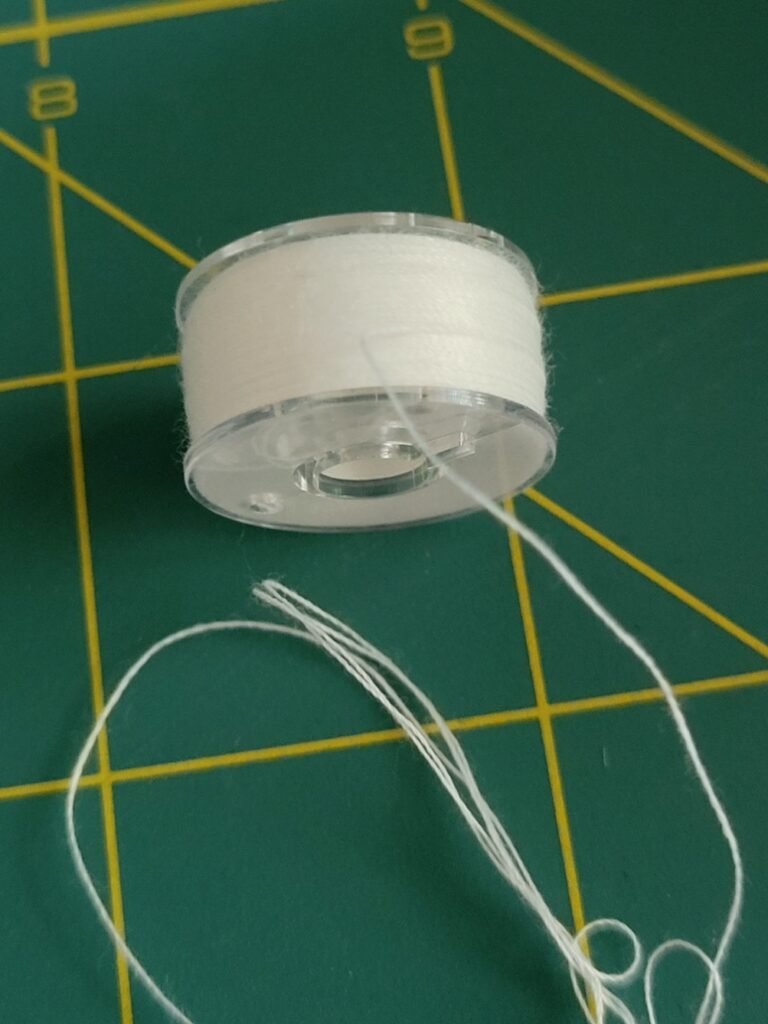
Try a different bobbin and bobbin thread also.
Sometimes an incorrectly wound bobbin (too loose, asymmetric, too tight, etc.) can also cause problems as can a warped bobbin itself.
Lastly, make sure you have the correct size and material of bobbin for your machine.
Once upon a time, I used to buy generic bobbins for my Brother and Singer sewing machines, but I ran into so many problems that now I only buy genuine bobbins for them.
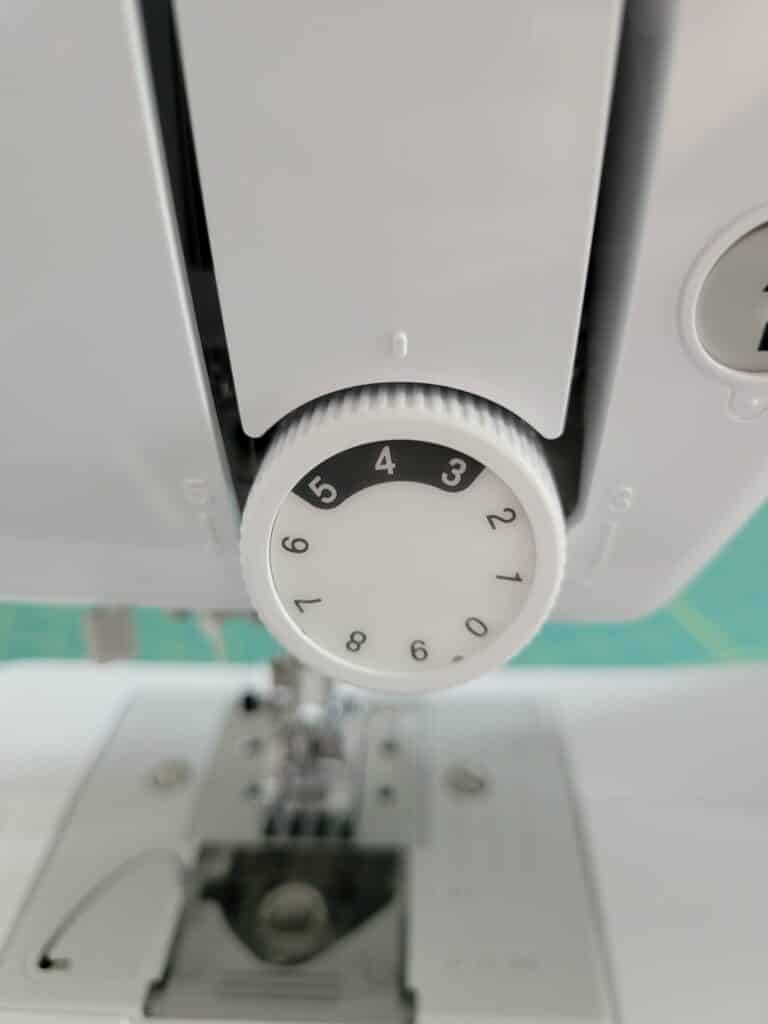
5. Adjust Presser Foot Pressure.
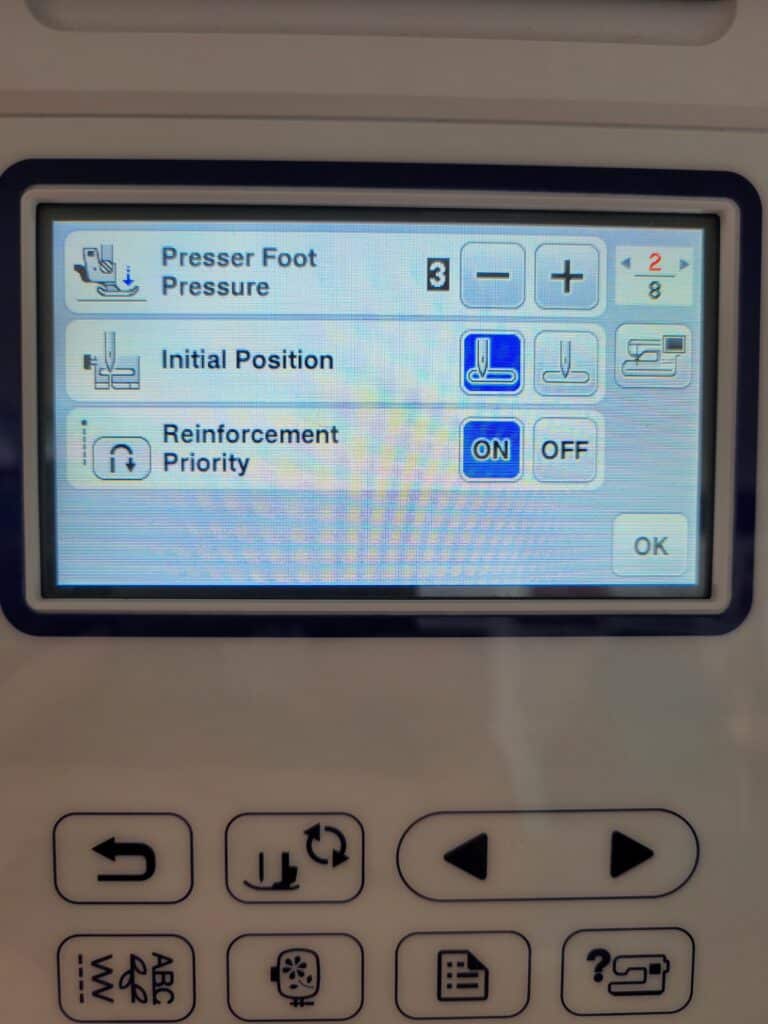
While I’m always fiddling with presser foot pressure on my embroidery machine, serger, and coverstitch, this isn’t something I fine-tune often on my sewing machine because I typically sew fabrics within the realm of normal weights.
Now, most entry-level sewing machines do not have presser foot pressure options, but if your machine has a knob or another way to adjust presser foot pressure, you can adjust this also to troubleshoot skipped stitches.
Typically, if your presser foot pressure is too low, the fabric is not secured adequately and will move as you sew.
When the needle pulls up out of the fabric, the fabric can rise with the needle since the presser foot isn’t applying enough pressure to keep it down. This can cause skipped stitches.
So, increase presser foot pressure to a higher number to combat this possible sewing issue.
6. Assess Tension.
Adjusting the tension on my sewing machine is a last resort, as problems are almost always caused by something else.
However, if your tension settings aren’t close to default and you don’t have a reason for them to be there, reset them to default and make small adjustments to see if this fixes skipped stitch issues.
7. Opt Out of Basting Spray, Fusibles, and Other Sticky Things.

As with missed sewing stitches due to fabric rising when there’s not enough presser foot pressure, another thing that causes fabric to raise with the needle is sticky stuff.
Glues, basting spray, hem tape, and even iron-on interfacing can also build up on the needle and in the feed dog area, which can affect stitch formation.
While I use these supplies more when working with my embroidery machine, I do sometimes experience problems with them while sewing.
For example, basting spray is common when free-motion quilting with a darning foot. If this is the cause of skipped stitches, switch to a different product (I’m currently loving Odif 505) or baste with safety pins instead.
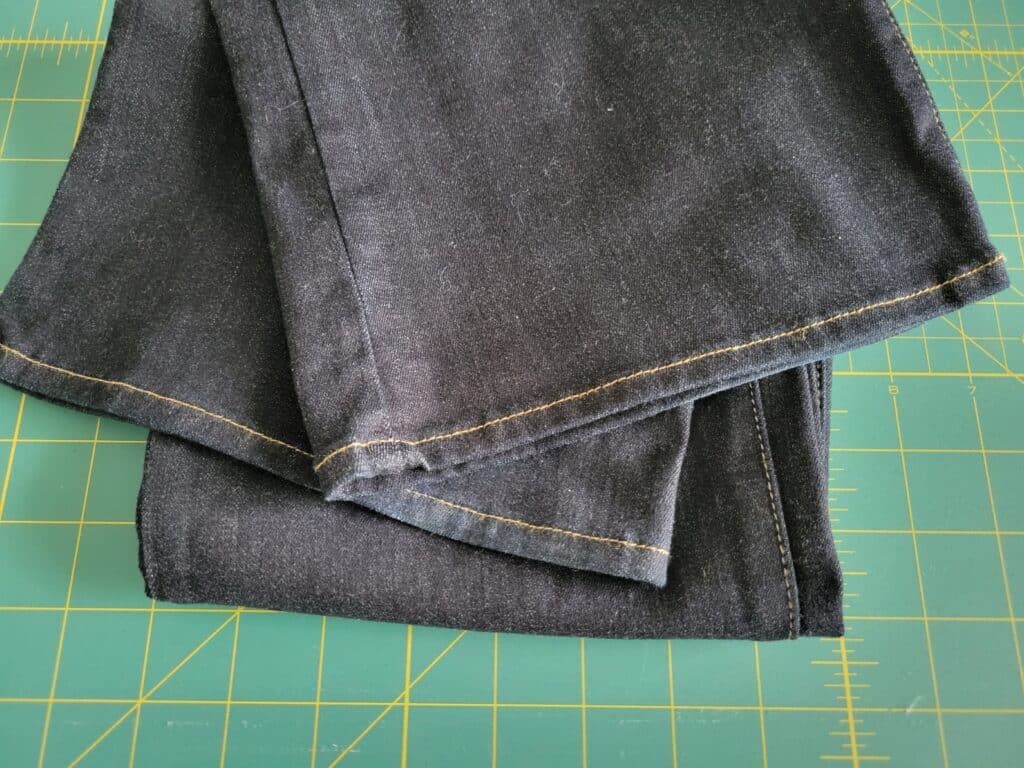
8. Fix Skipped Stitches at Seams.
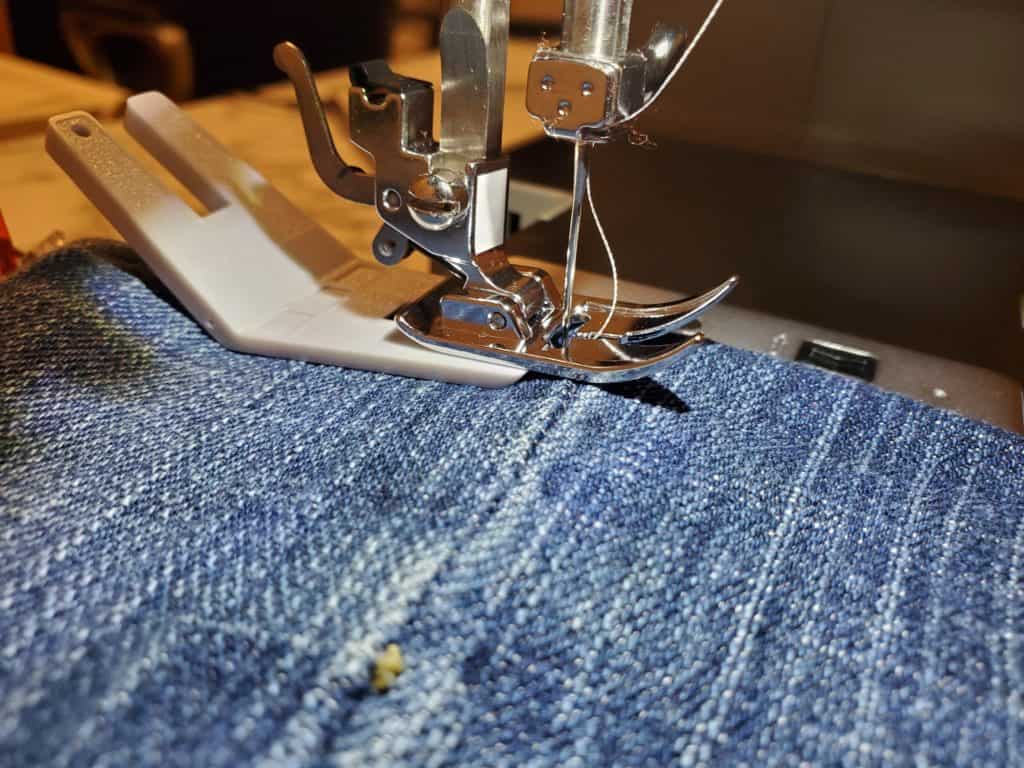
If your machine is skipping stitches when sewing over seams, here are things you can do:
- Decrease presser foot pressure to allow the presser foot to navigate over the hump.
- Use the handwheel to advance one stitch at a time rather than breezing over bulky areas at high speed.
- Flatten the seam before sewing. (I have to do this often when covering stitching over seams.)
- Switch to a stronger needle with a better point.
- Try a clearance plate or hump jumper to get the presser foot up there. Some presser feet will also have springs on their left side to help in this situation.
9. Consider Timing Issues and Other Bad Stuff.
If you’ve checked every part of your sewing machine and still have skipped stitches, you might need to take your sewing machine to a repair shop.
While you can try to adjust timing, for example, on a sewing machine by yourself, this really is better left to someone with experience.
However, I hope this long list of troubleshooting steps for skipped stitches on a sewing machine helps you get your machine back to stitching as it should without the need for a trip to your local sewing shop!
Thank you for your time, knowledge and the article really helped with thing I didn’t think to troubleshoot. Thanks again
Brenda
Palmetto Florida