Piecing Embroidered Quilt Blocks in the Hoop Tutorial
This post may contain affiliate links, which means I’ll receive a commission if you purchase through my links, at no extra cost to you. I sometimes receive free products for review. Please read disclosure for more information.
Since I’ve run out of things to monogram and personalize, my current crafty focus is using my embroidery machine to stitch in-the-hoop projects and quilt like a fiend.
When it comes to quilting, I love creating appliqued quilt blocks, adding continuous quilting designs to finished tops, and, my favorite, piecing quilt blocks in the hoop with my embroidery machine.
And, since I’ve recently been working on digitizing and stitching a Valentine’s Day table topper with ITH-pieced blocks, I’ve got piecing on my mind.
Thus, here are my best tips for creating embroidered quilt blocks in the hoop! Specifically, I’ll cover how to stitch ITH quilt blocks, tips for digitizing quilt block embroidery designs, and fun ways to stretch your creative genius when piecing.

Piecing-In-The Hoop Defined
Piecing in the hoop means using an embroidery machine to essentially foundation paper piece quilt blocks for you. Instead of using a piece of foundation paper as the base when sewing, you use a piece of stabilizer and embroider the seam lines with your embroidery machine.
What I love about piecing blocks with an embroidery machine is it’s more accurate, arguably faster, and significantly less frustrating (for me, at least) than foundation paper piecing with a sewing machine.
The History of ITH Piecing
I can trace the concept of piecing quilt blocks in an embroidery hoop to at least the mid-2000s when home embroidery machines were gaining popularity.
While I can’t discover who invented the idea or coined what terms (I would love to hear your memories), I found the terms “embroidery machine piecing” and “quilting-in-the-hoop” in 2006 books published by Jeanine Twigg and then Linda Turner Griepentrog plus Rebecca Kemp Brent, respectively.
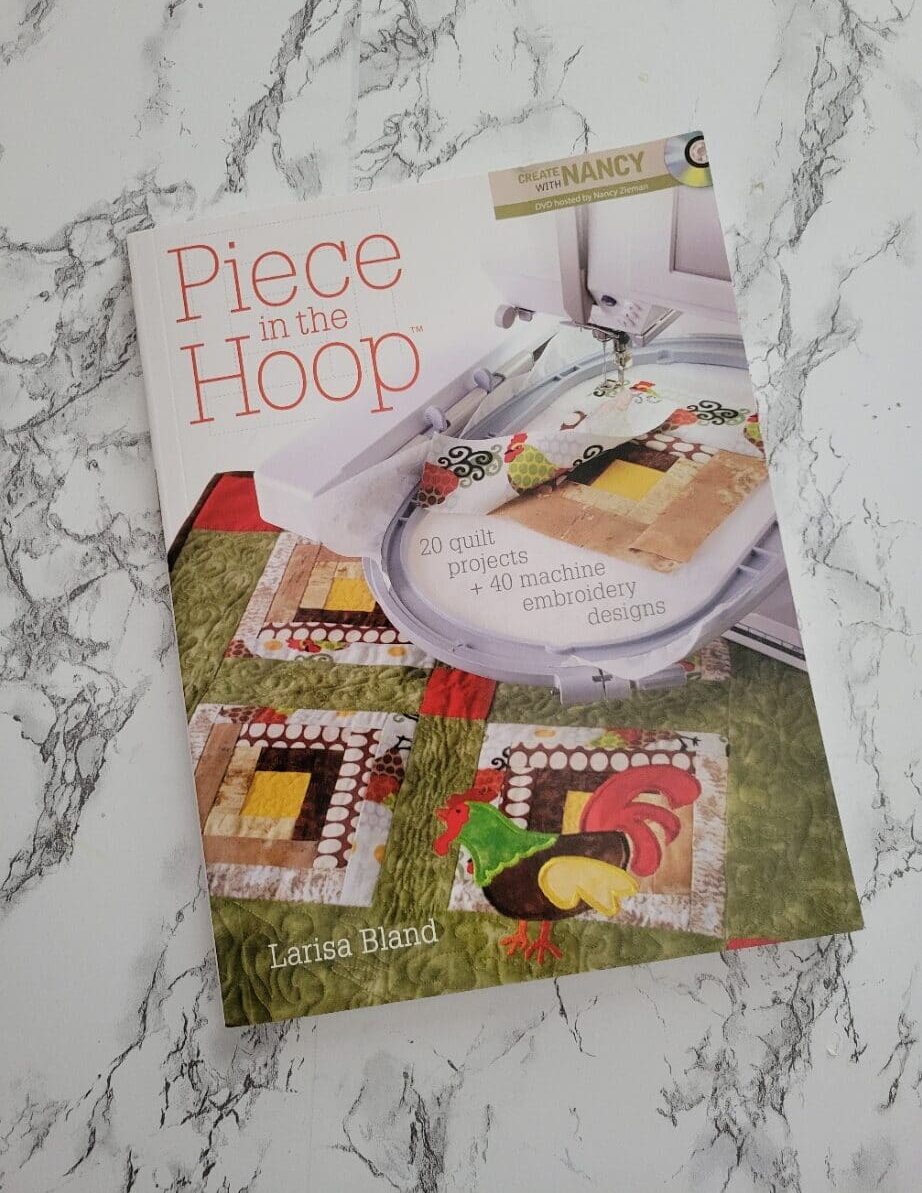
I also found a 2010 Piece in the Hoop book by Larissa Bland (associated with Nancy Zieman), which adds a trademark symbol to the term “piece in the hoop.” However, I can’t find a trademark filing, and the domain name mentioned in the book is no longer live.
All this to say, I don’t know exactly where the idea came from, but embroiderers have been piecing for at least 15 years (and likely much, much longer)!
What Supplies You Need
While you have flexibility in supply selection, your end-use for the pieced block determines some of what’s required. In addition to an embroidery machine, hoop (choose the smallest hoop that fits the embroidery design size), and basic embroidery supplies, here’s what you need.
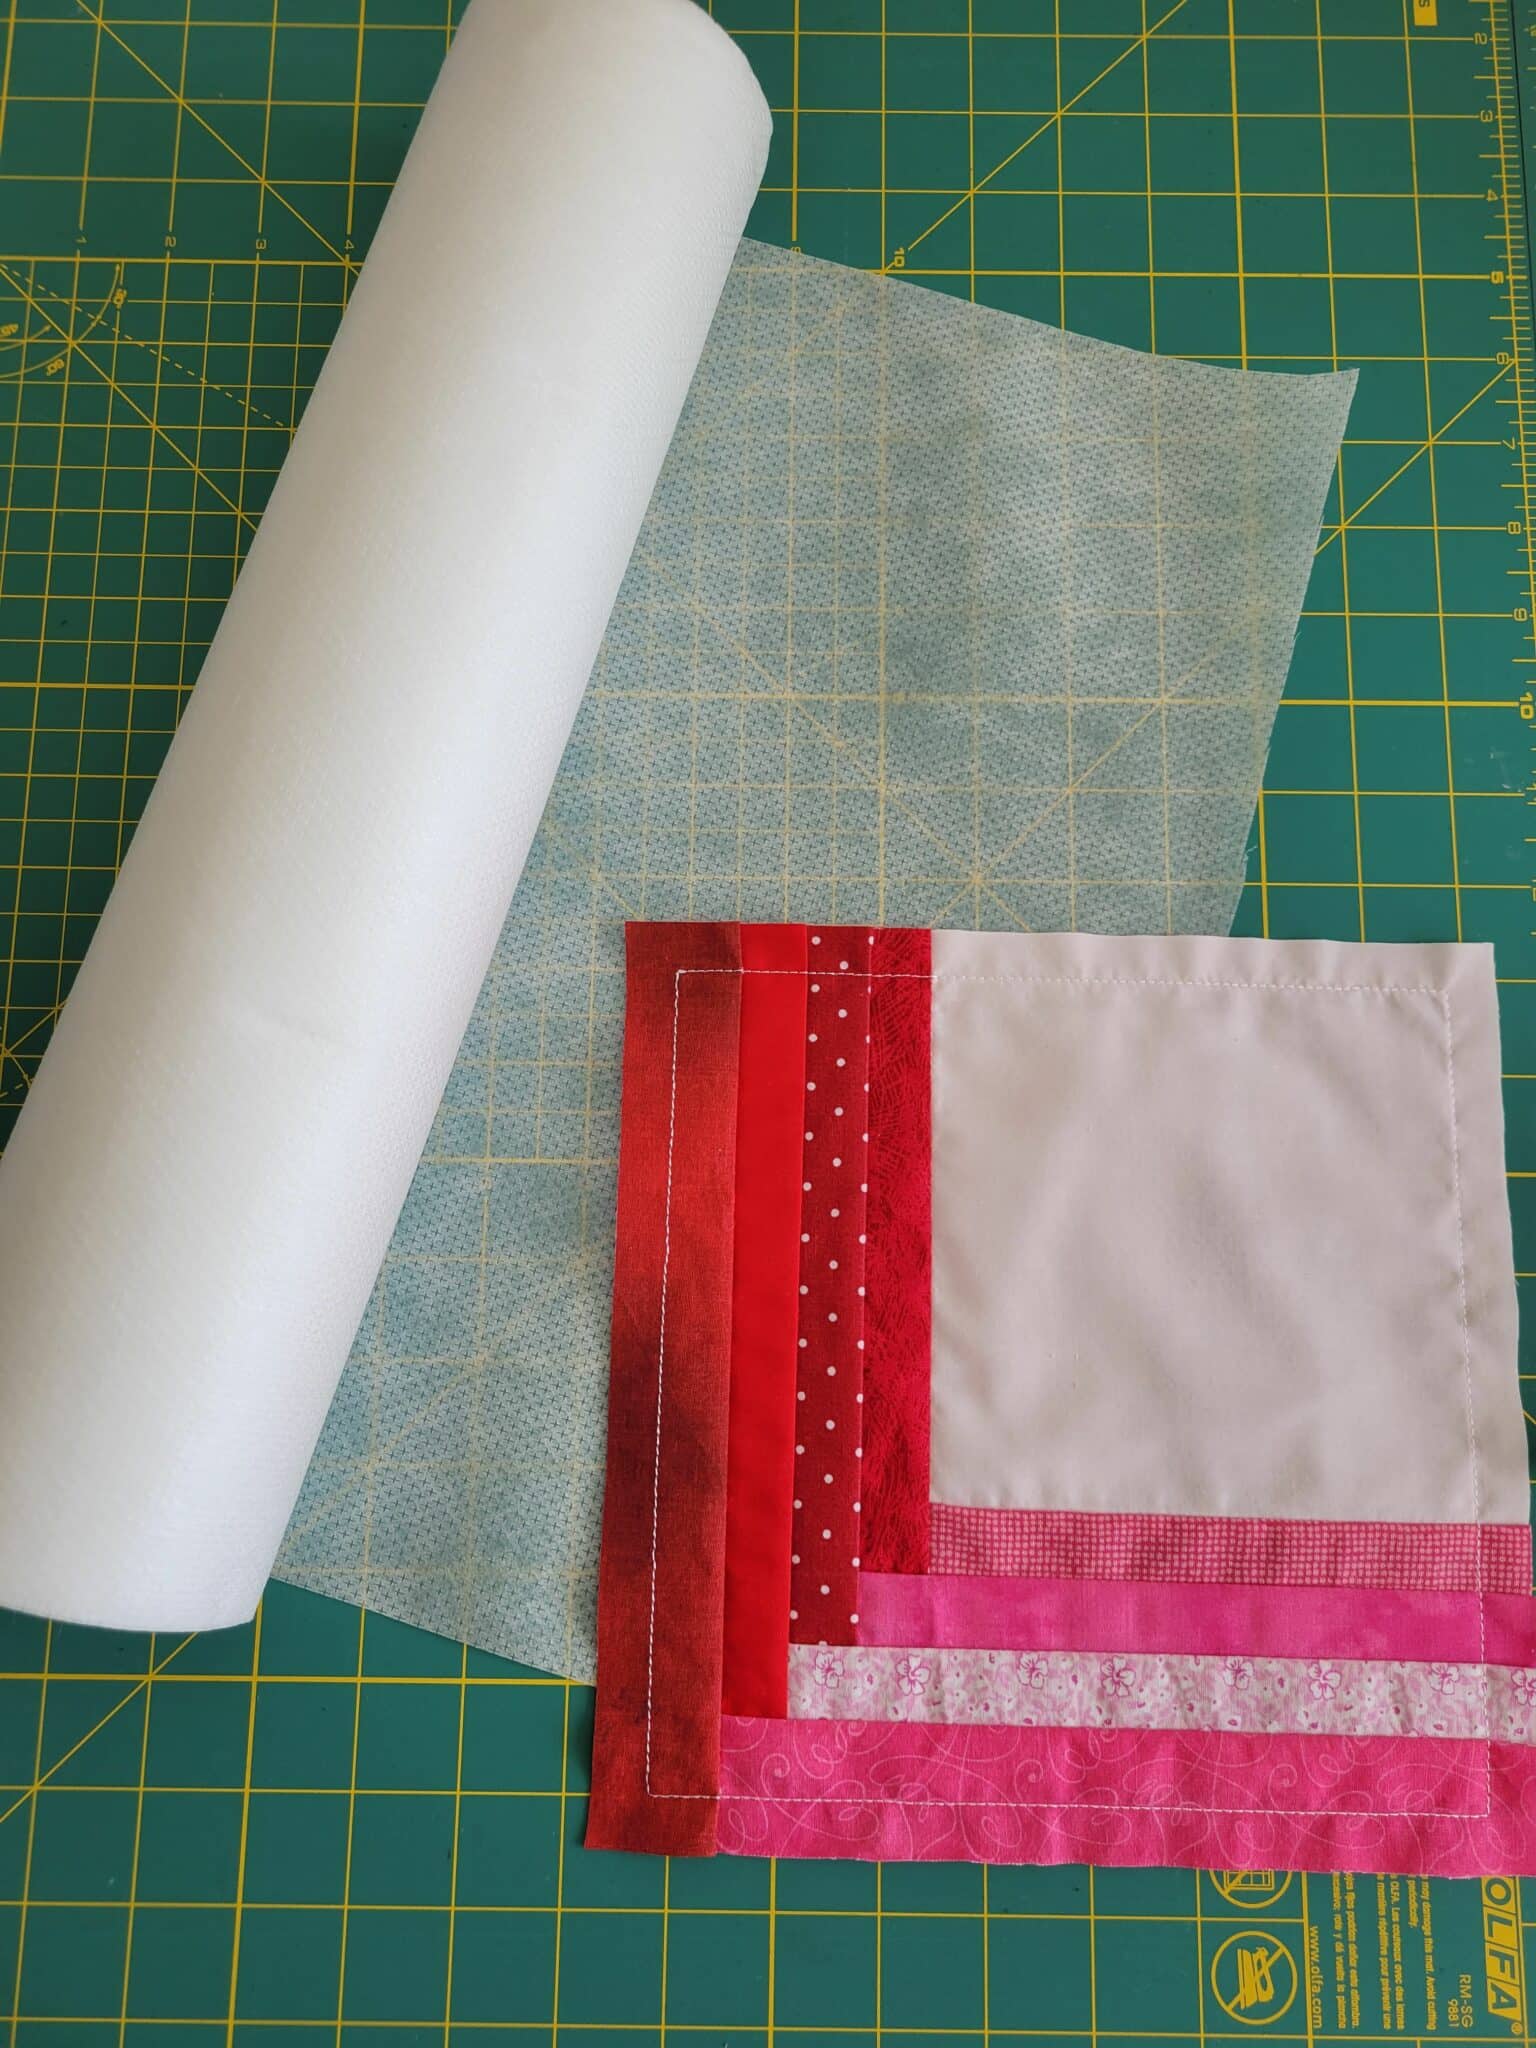
1. Stabilizer
Tear-away, wash-away, and no-show mesh cut-away stabilizers are viable options, as is something like DIME’s Exquisite Tear ‘N Wash stabilizer. The best choice for stabilizer depends on the answer to the question: do you need it removed after the piecing is finished?
A. Tear-Away Stabilizer
Light-weight tear-away stabilizer is removed after piecing the block, providing a fabric-only block.
I don’t prefer tear-away stabilizer for two reasons:
- You have to remove it very, very carefully, or you’ll distort the quilt block.
- I digitize my designs with placement and seam stitches in almost identical locations. For small blocks with many needle penetrations, the tear-away can rip prematurely.
I do sometimes use tear-away when I add batting before piecing, though. The batting provides decent support for the stitching lines, so the stabilizer selection isn’t as crucial.
B. Wash-Away
Wash-away stabilizer is the best option if you want to remove the stabilizer after stitching. One caveat, though: be careful if you’ve not prewashed your scrap fabric–you risk shrinkage or fabric dyes bleeding when the block is later exposed to water.
C. No-Show Mesh Stabilizer (or Lightweight Cut-Away)
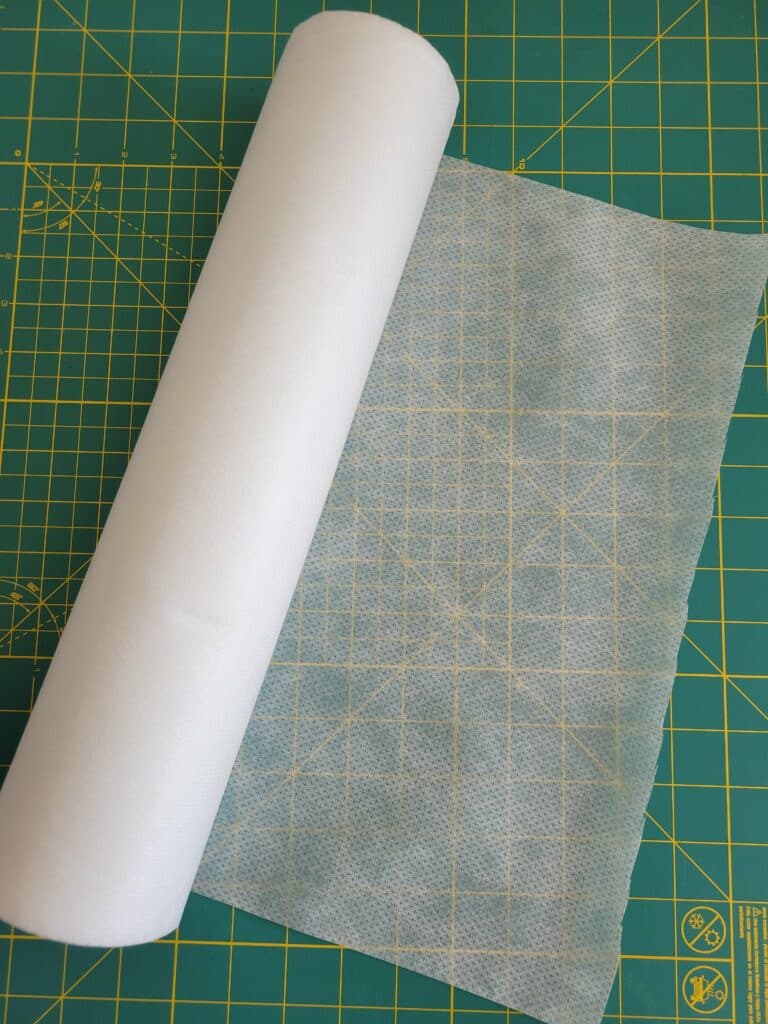
My favorite stabilizer for piecing with my machine is no-show mesh stabilizer.
It’s permanent and lightweight, supporting the design as it’s stitched and after it’s removed from the hoop. You also don’t have to worry as much about fabric grain orientation or the dreaded bias stretch.
D. Battilizer
Battilizer is an excellent option for quilt blocks you want to have batting. I rarely use it for ITH piecing, though, because it’s pricey and pretty wasteful to hoop so much to only stitch on a small portion of the hooped stabilizer.
A Note About Fusible Stabilizer and Adhesive
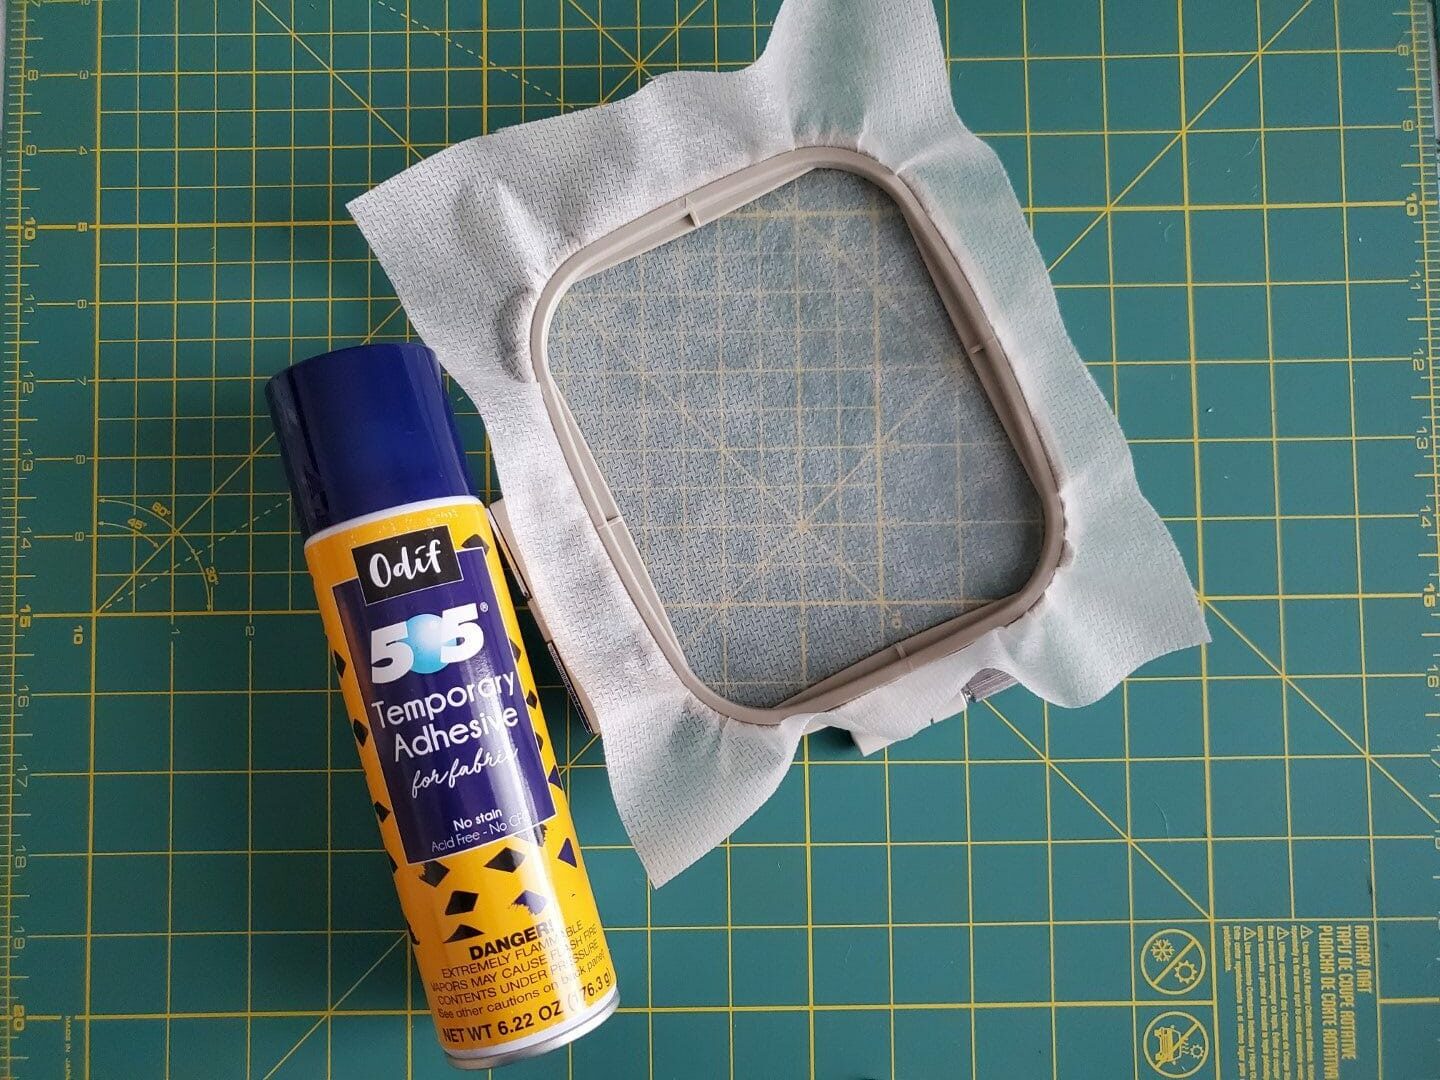
Some embroiderers prefer fusible stabilizer, which will hold the fabric more once it’s folded back. Others like using a fabric glue stick or temporary fabric adhesive to hold fabric after finger pressing or using a seam roller.
I prefer to press with an iron and use regular stabilizer, thus keeping my iron and block itself cleaner.
If I have issues with fabric moving during stitching, I use my That Purple Thang to hold it down.
2. Adding Batting In the Hoop vs. After Piecing
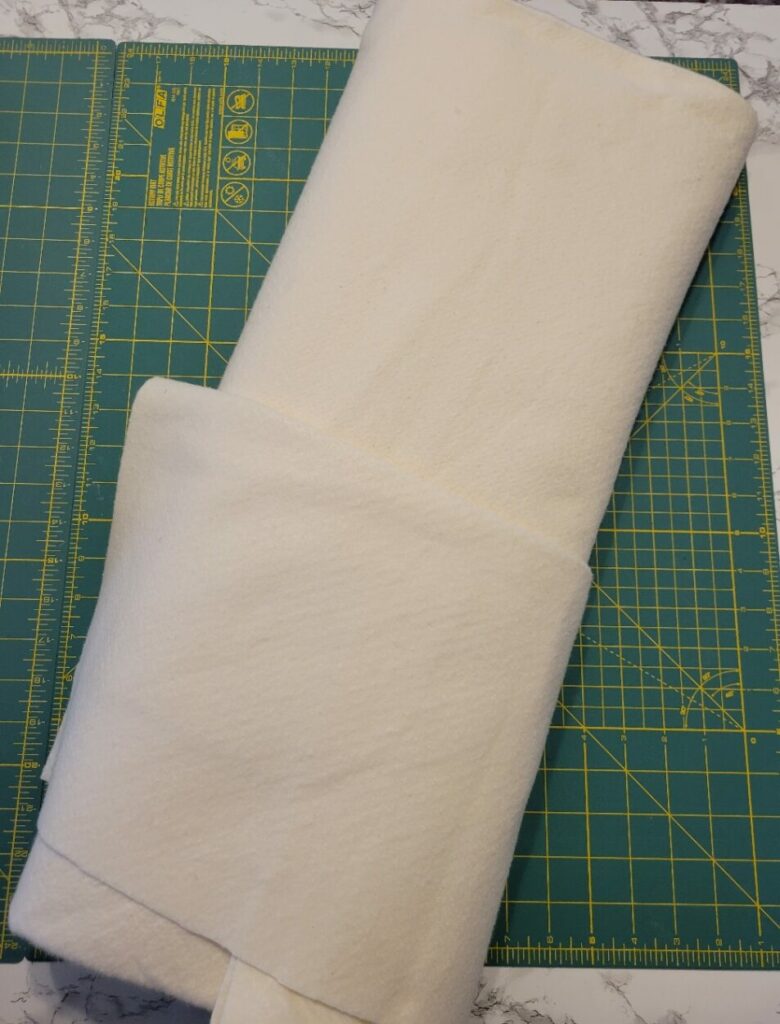
You have two options for when to add batting to your project.
- After piecing: The first option is to hoop a layer of stabilizer (which you can remove later if desired) and then piece. You then cut all blocks to size, stitch them together, and create a quilt sandwich like normal with batting in the middle. Finally, add any quilting stitches.
- Before piecing: This “quilt-as-you-go” method is popular for applique blocks but can also be used for blocks pieced in the hoop. Here, you hoop stabilizer, tack down a piece of batting, and then add fabric patches and any desired quilting stitches on top of the batting. Once you’ve finished the quilted blocks, stitch them together on your sewing machine, add just backing fabric, and stitch in the ditch along seams to secure the quilt.
3. Thread Options
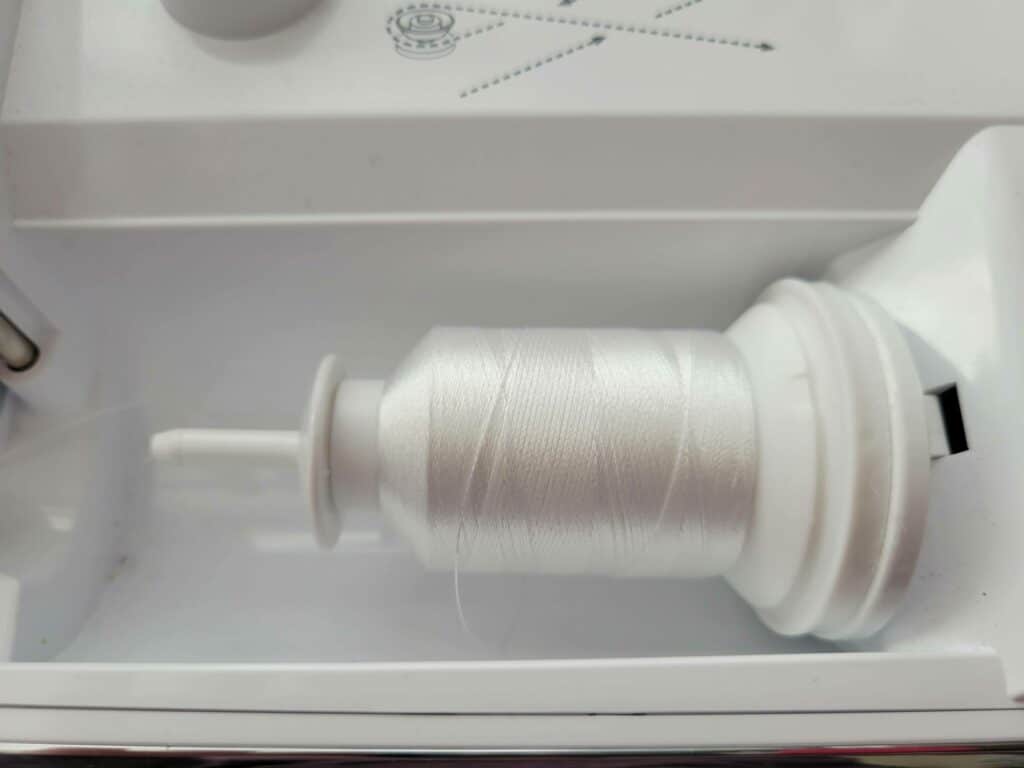
I prefer to match the bobbin and top threads, using a matching neutral color.
However, you can use embroidery bobbin thread and your favorite 40wt machine embroidery thread on the top if you notice tension issues.
Piecing purists may prefer cotton threads to match the fiber content of quilting cotton, but polyester or rayon embroidery thread can work, too.
Using a thinner thread (60 wt, for example) also reduces bulk at fold lines where the placement stitches run first. While seam bulk isn’t a huge issue for larger blocks, small blocks with many pieces (think more complicated than a 4″x4″ log cabin block) will lie flatter at folds if a finer thread is used.
Two exceptions:
- Use the usual 40wt top thread when adding embroidery designs on top of a pieced block.
- I like a thicker thread (like 30wt cotton) to make any embroidery stitching more prominent on crazy quilt blocks. (Variegated threads are also fun to use.)
4. Needle Selection
When piecing, start with a 75/11 machine embroidery needle. If you’re using batting and the needle doesn’t pierce all layers (or the machine is skipping stitches), try switching to a larger needle.
Threads thicker than 40wt may also benefit from a larger needle. For example, an 80/12 or 90/14 embroidery needle may best suit 30wt cotton thread.
Resizing Quilt Block Designs
If you need to resize your design, do so with a careful eye on the final product:
- Use an EMB, JAN, or other Grade A native software file format for the most accurate resizing.
- If the stitch count does not change as the design is resized, bad stitch lengths may be a consequence–stitching could be cramped and bulky or spaced too far apart for a good fabric fold.
- Resizing decorative embroidery stitches (such as on crazy quilt designs) can get tricky if you do more than minimum size adjustments with machine file formats.
- If seam allowances are included within the perimeter stitch, resizing will change them from 1/4.” Adjust manually after resizing.
Overview of the Piecing Process
While the exact piecing steps vary between digitizers, understanding the process of piecing an in-the-hoop block is important before creating your own blocks.
Generally, ITH-pieced quilt blocks start with one piece of fabric tacked down to stabilizer and trimmed. Fabric is then added right side down to the block and stitched. The fabric is then folded over so the right side shows. The process continues.
1. Determining Piecing Order

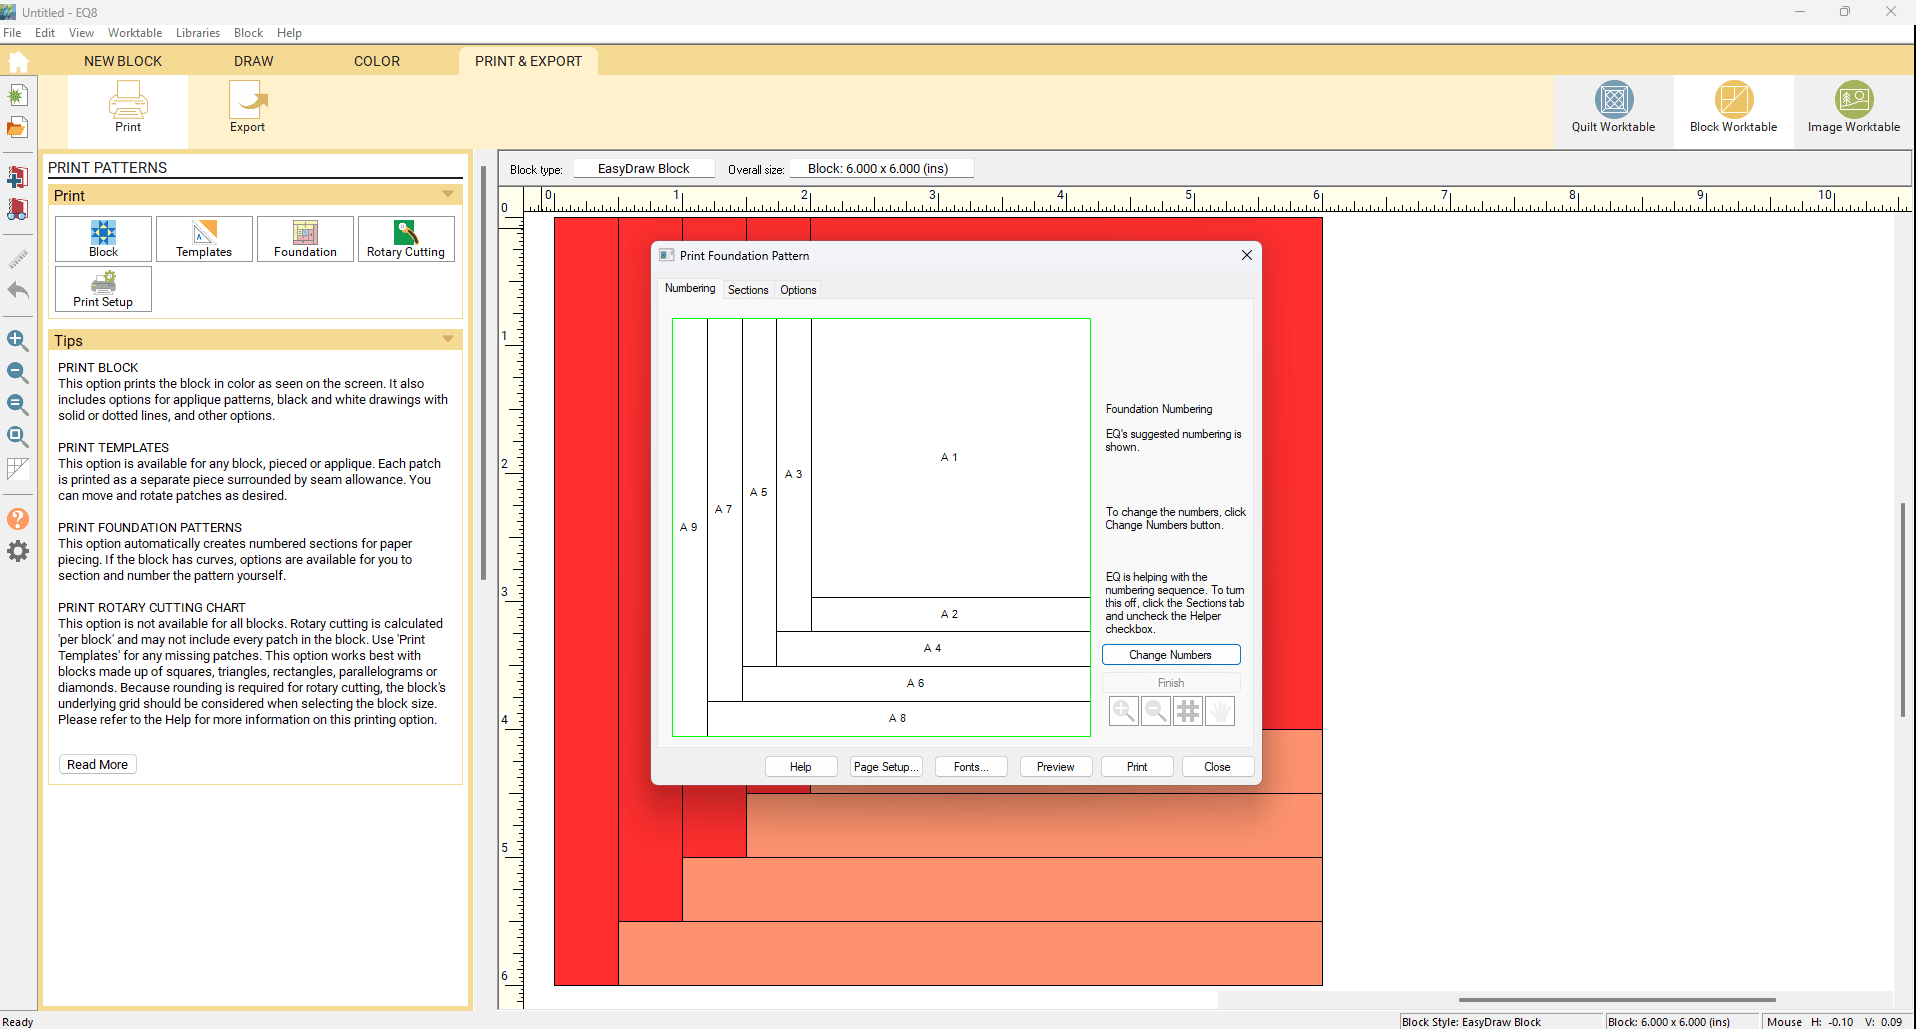
As an example, above are the FPP steps for a crazy quilt block I created in software.
If you look at the pattern, A1 is the first patch that needs to be tacked down. Then, the subsequent fabric patches are shown in numbered order.
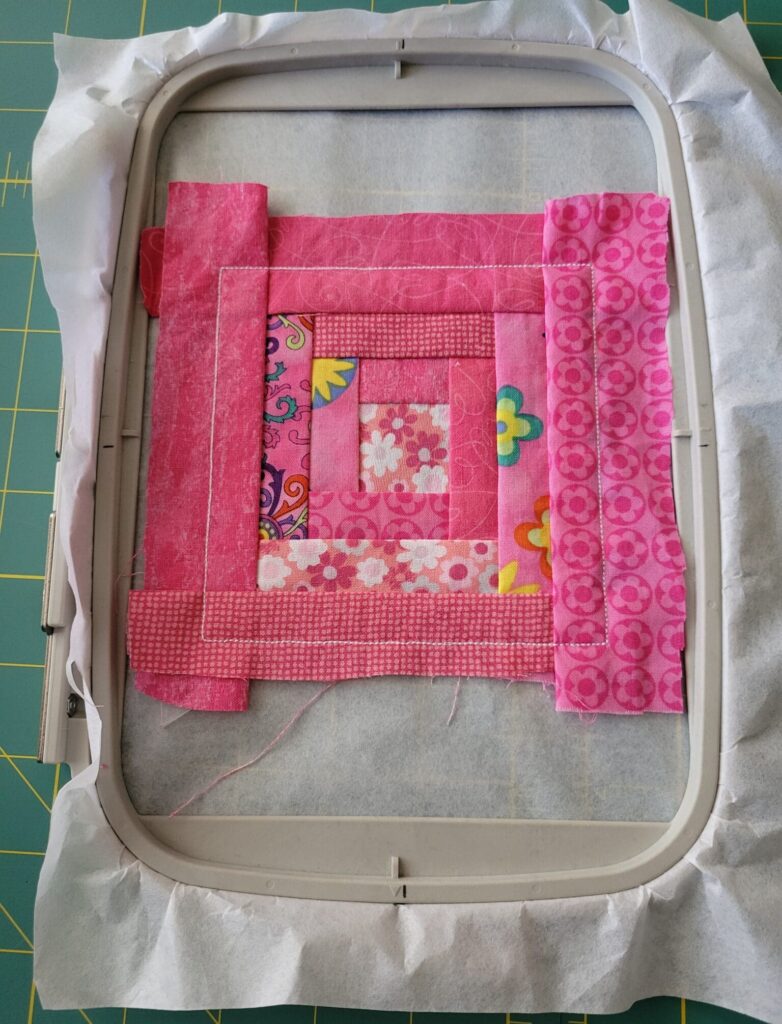
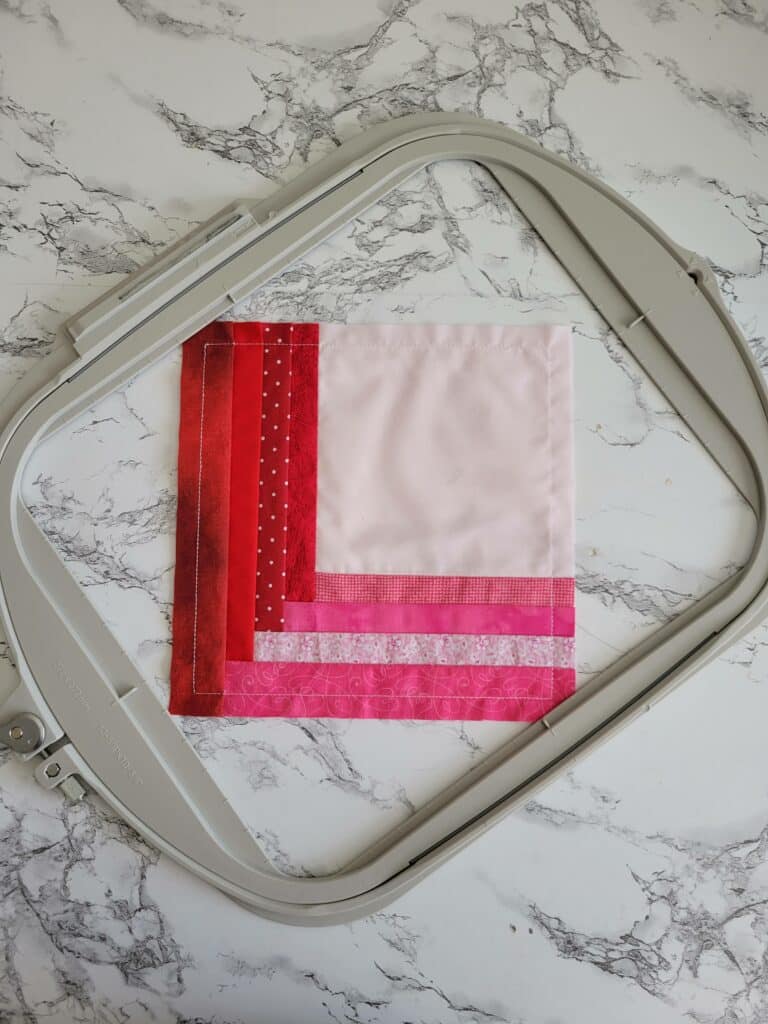
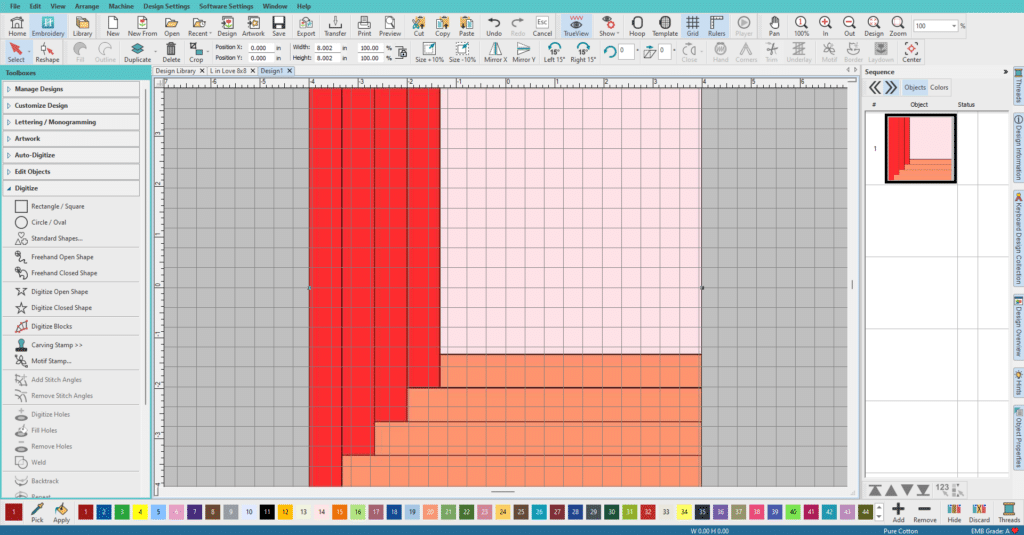
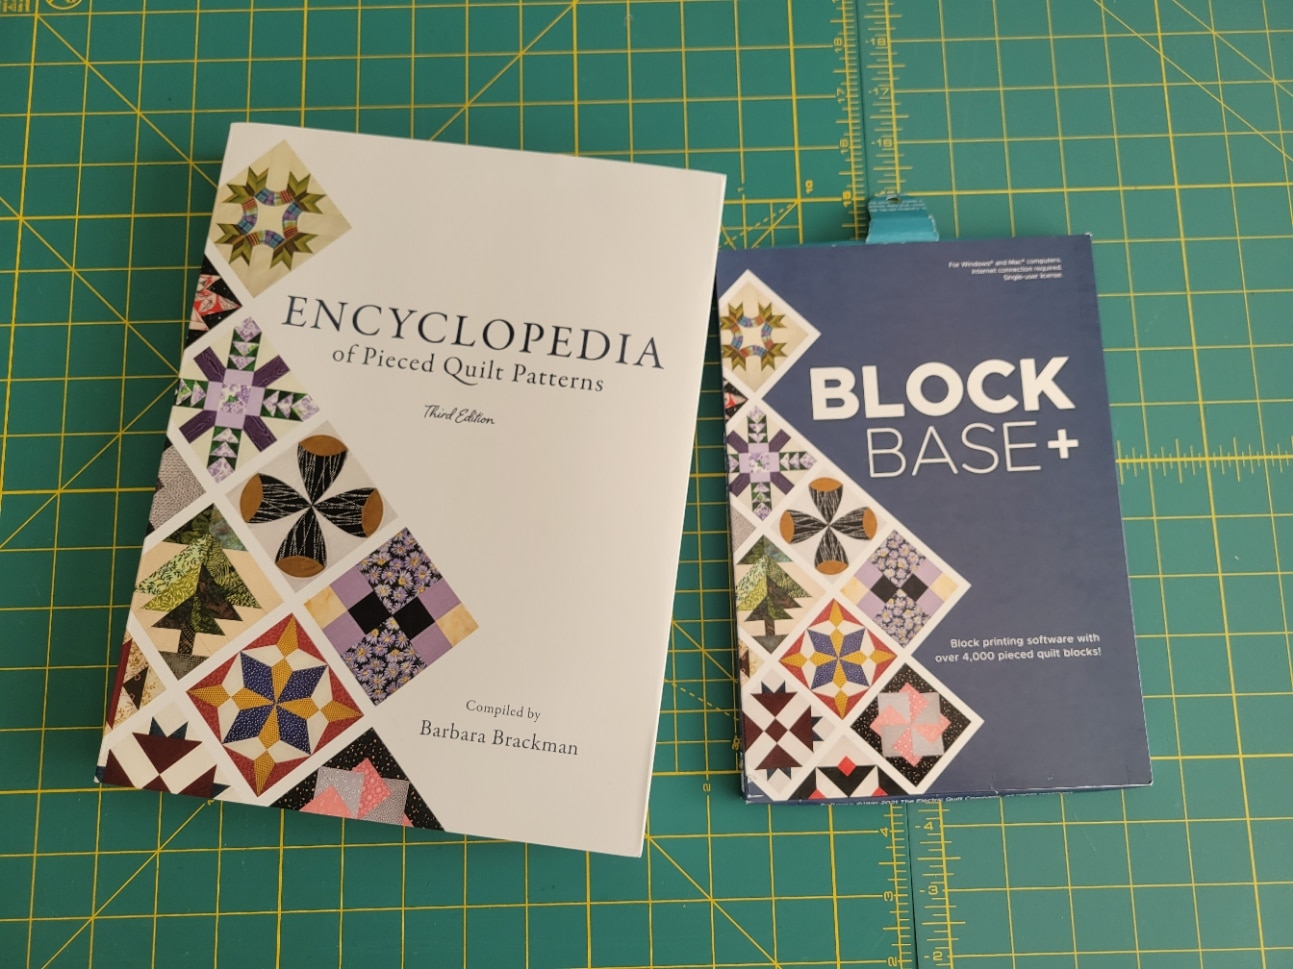
Above is another example of the L block I created for my Valentine’s table runner. I chose the big block as my first piece, and every subsequent block is ordered appropriately.
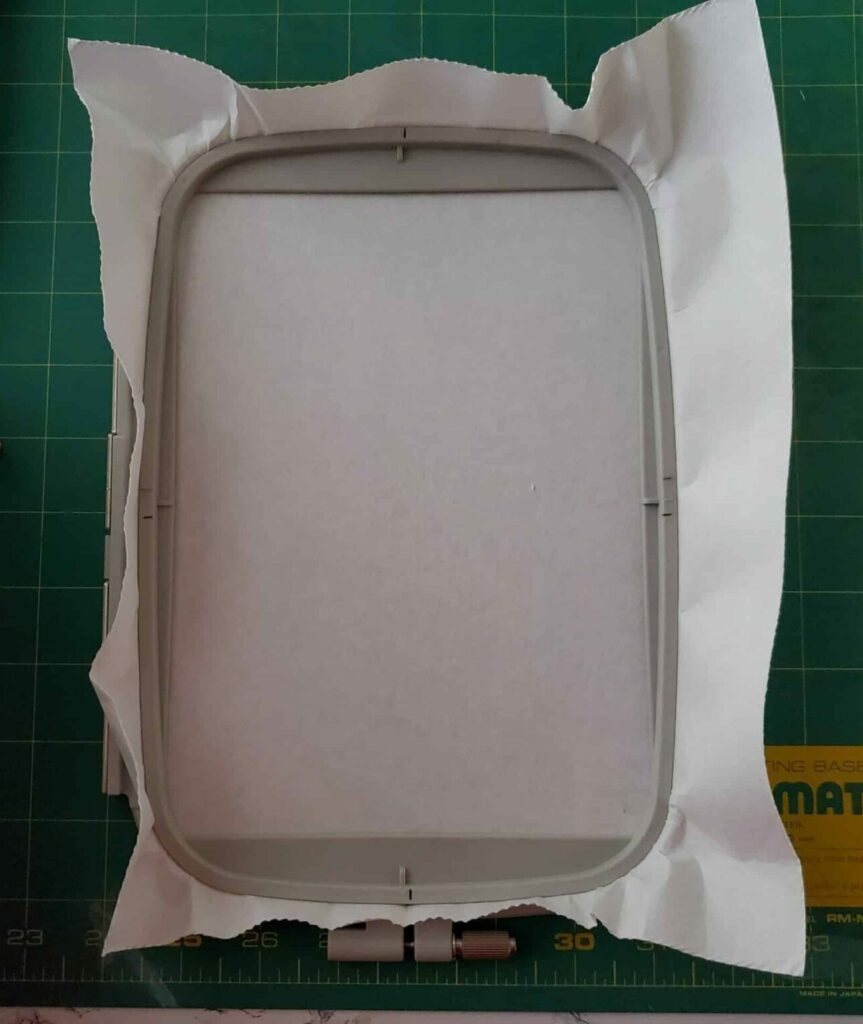
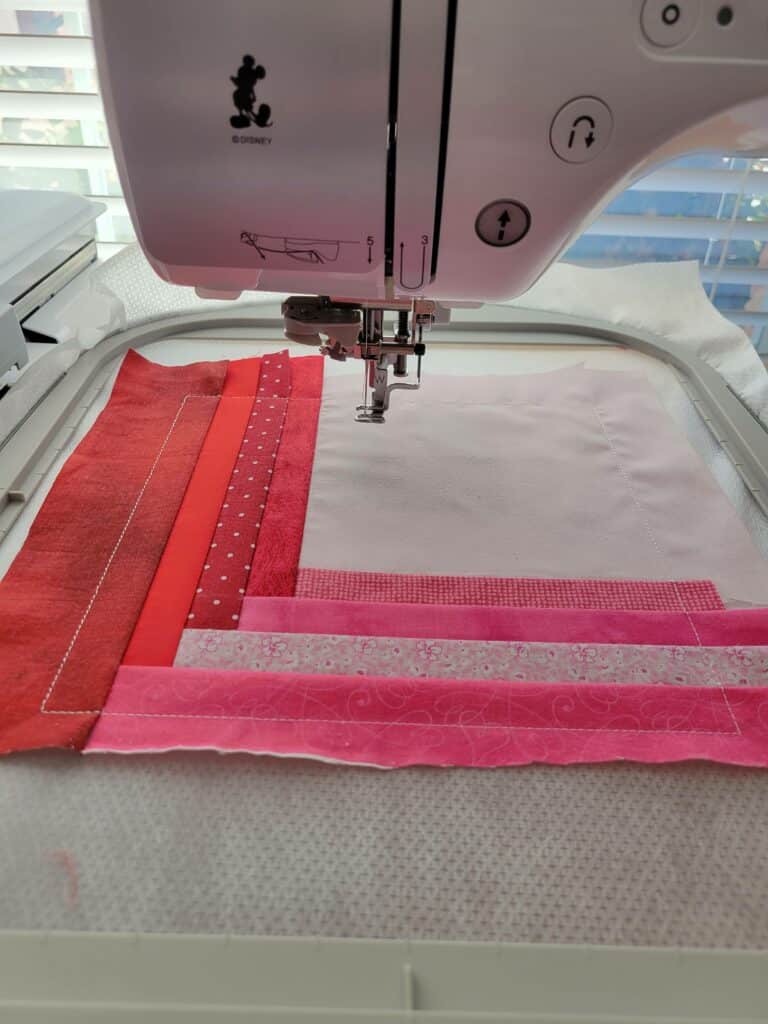
2. Fabric Placement When Piecing Embroidered Quilt Blocks
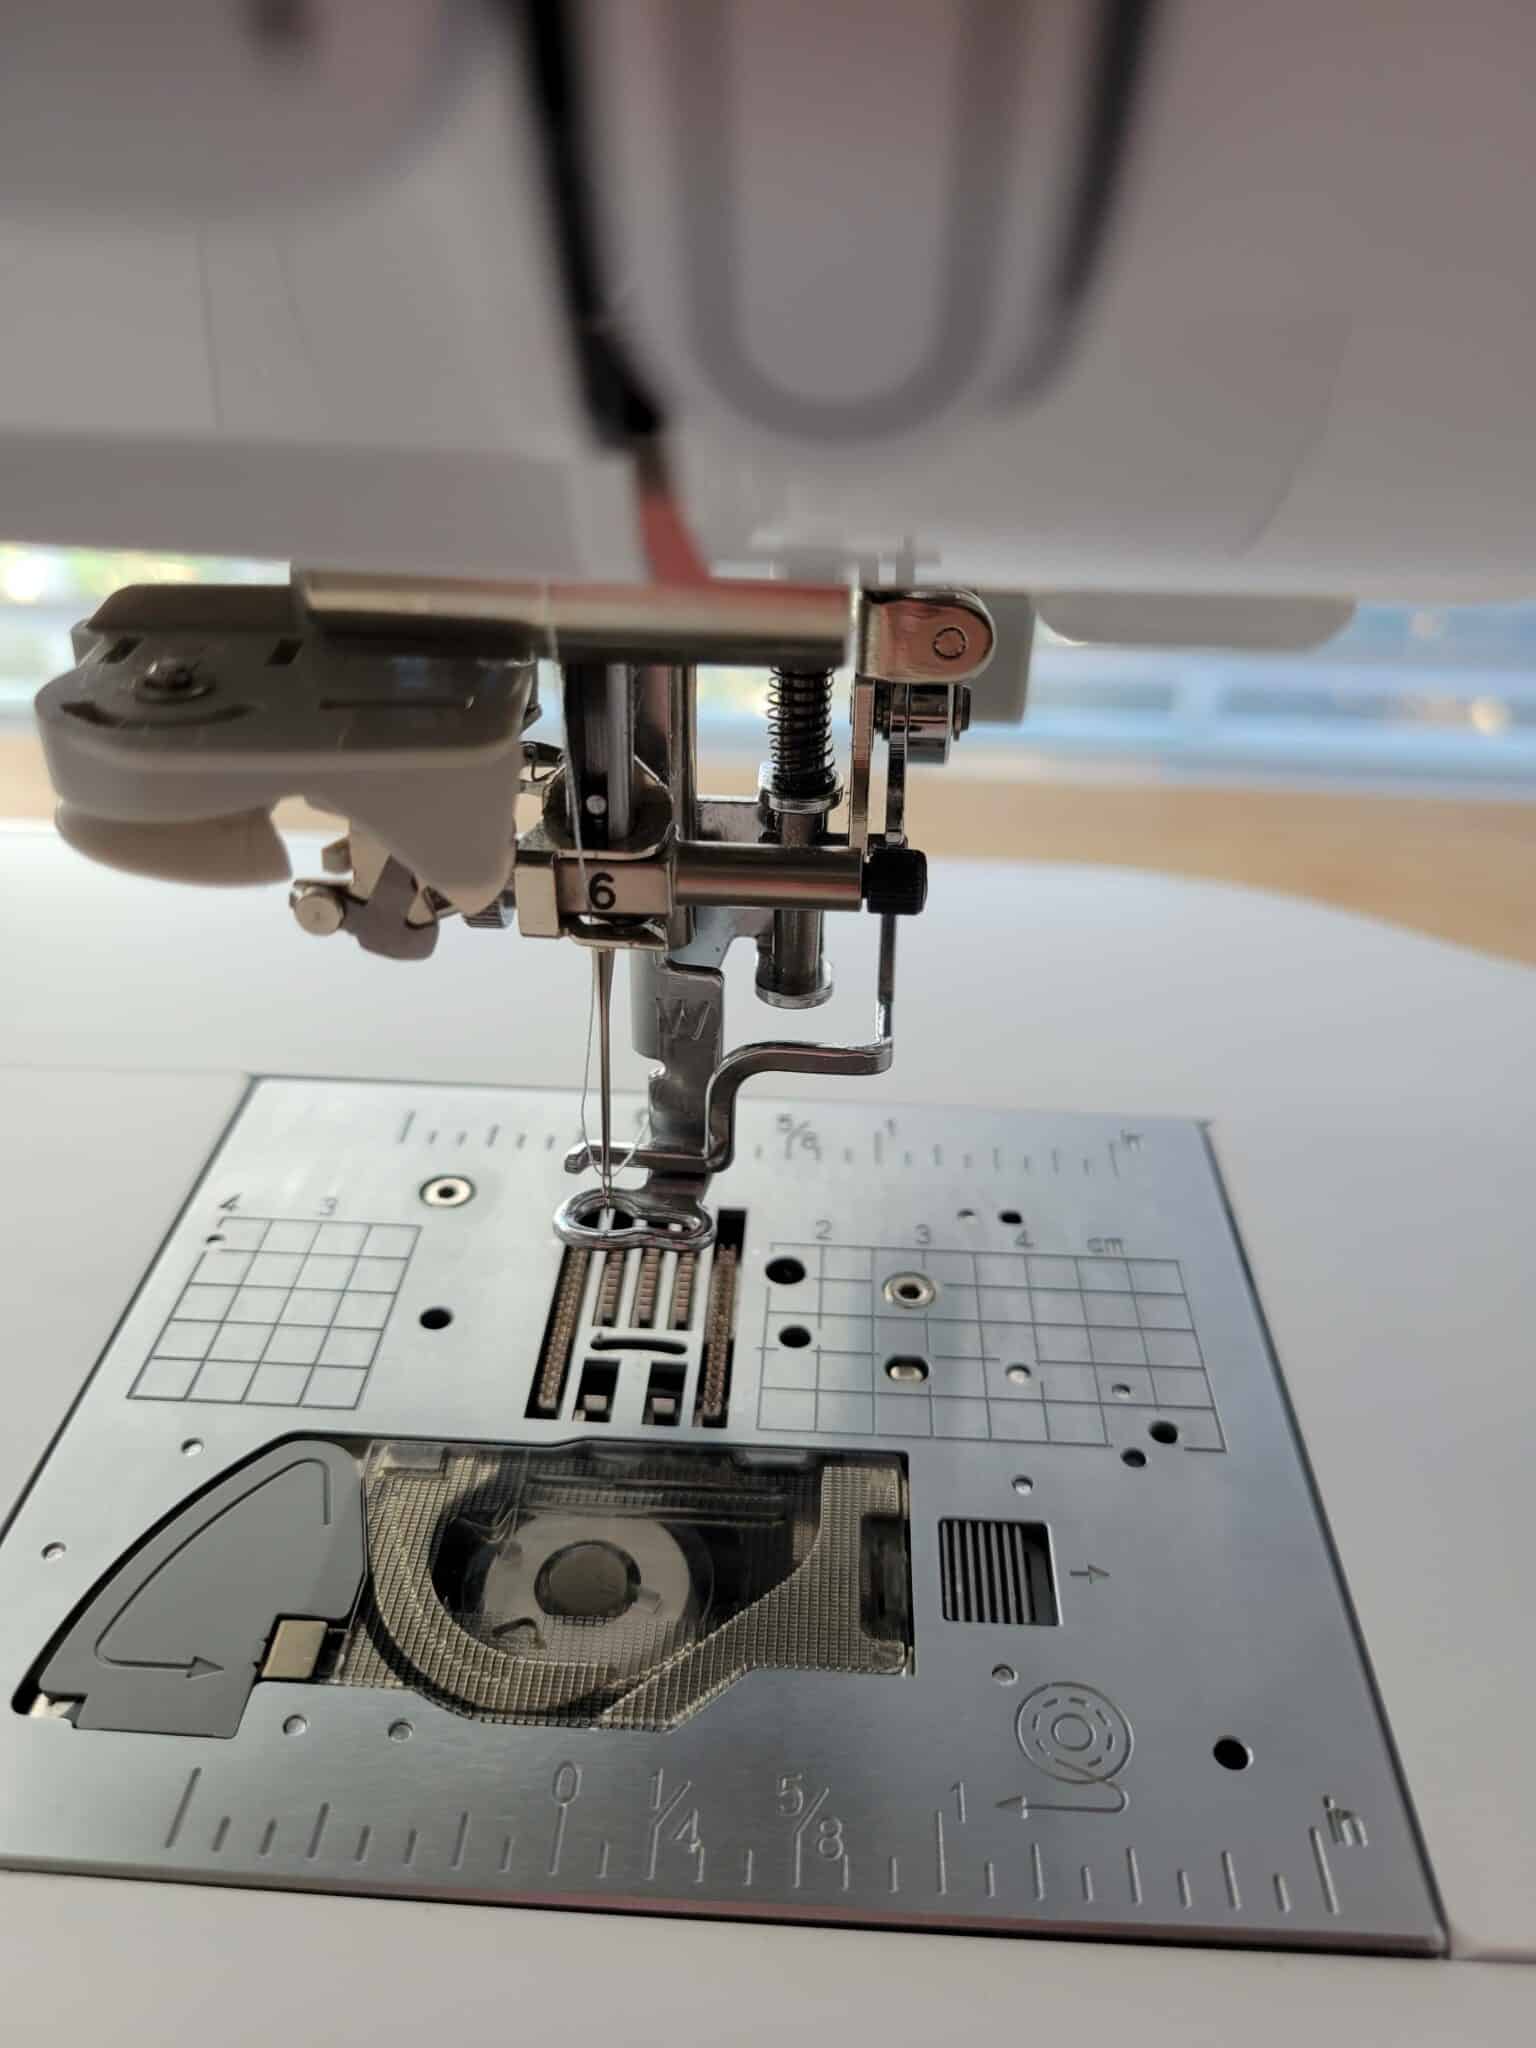
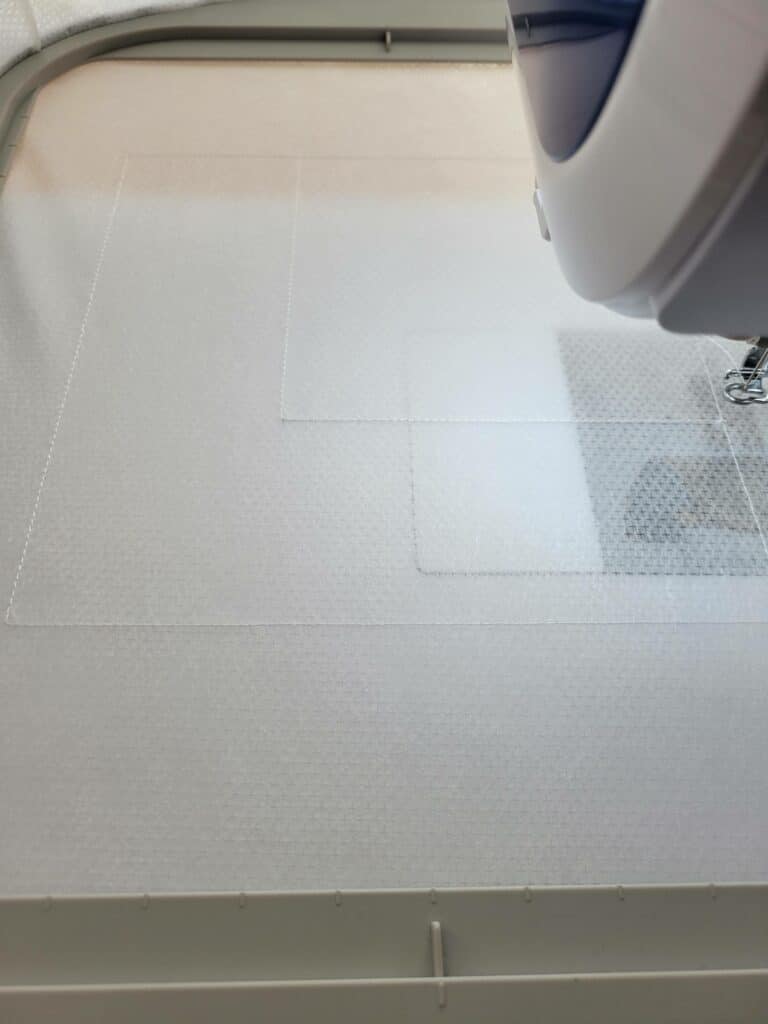
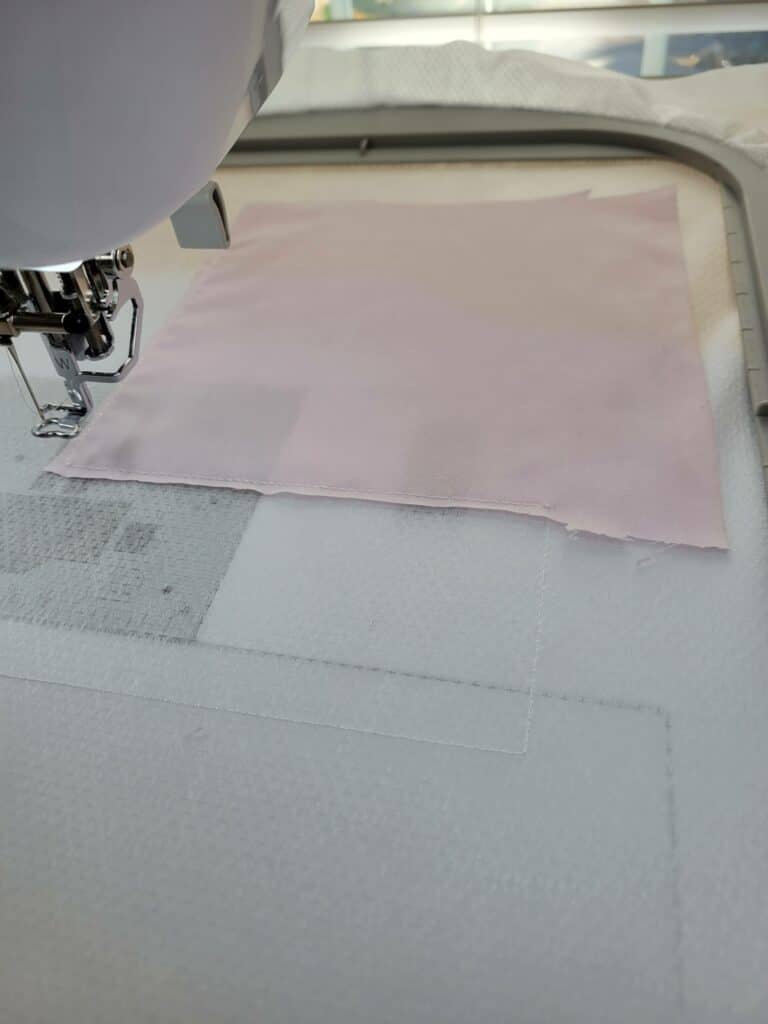
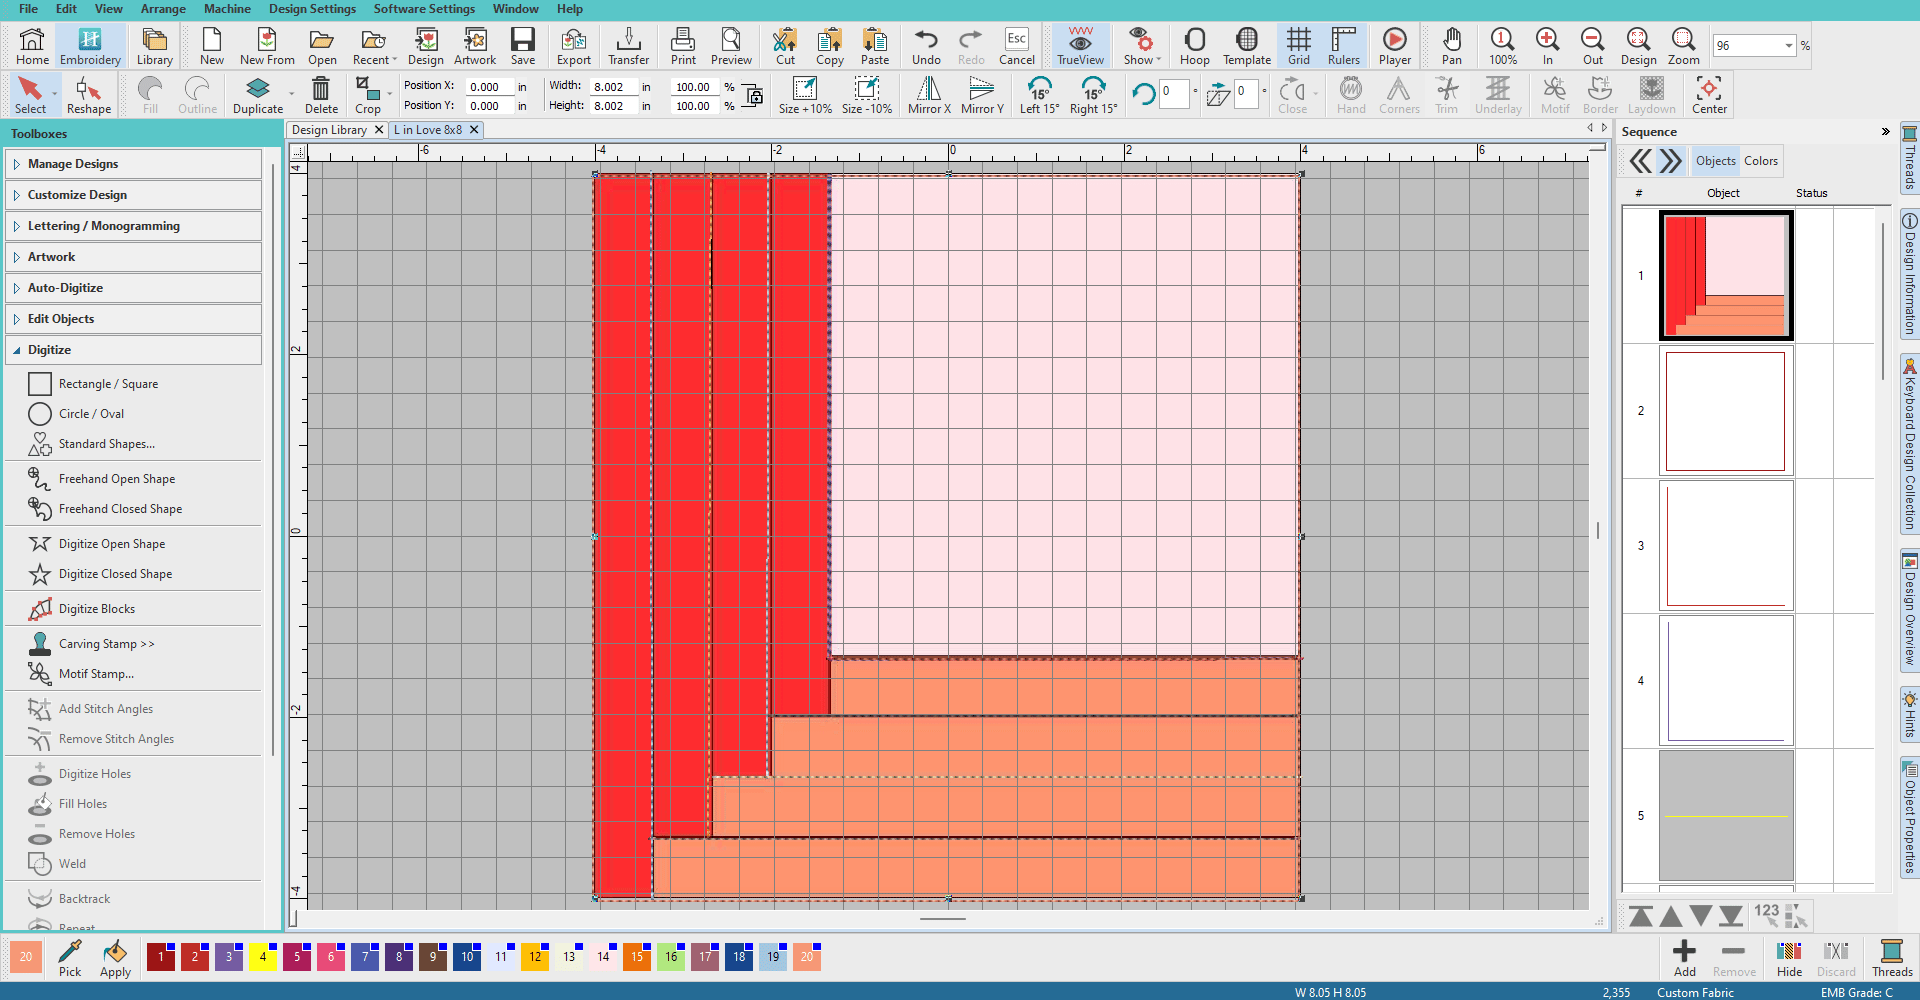
As mentioned, placing the beginning fabric is the first step in creating a pieced project. (Unless you stitch a block outline first, as I did below.)
Thus, the first fabric’s placement line is stitched, the fabric is placed, the tacking stitch runs, and the fabric is trimmed. (Leave seam allowances on the borders.)
Then, it’s time to add a new piece of fabric–a placement line will be stitched.
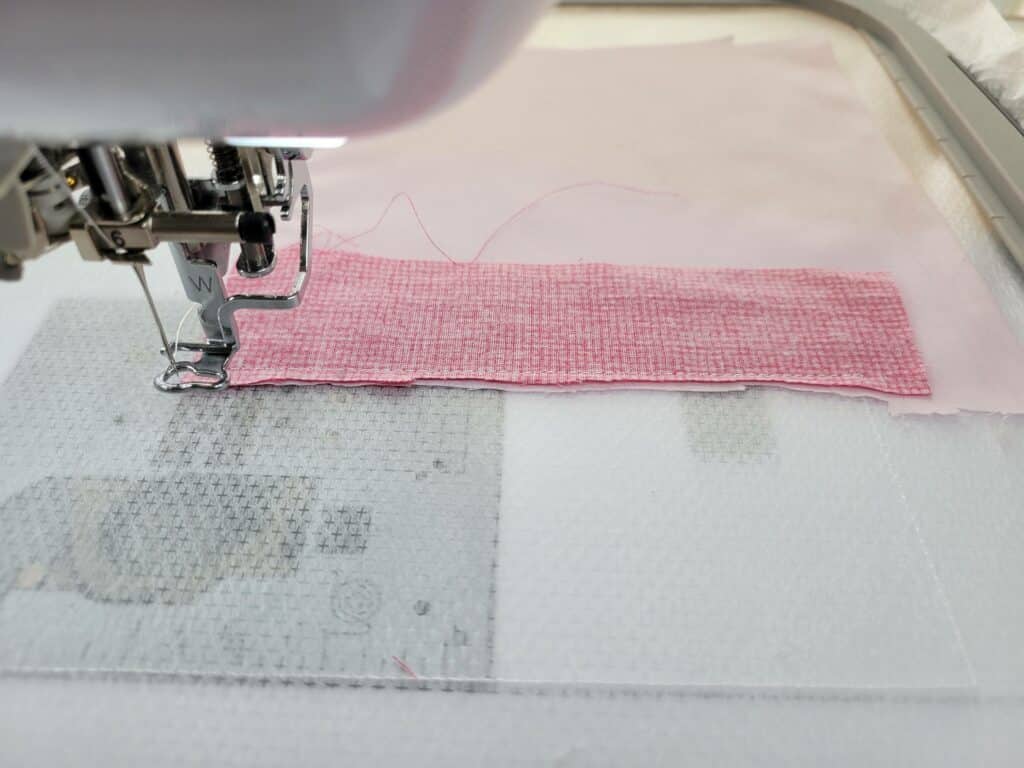
Lay your fabric right side down, covering the placement line by 1/8″-1/4.” The largest part of the fabric should cover the already stitched fabric section. (Thus, when it’s folded back, it will cover the empty stabilizer.)
Run the tacking stitch.
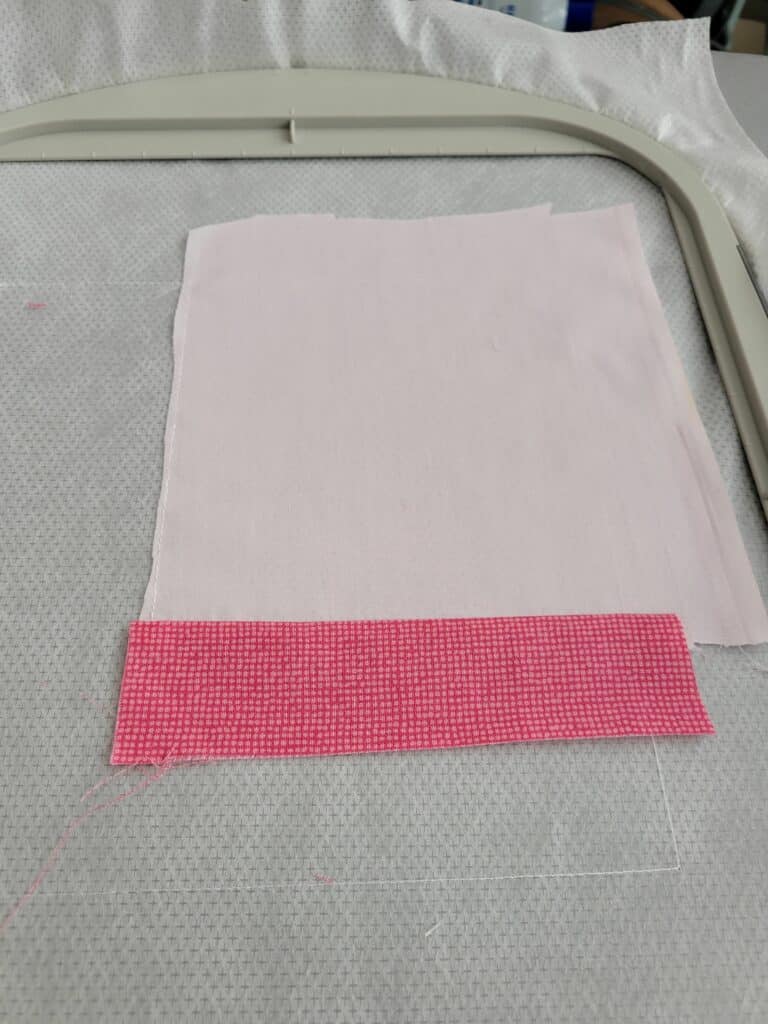
Then, fold the fabric back toward the stabilizer and press with a quilting mini-iron, your fingers, or a seam roller.
Stitch the following placement line in the sequence. You can trim the prior fabric to the stitch line if it’s too large.

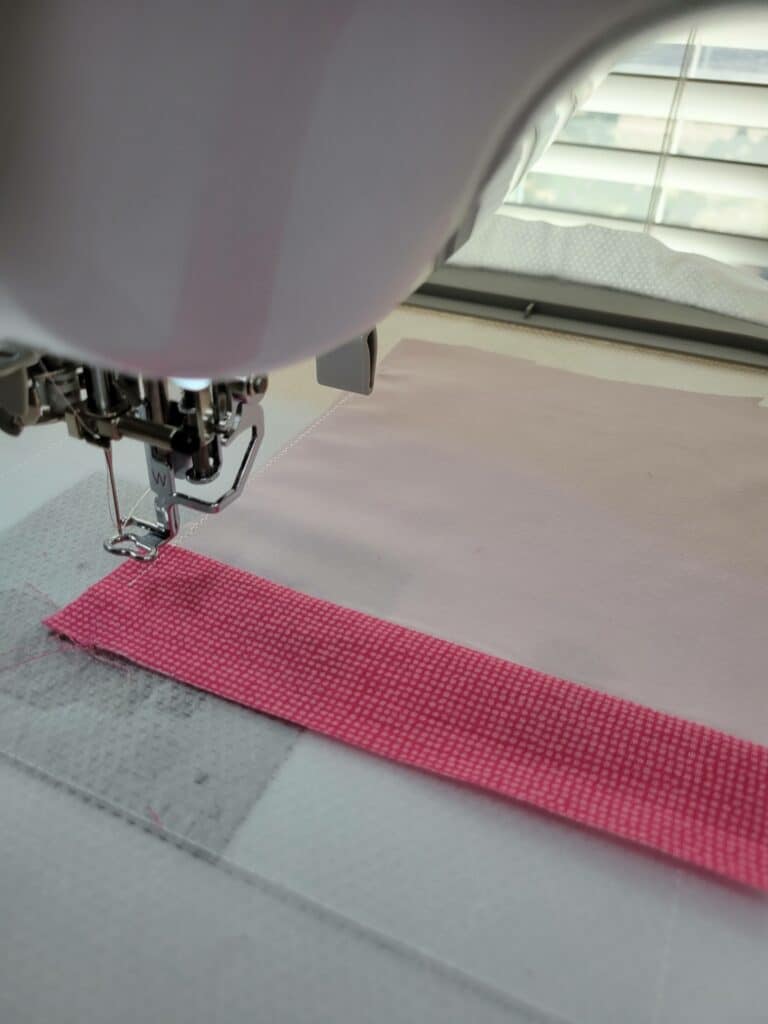
Then, place the next piece of fabric right side down as you did in the previous step.
Fold, press, and stitch the next placement line.
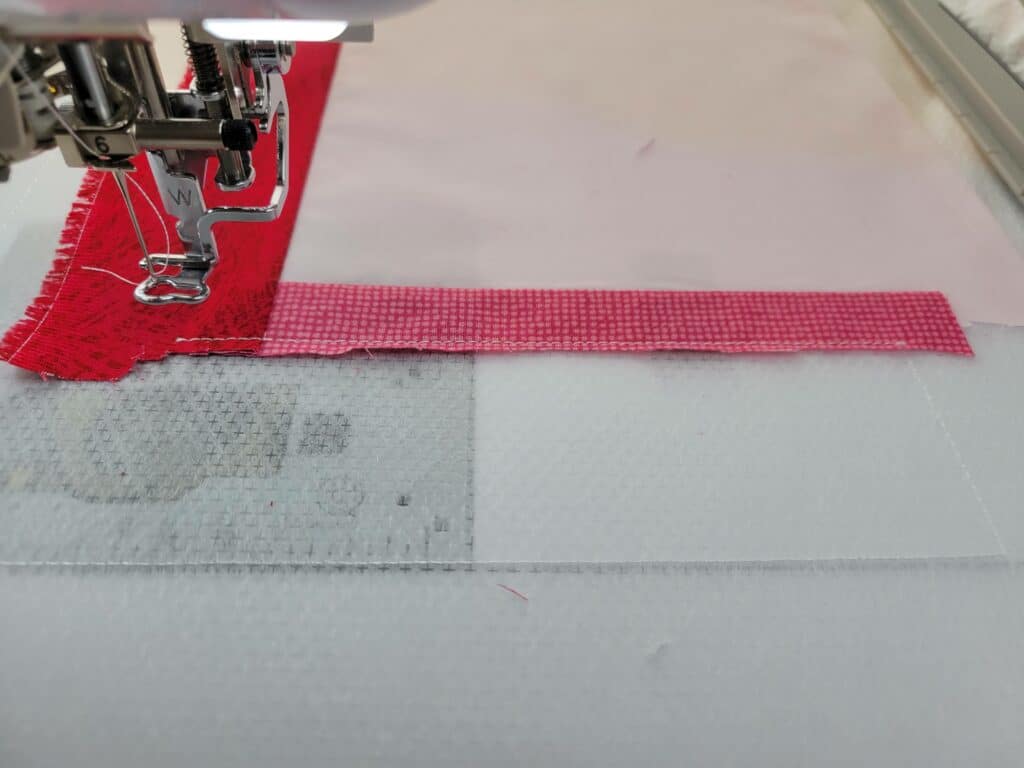
At each placement line, take a moment to trim excess fabric to the stitch line to decrease bulk.
- With permanent stabilizer, trimming close to the stitch will reduce bulk and decrease show through of dark colors to light fabrics.
- For temporary stabilizer, trimming 1/4″ from the stitching line will maintain a standard 1/4″ seam allowance on the block’s back.

Keep following the piecing order until you’ve embroidered the entire quilt block. (Also, always remember your seam allowances.)
Stitch the perimeter stitch last, which becomes your stitching line when sewing multiple blocks together.
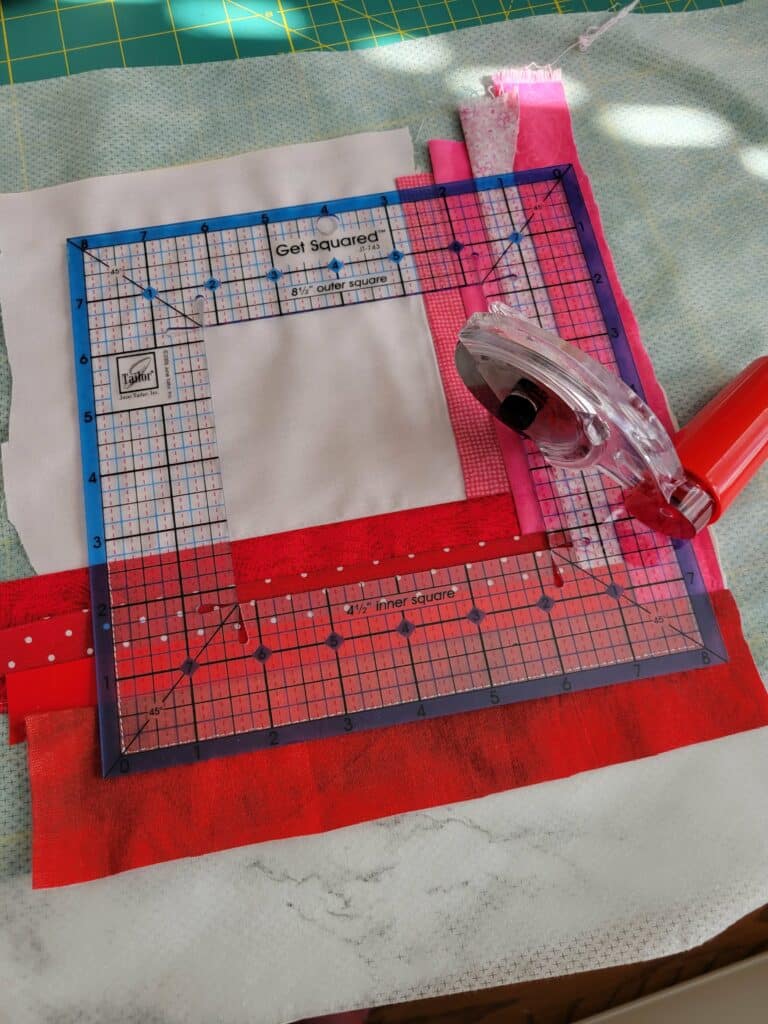
Square up your block with your rotary cutter, and remove any stabilizer that isn’t meant to be permanent.
Then, congratulate yourself on a job well done!
Pre-Cutting Fabric vs. “Winging It”
Exact fabric cutting is largely unnecessary, and I’m firmly in the “it looks about the right size” camp and always prefer to guesstimate fabric sizes for in-the-hoop blocks.
However, if you like more precision or are a fabric conserver, you can accurately cut your fabric to size beforehand.
- One way to do this is to print a template from embroidery software add 1/4″ to all sides, and cut pieces based on that.
- Another option is to scan the design to a cutting machine and direct it to cut pieces with the seam allowance. (My two favorite machines for scanning and cutting are my Brother ScanNCut and Silhouette Cameo 4. If you’re an SNC user, check out this tutorial showing how to cut quilting cotton with a Brother ScanNCut.)
Digitizing ITH Quilt Block Embroidery Designs
One of the reasons I love piecing blocks with an embroidery machine is designs are SO easy to digitize (I’m talking less than 5 minutes of creation time), and there are so many possibilities.
1. Find an Appropriate Quilt Block
Most quilt blocks cannot be 100% pieced by an embroidery machine in the hoop.
You can still create embroidery designs for some designs that can’t be pieced in the hoop (curved piecing, for example). Just think of each block patch as an applique, which needs placement and tacking stitches. After placing all fabric, use a satin or decorative border stitch to complete the block.
But, back to blocks that an embroidery machine can piece.
A good place to start when dreaming up embroidery quilt block designs is finding blocks that can be foundation paper pieced with your sewing machine. For example, log cabin blocks, some crazy quilt blocks, and pineapple quilt blocks.
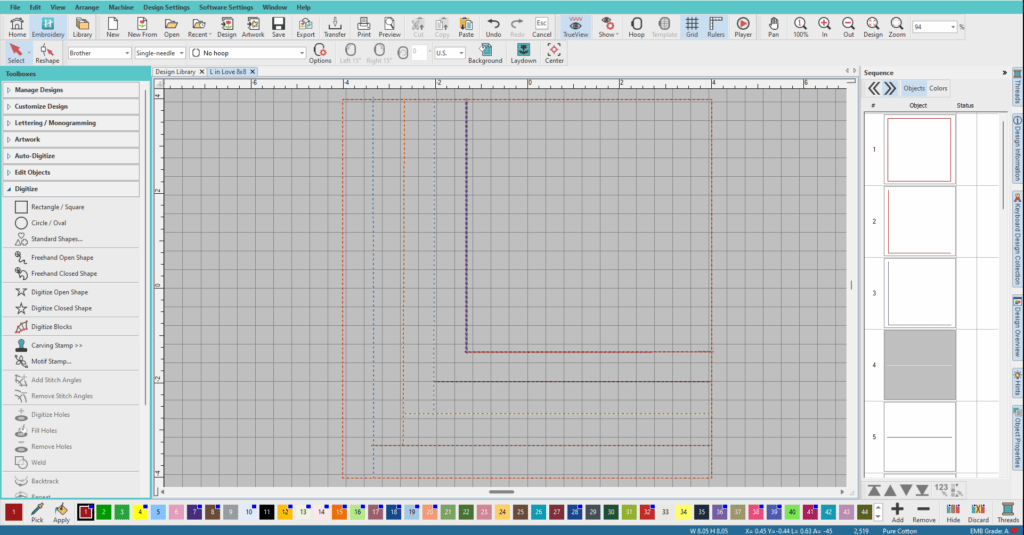
In addition to the blocks in my software, I also draw inspiration from books I’ve purchased over the years.
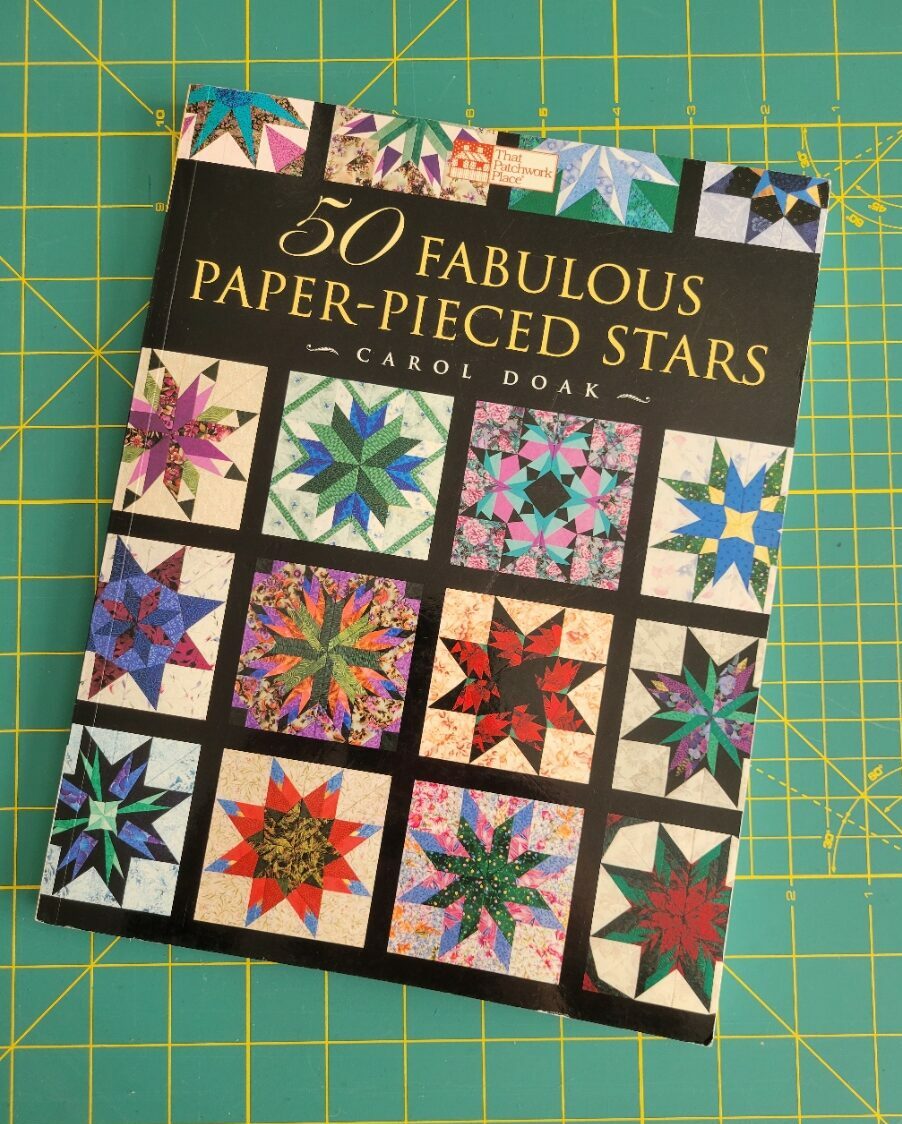
Carol Doak has so many fun piecing books, and my recent favorite is 50 Fabulous Paper-Pieced Stars. I’ve been trying to recreate these blocks with my embroidery machine for the pure joy of saying I can!
2. Import the Artwork
To create an embroidery design from a quilt block, you next need to import the block diagram with piecing lines into software.
Now, I LOVE EQ8 quilting software, which lets me create blocks on grids and use their library of pre-created blocks for inspiration. (The software also generates images of the completed block and the FPP order. If it doesn’t generate an FPP order, the block often can’t be pieced on my machine in one hooping.)
I also have (and recommend) Electric Quilt’s Block Base Plus program (and associated Encylopedia of Pieced Quilt Patterns), which has 4000+ built-in quilt designs that export in SVG format to be imported into embroidery software or to a cutting machine, for that matter.
Of course, you can also draw your desired quilt block by hand or find a block image online.
Once imported, resize to the desired block size before starting to digitize.
3. Create the Embroidery Stitches
With the artwork there, step-by-step place stitches.
I follow this general order for digitizing:
- Perimeter stitch in block size
- Placement stitch for the first patch
- Tacking stitch for the first patch
- Placement line for next patch
- Tacking line for next patch
- Repeat Steps 4 & 5 until each patch is digitized
- Finish with another perimeter stitch
I’ve seen some quilt block designs that start out by stitching the entire design on the stabilizer, which means you don’t have to create placement lines. I don’t always remember which patches come next, so I like the reminder of a placement stitch at each step.
Also, make sure to change each stitch line to a different color to direct your machine to pause and allow you to place fabric.
Last, when placing tacking and placement stitches, remember that folding back the fabric at the tacking stitch may let the placement stitch show through the seam. Thus, adjust your stitch lines accordingly.
Next, remove your artwork, evaluate the design, and create a test stitch!
Embroidery Design Size vs. Final Block Size
Embroidery design sizes can be misleading.
First, the hoop size does not always mean the block will be that exact size. For example, a block for a 4″x4″ hoop can only be 3.93″x3.93,” which is the max embroidery hoop area of a 4″x4″ hoop.The same applies to an 8″x8″ hoop block, which only has max dimensions of 7.9″x7.9.”
Next, some digitizers include seam allowances in their design, while others encourage you to leave 1/4-1/2″ excess fabric outside the perimeter stitch as the seam allowance.
If seam allowances are included, stitching a 6″x6″ block will result in a finished 5.5″x5.5″ block, thanks to a 1/4″ seam allowance on each side. I prefer to digitize blocks at the size of the hoop, and I manually leave a 1/4″ – 1/2″ seam allowance on the outside, thus allowing me to stitch a bigger finished block size in the hoop.
Last, dense stitching, project shifting, and other embroidery snafus can cause your perimeter stitch not to be the exact size you expected at every point. Thank goodness for squaring!
In conclusion: I hope you learn to love digitizing and piecing embroidered quilt blocks with your machine as much as I do!
And, for my fellow quilting buddies, also check out my tutorial on continuous quilting with an embroidery machine and where to find free embroidery designs for quilting. Plus, I have a free crazy quilt embroidery design and tutorial if you want to try your hand at piecing in the hoop.
This is a great tutorial! Also, check out Dime’s My Block Piecer software…its AMAZING for quilt blocks in the hoop!
Thanks for mentioning and reminding me about My Block Piecer! I trialed it a while ago and loved it but decided I’d already spent too much money on EQ8, BlockBase+, and my Hatch digitizing software to rationalize purchasing one more program haha.
I love your tutorials. I had to replace my older Pfaff 2170 embroidery machine due to unrepairable parts. I purchased the new Pfaff Creative Icon 2 sewing and embroidery machine. LOVE IT! I now have huge embroidery hoops that have expanded my creativity exponentially. I love foundation piecing and this tutorial just opened up a whole new quilting world for me. I’m hoping to digitize spike type foundation piecing. The more complicated and complex the piecing the more I like it. THANK YOU! (My husband might not. Lol)
The Creative Icon is such a nice machine–I wish my Luminaire had some of the Icon’s stitch and embellishment options. And, I love stitching complicated/complex things, too. The more creative or challenging the project, the more excited I am to master it!
Hope you have fun with your new machine!