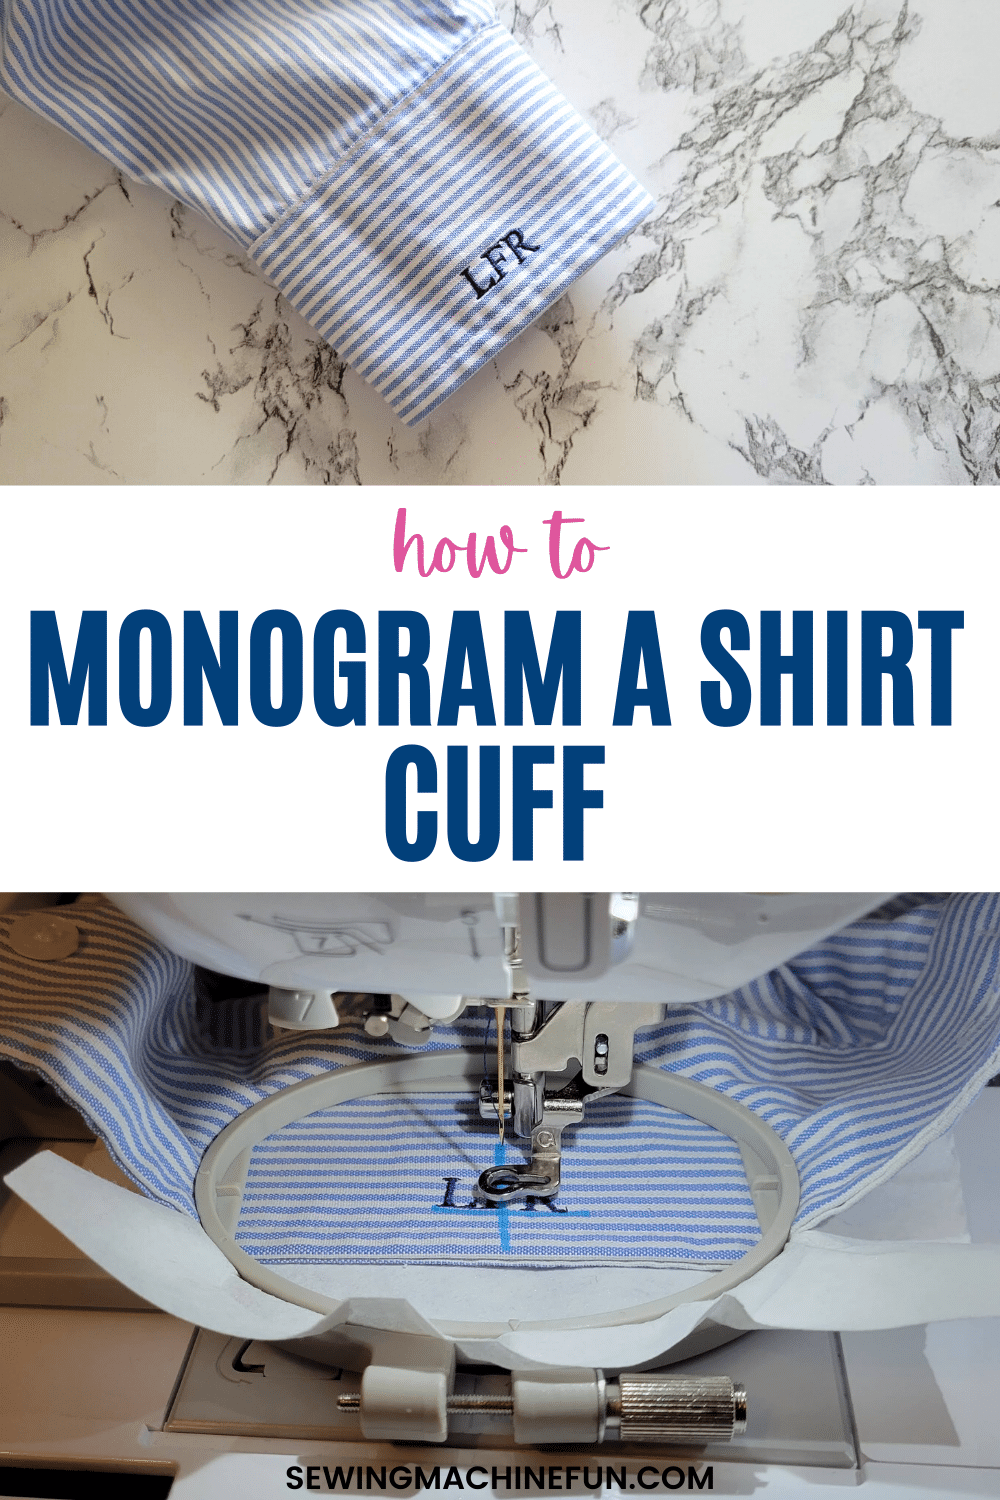
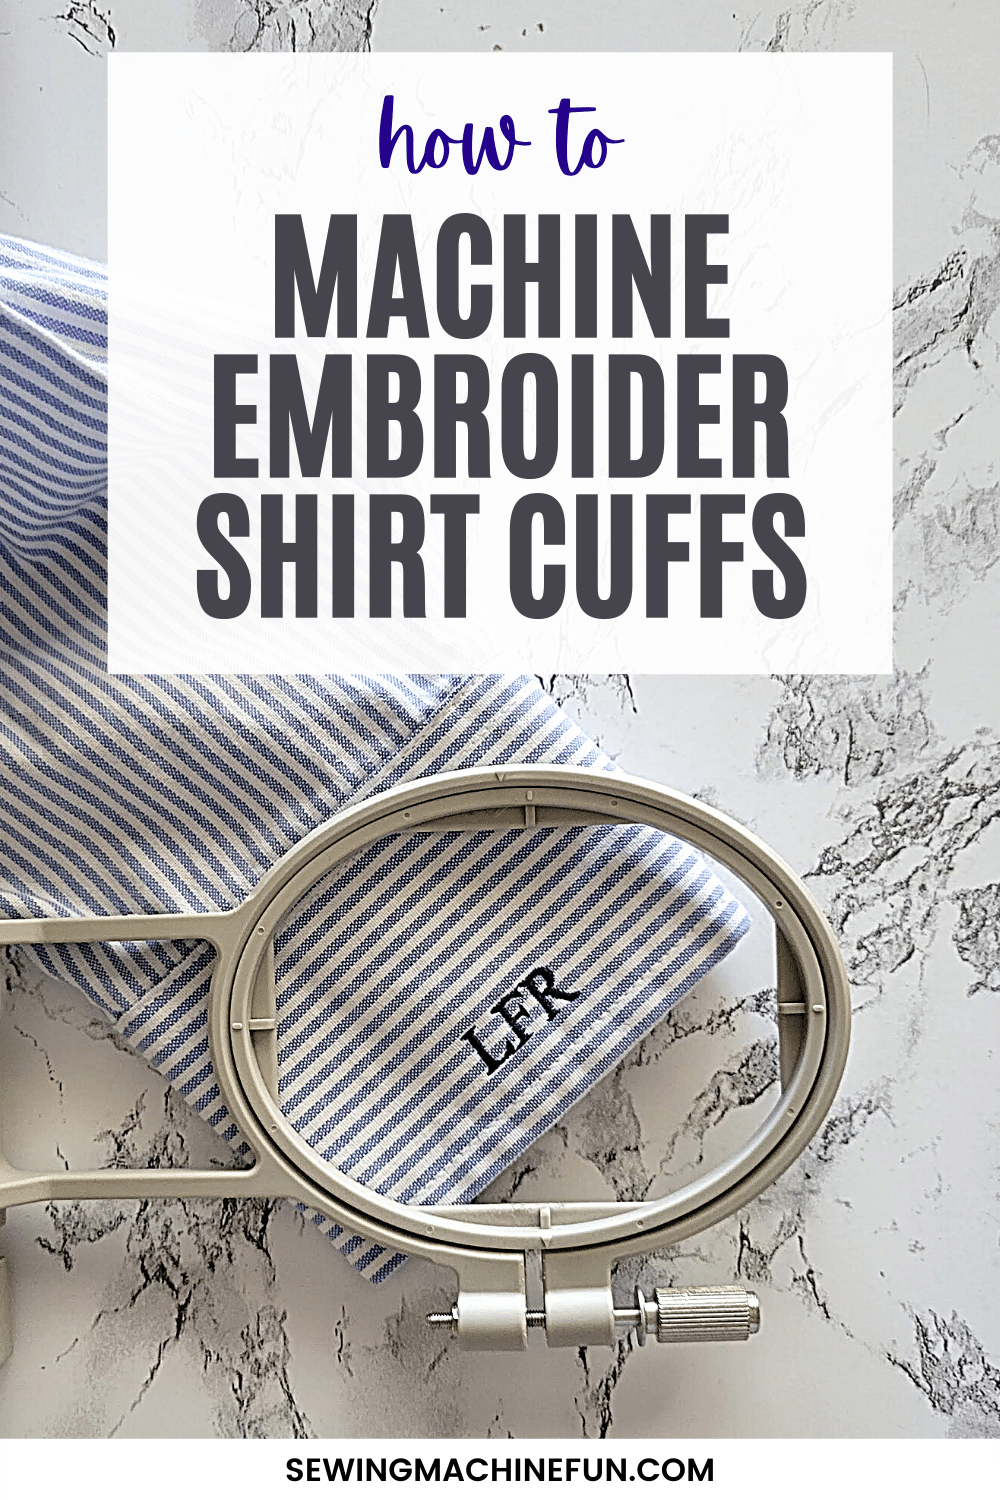
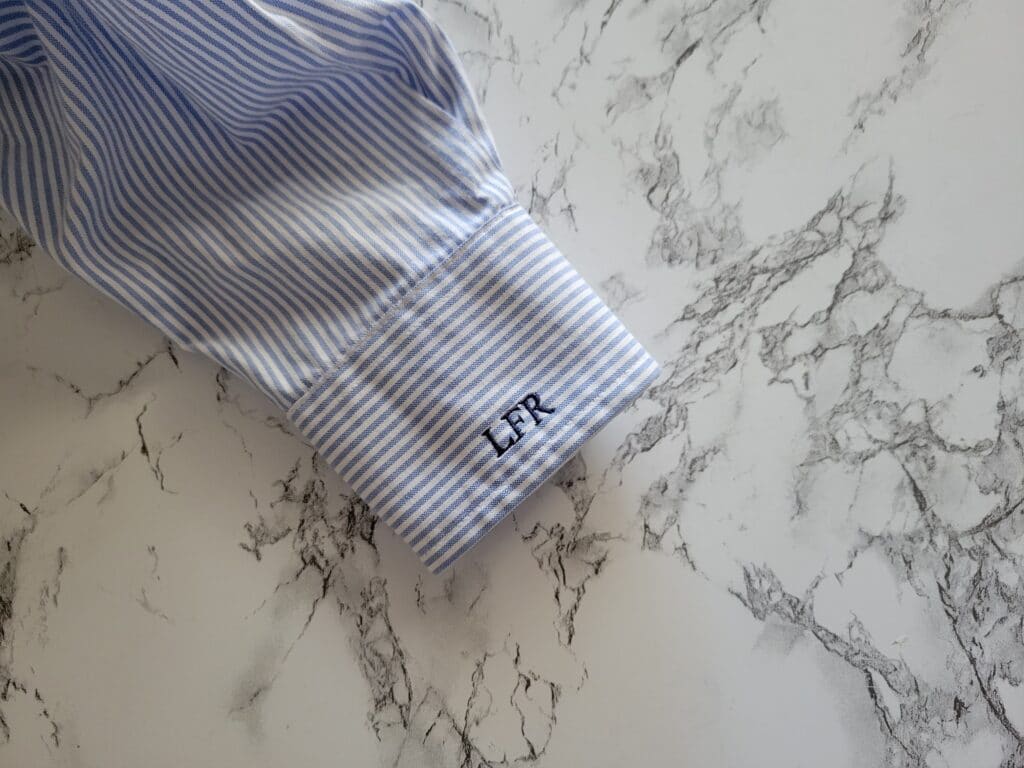
How to Embroider a Monogram on Men’s Shirt Cuffs
This post may contain affiliate links, which means I’ll receive a commission if you purchase through my links, at no extra cost to you. I sometimes receive free products for review. Please read disclosure for more information.
The debate around whether it’s stylish or not to monogram a shirt cuff is an entertaining read.
For instance, GQ called monograms on shirt cuffs tacky, and Real Men Real Style thinks adding a monogram in a conspicuous place is “putting on a show of fake classiness.”
However, the classiest dress shirt companies offer cuff monograms on their custom shirts, and other style resources talk about how personalized shirts are all the rage for a stylish man!
So, are they cool? Are they not? Well, I don’t have much opinion, but I can show you how to monogram men’s shirt cuffs with an embroidery machine.
Once you learn details about the monogram embroidery design’s size, placement, and orientation, the actual embroidery process itself is not tricky at all!
Cuff Monogram Placement and Details
There are a few agreed-upon rules for monogramming shirt cuffs, but much comes down to preference.
Here are some more details, though, for setting up the perfect cuff monogram.
1. Which Cuff to Monogram
The most frequently monogrammed cuff is the left one. For right-handed men, this is the non-dominant side and the wrist that wears the watch.
It’s also not the hand that people reach out to shake.
2. Cuff Monogram Location
The location is somewhat preference, as you can find monograms anywhere and everywhere on men’s cuffs. (Just check out this random Pinterest board I came across.)
Here are a few expert opinions, though.
First, monograms usually sit on the cuff above the center of the wrist. This is what dress most shirt retailers (like Brooks Brothers and Jos. A. Bank) do.
For exact specs, AllStitch’s placement chart and Embroidery Library’s placement guide agree that shirt cuff monograms should be 1 3/8″ toward the buttonhole when the cuff is folded in half.
However, one recommends 1/4″ above the topstitching on the edge of the cuff, and the other suggests 1/4″ from the edge of the cuff for vertical placement. Wilcom recommends the bottom of the monogram be 1/4″ to 1/2″ above the edge, which encompasses both of these!
I think everyone can agree that close to the stitching line and not awkwardly in the middle of the cuff is the best placement.
Confused? DIME’s Perfect Placement Kit has a template for using target stickers to mark their perfect placement if you don’t want to deal with measuring!
3. Directionality
The monogram should be upside down for the wearer and face out so others can read it when looking the cuff.
4. Letter Order and Tradition
Cuff monograms or initials can be the same size or with the middle letter larger.
- When doing all letters the same size, initial the shirt cuff as first, middle, last.
- If using the middle letter as larger, embroider the letters as first, last, middle.
5. Size of Cuff Monogram
Monograms should be small.
Joyce Jagger recommends no more than .35″ tall for monograms with letters the same size and no more than .75″ tall for larger middle letters. Similarly, I read a post on AnntheGran where Deborah Jones recommends 3/8″ height for uniform lettering; this is what I used in my tutorial.
6. Monogram Fonts
The Fine Young Gentleman recommends a block font, but I like serifs. I’m not a huge fan of script monograms for men, though.
However, to each their own preference!
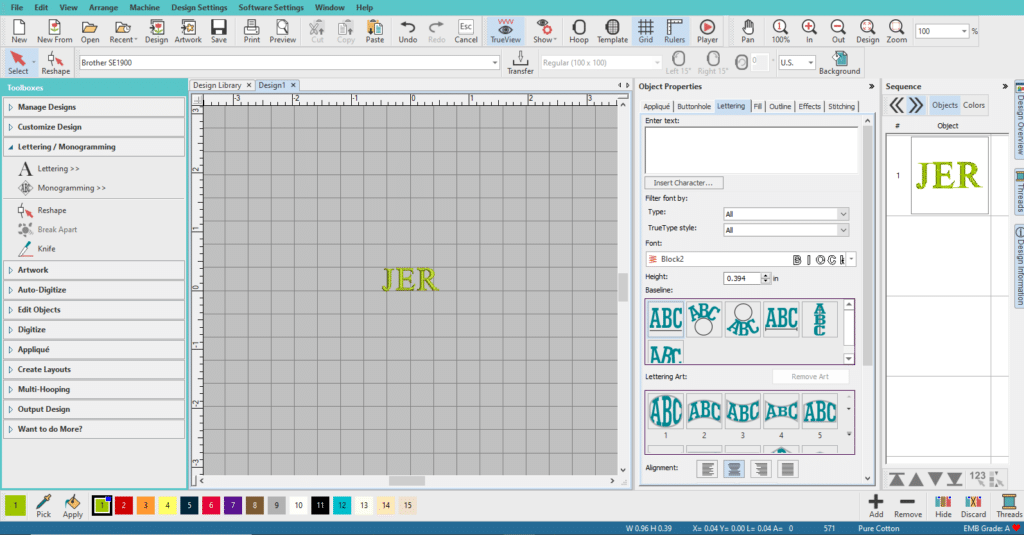
Because cuff monograms are tiny embroidery designs, it’s essential to have a font digitized for small sizes.
Within my Hatch embroidery program, very few options allowed for tiny lettering. The font I chose was Times Small, which is essentially Times New Roman digitized to work at a minimum height of 0.2 in.
If you need help with small fonts, the Professional Lettering Techniques Crafty class has hints to help you achieve success!
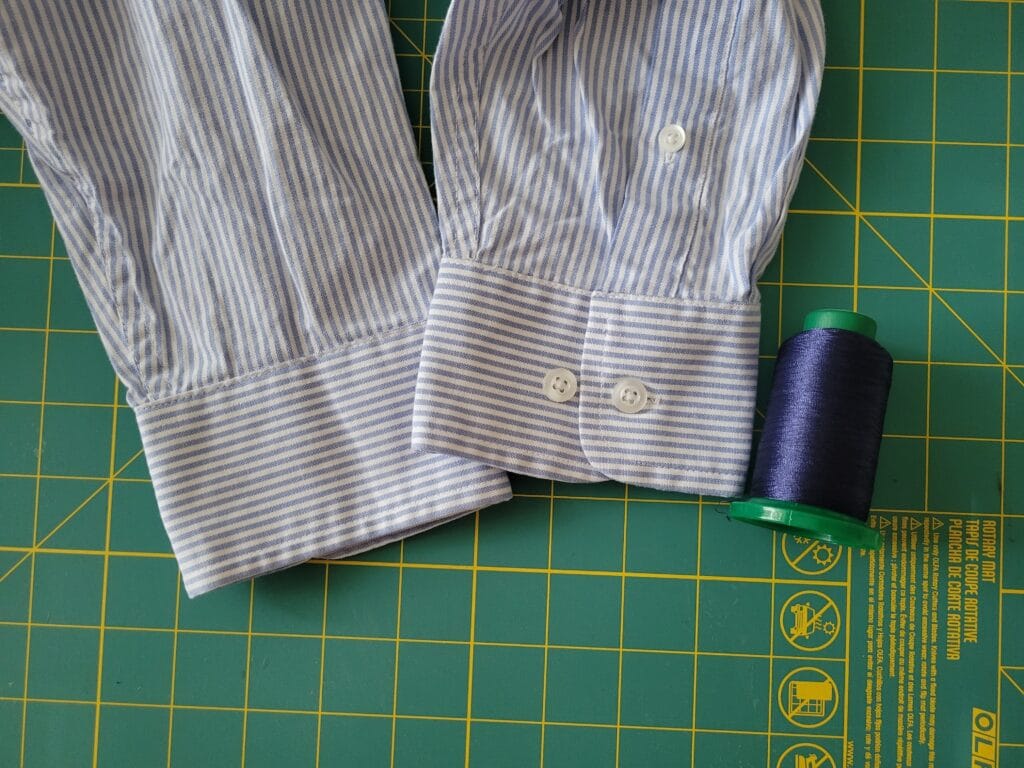
Supplies
Now, here are the supplies I used for this embroidery project.
- My embroidery machine (Brother SE1900) and smallest oval hoop
- Dress shirt to be personalized
- Stabilizer: tear-away stabilizer and Odif 505
- Thread: I used 40wt Exquisite polyester embroidery thread. (You may get a cleaner design with 60wt or 90wt thread. But, I wanted a navy monogram and didn’t have 60wt or 90wt in that color, so 40wt did the trick!)
- Needle: 75/11 embroidery needle. You can size down to 70/10 or 65/9 if using a thinner embroidery thread.
- Tools: Scissors, measuring tools, marking utensils, etc.
How to Embroider a Men’s Shirt Cuff
1. Prepare the Cuff.
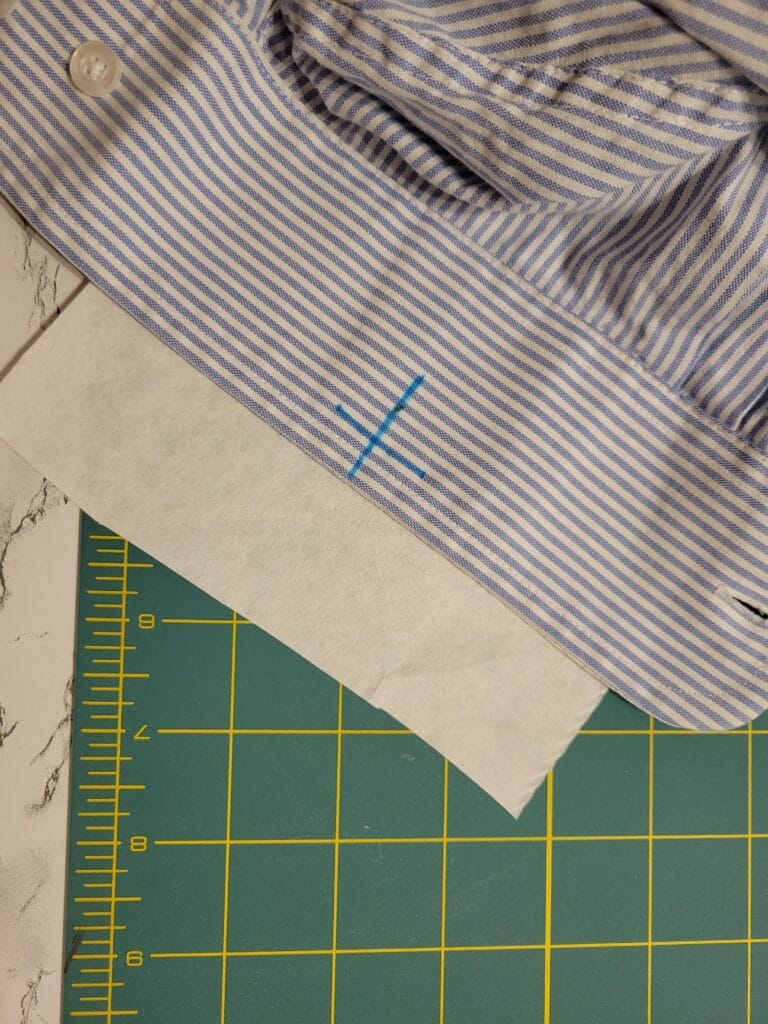
Use a water-soluble marking pen or your favorite marking utensil to mark where you want the bottom of your embroidery design to stitch. This is usually 1/4″ to 1/2″ above the cuff.
(If you know the dimensions of your design, you can mark the vertical center, but I find it easy enough to line up the bottom of my design with the bottom of the marking using the touchscreen on my embroidery machine.)
Then, mark where around the cuff the design will go. Ensure you know which button of the two on the cuff is used by the wearer, as this will make a difference with the location.
To do this, I just tried the shirt on my husband and marked where it fell on the center of his wrist and watch rather than measuring!
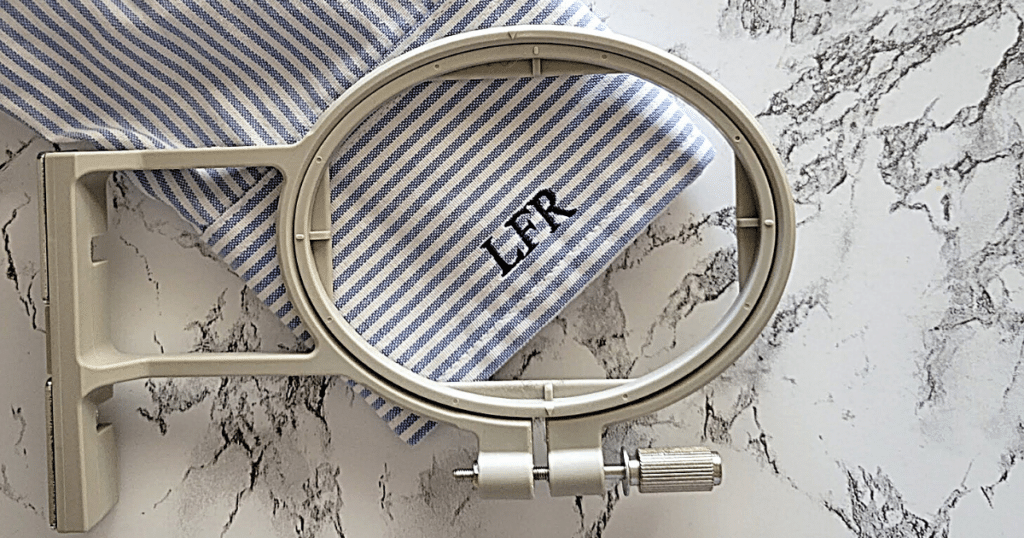
2. Hoop Stabilizer and Cuff Together.
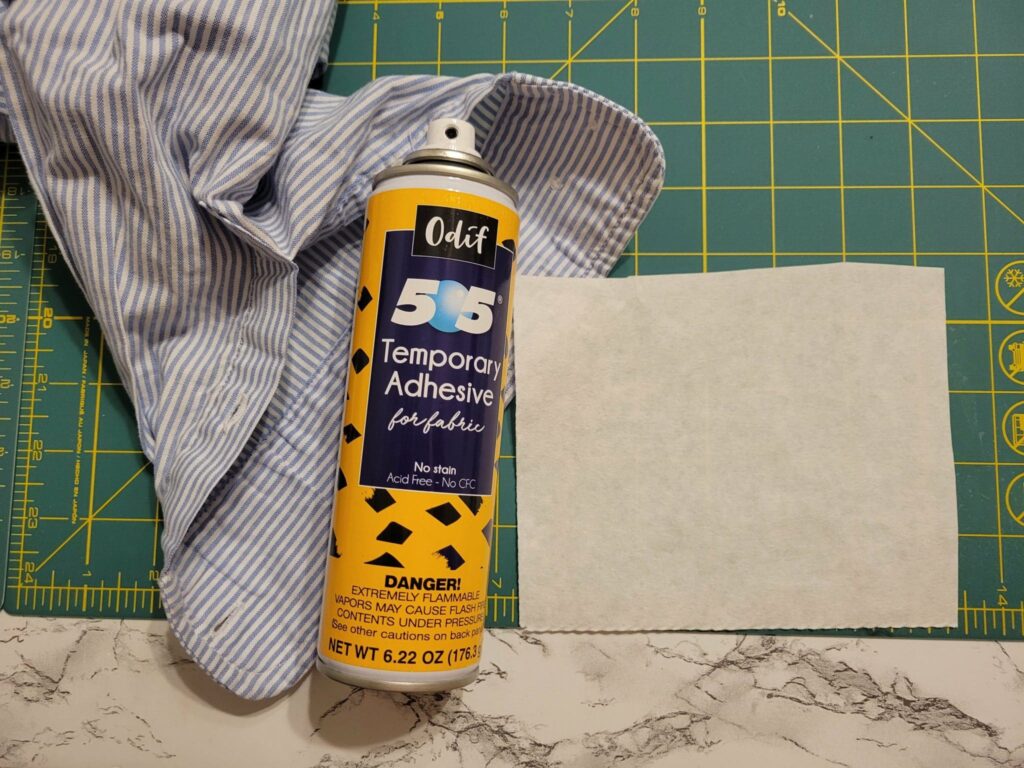
I tried floating one trial for this tutorial, but because the shirt cuff was a double layer, the bottom stuck great to adhesive stabilizer, but the top moved around during stitching.

Thus, I had the best results when hooping the shirt cuff in a small hoop (my 1.5″x2″), which also helped to minimize movement.
Using a layer of Odif 505 on the tear-away also helped me hoop both layers more easily.
If you can’t hoop the shirt, pin or baste both layers of the shirt to the stabilizer when floating to prevent movement during stitching.
3. Set Up and Start Embroidering.
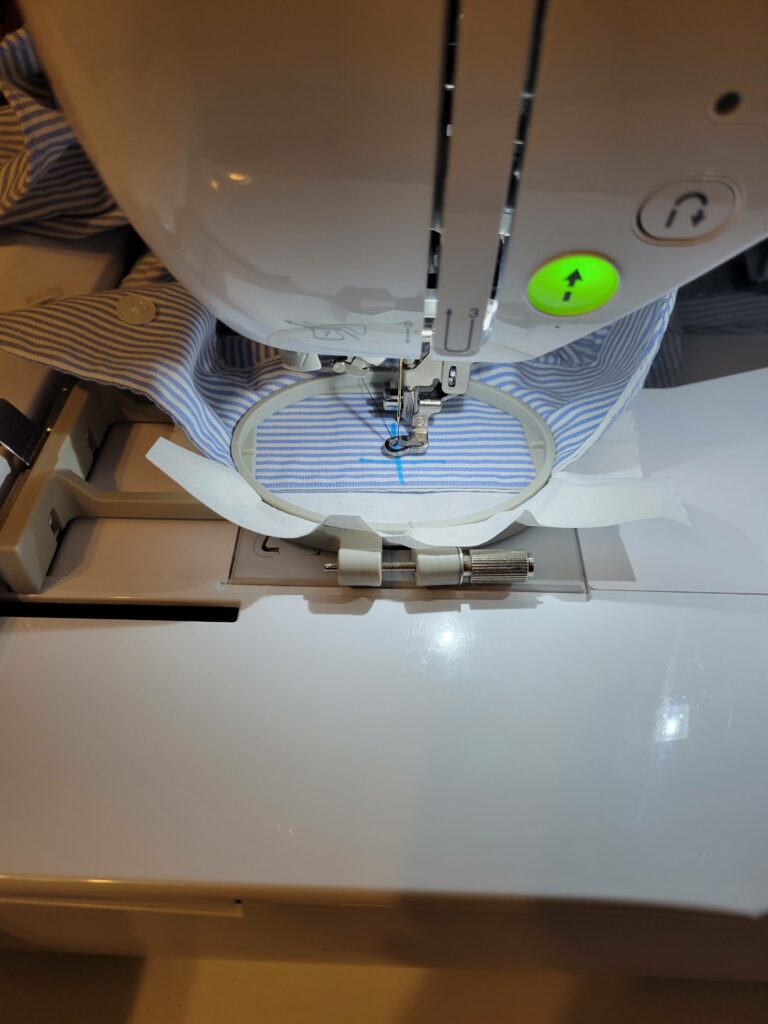
Place the hoop in your machine, and ensure you have the correct thread and needle.
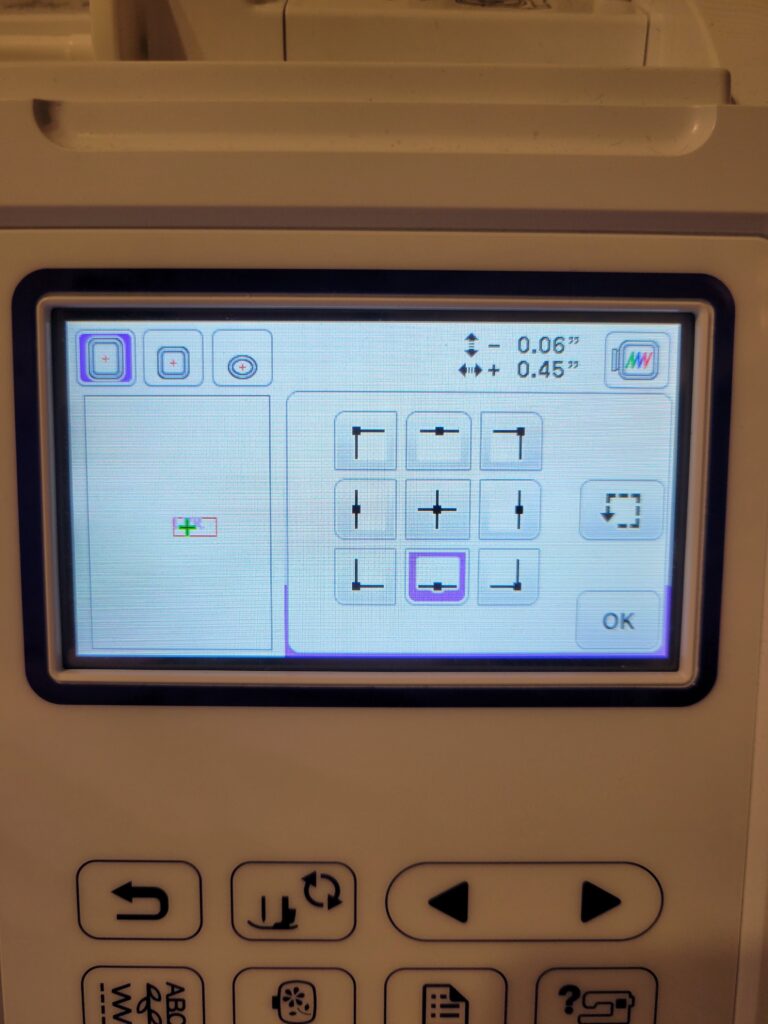
Then, load your design and check that it is oriented correctly. If you marked the shirt where the base of the initials will go, make sure you line the bottom of the design up with that mark.
I do this on my Brother embroidery machine (above) by moving the design around based on the center bottom of the design.
Next, press go and watch the magic happen in less than a minute!
4. Put on the Final Touches.
Remove the hoop from the embroidery machine and gently open the hoop to release the sleeve cuff.
Tear away the stabilizer from the back while keeping a thumb over the stitching to prevent distortion. Clean up any jump stitches and threads on the backside of the shirt.
Wash the marker away with a dab of water. Let dry, and press the embroidery from the back.
Conclusion
And, that’s it! Go rock that monogrammed shirt cuff! And then check out my big list of other things to embroider.