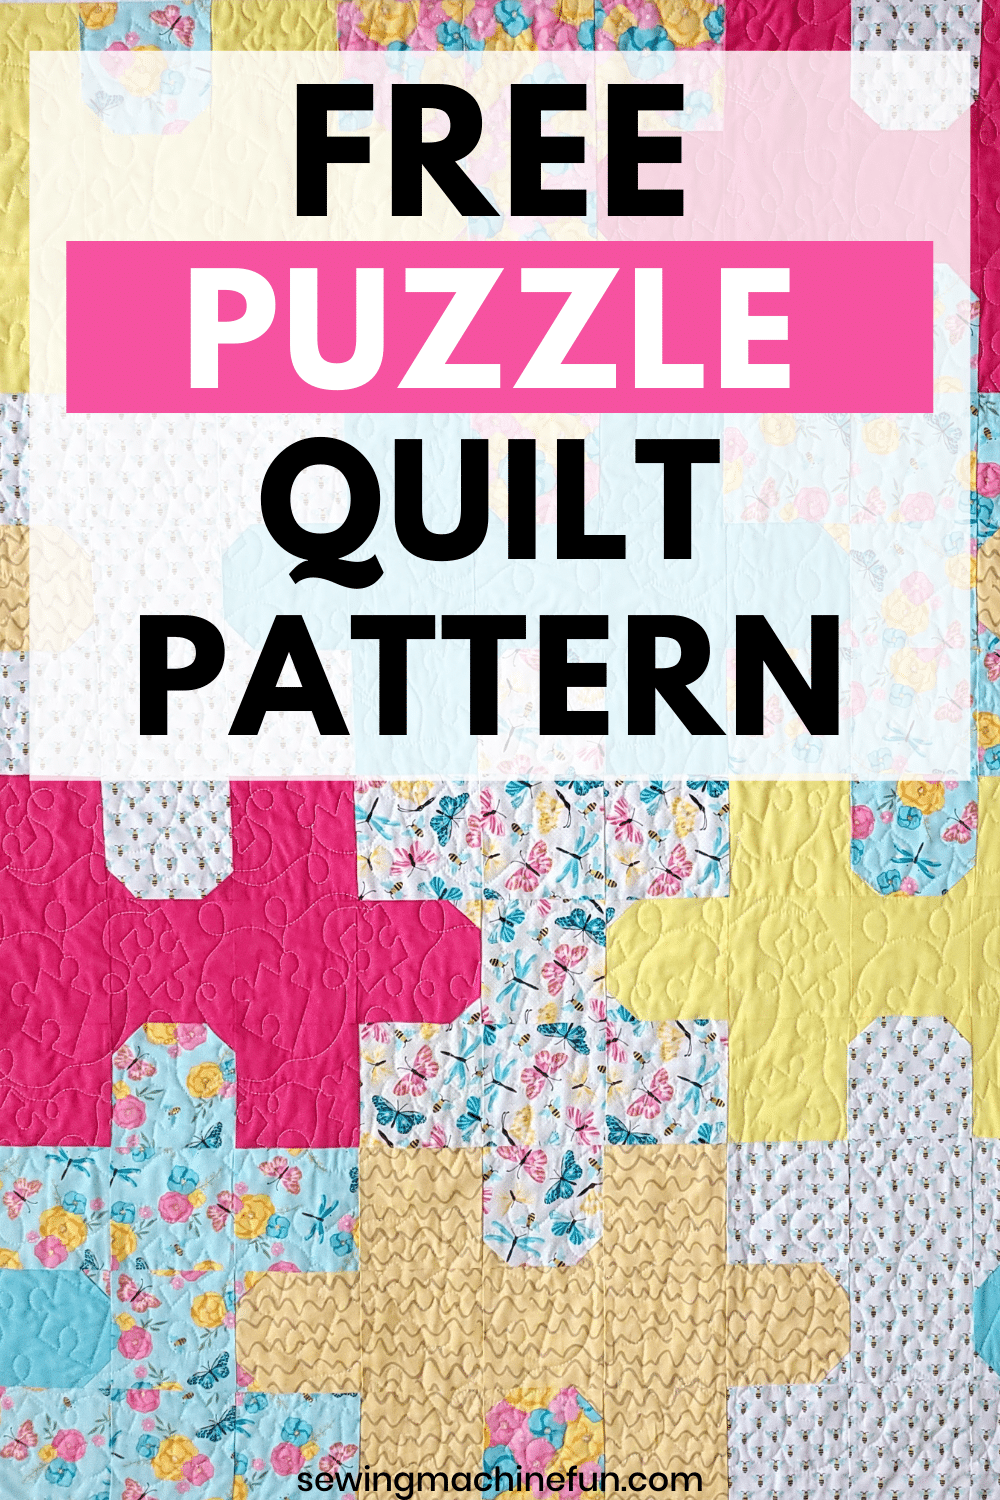
FREE Jigsaw Puzzle Quilt Pattern (AccuQuilt-Friendly Tutorial!)
This post may contain affiliate links, which means I’ll receive a commission if you purchase through my links, at no extra cost to you. I sometimes receive free products for review. Please read disclosure for more information.
My grandmother turned 90 this year, and this amazing jigsaw puzzle quilt was my gift to her!
Not only does she love puzzles, but she and my mom are my two companions when I go to quilt shows. So, a puzzle quilt was the perfect gift idea.
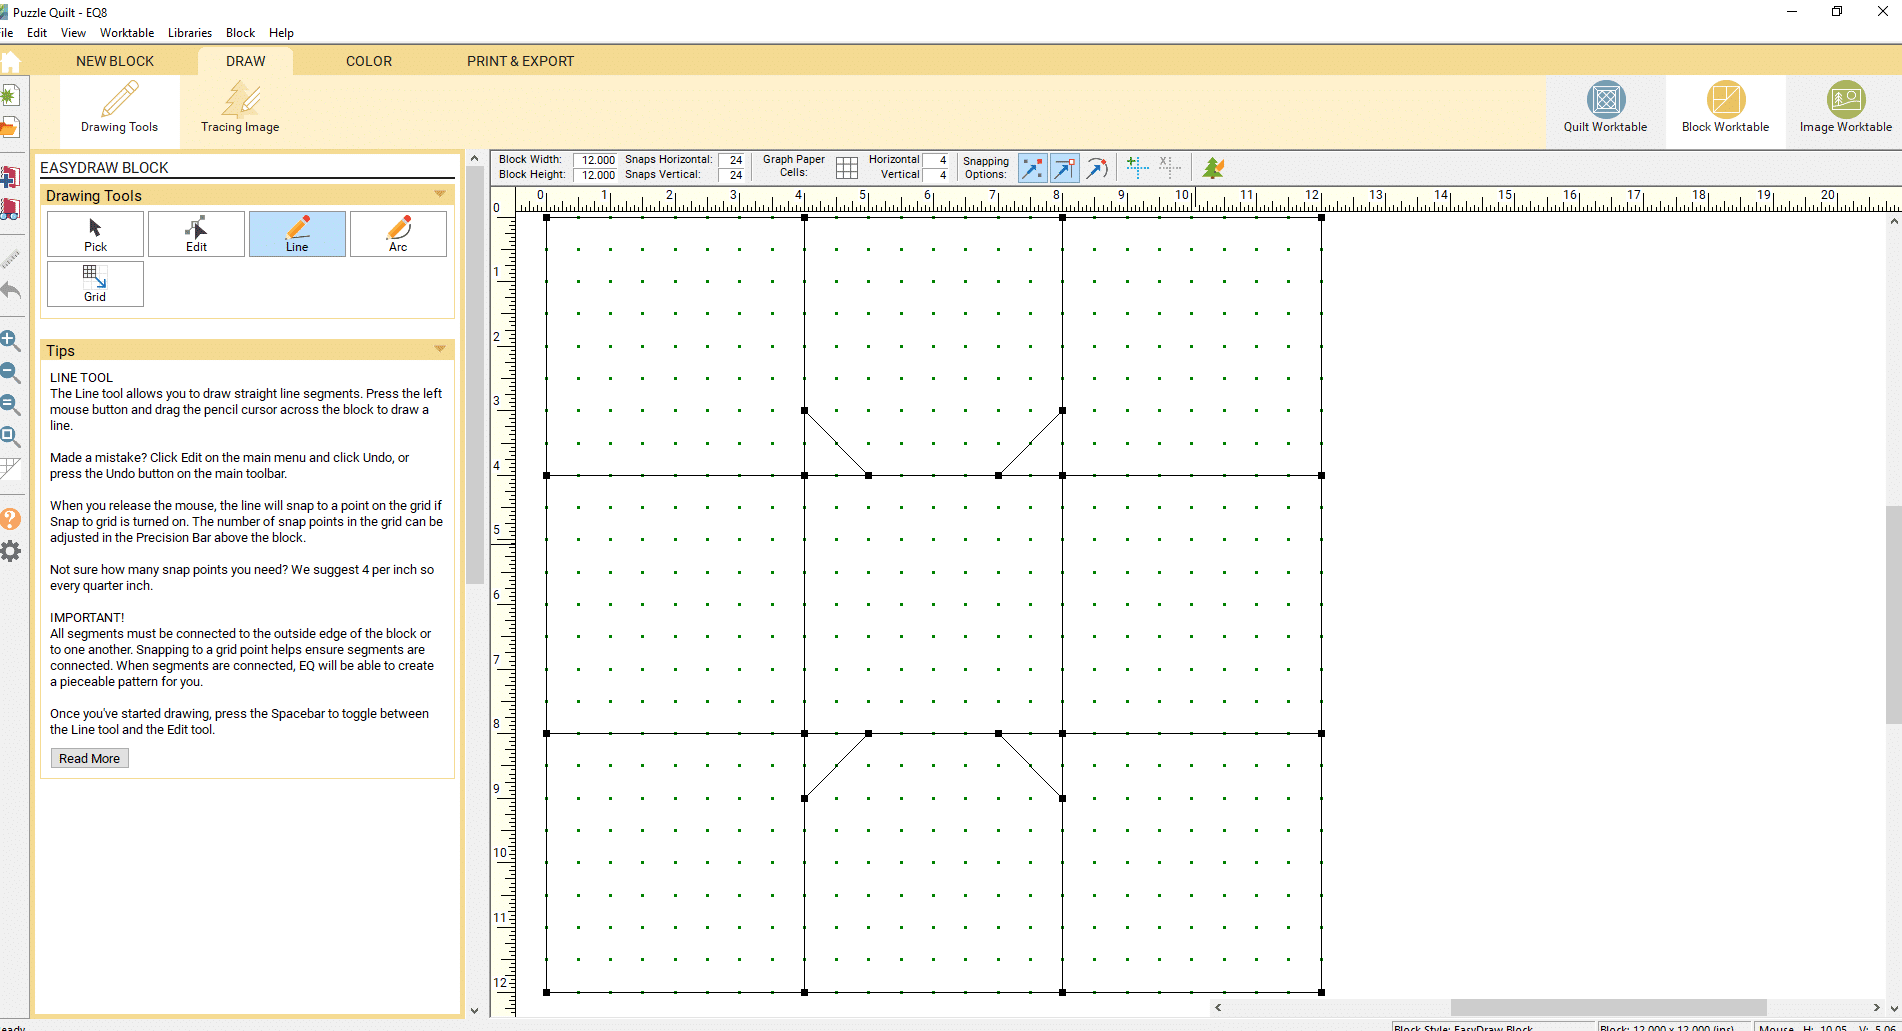
I created the design in Electric Quilt 8 software and used my AccuQuilt Go! to cut every single piece. I finished up using my embroidery machine to continuous quilt a puzzle design.
I’m so please with how it turned out, and my grandmother loved it!
Want to create your own?
Keep reading to grab my free jigsaw puzzle quilt pattern and the sewing tutorial.
Pattern Fabric Required + Other Supplies
I used three solid fabric colors and then five different patterned fabrics. You can customize the pattern however you desire, though.
The print fabrics were from two identical Fat Quarter bundles I splurge-purchased from JOANN.
The solids were broadcloth rather than quilting cotton because the colors just worked better, and I had so much in my stash. (Meh quality, unfortunately, but it did the trick.)
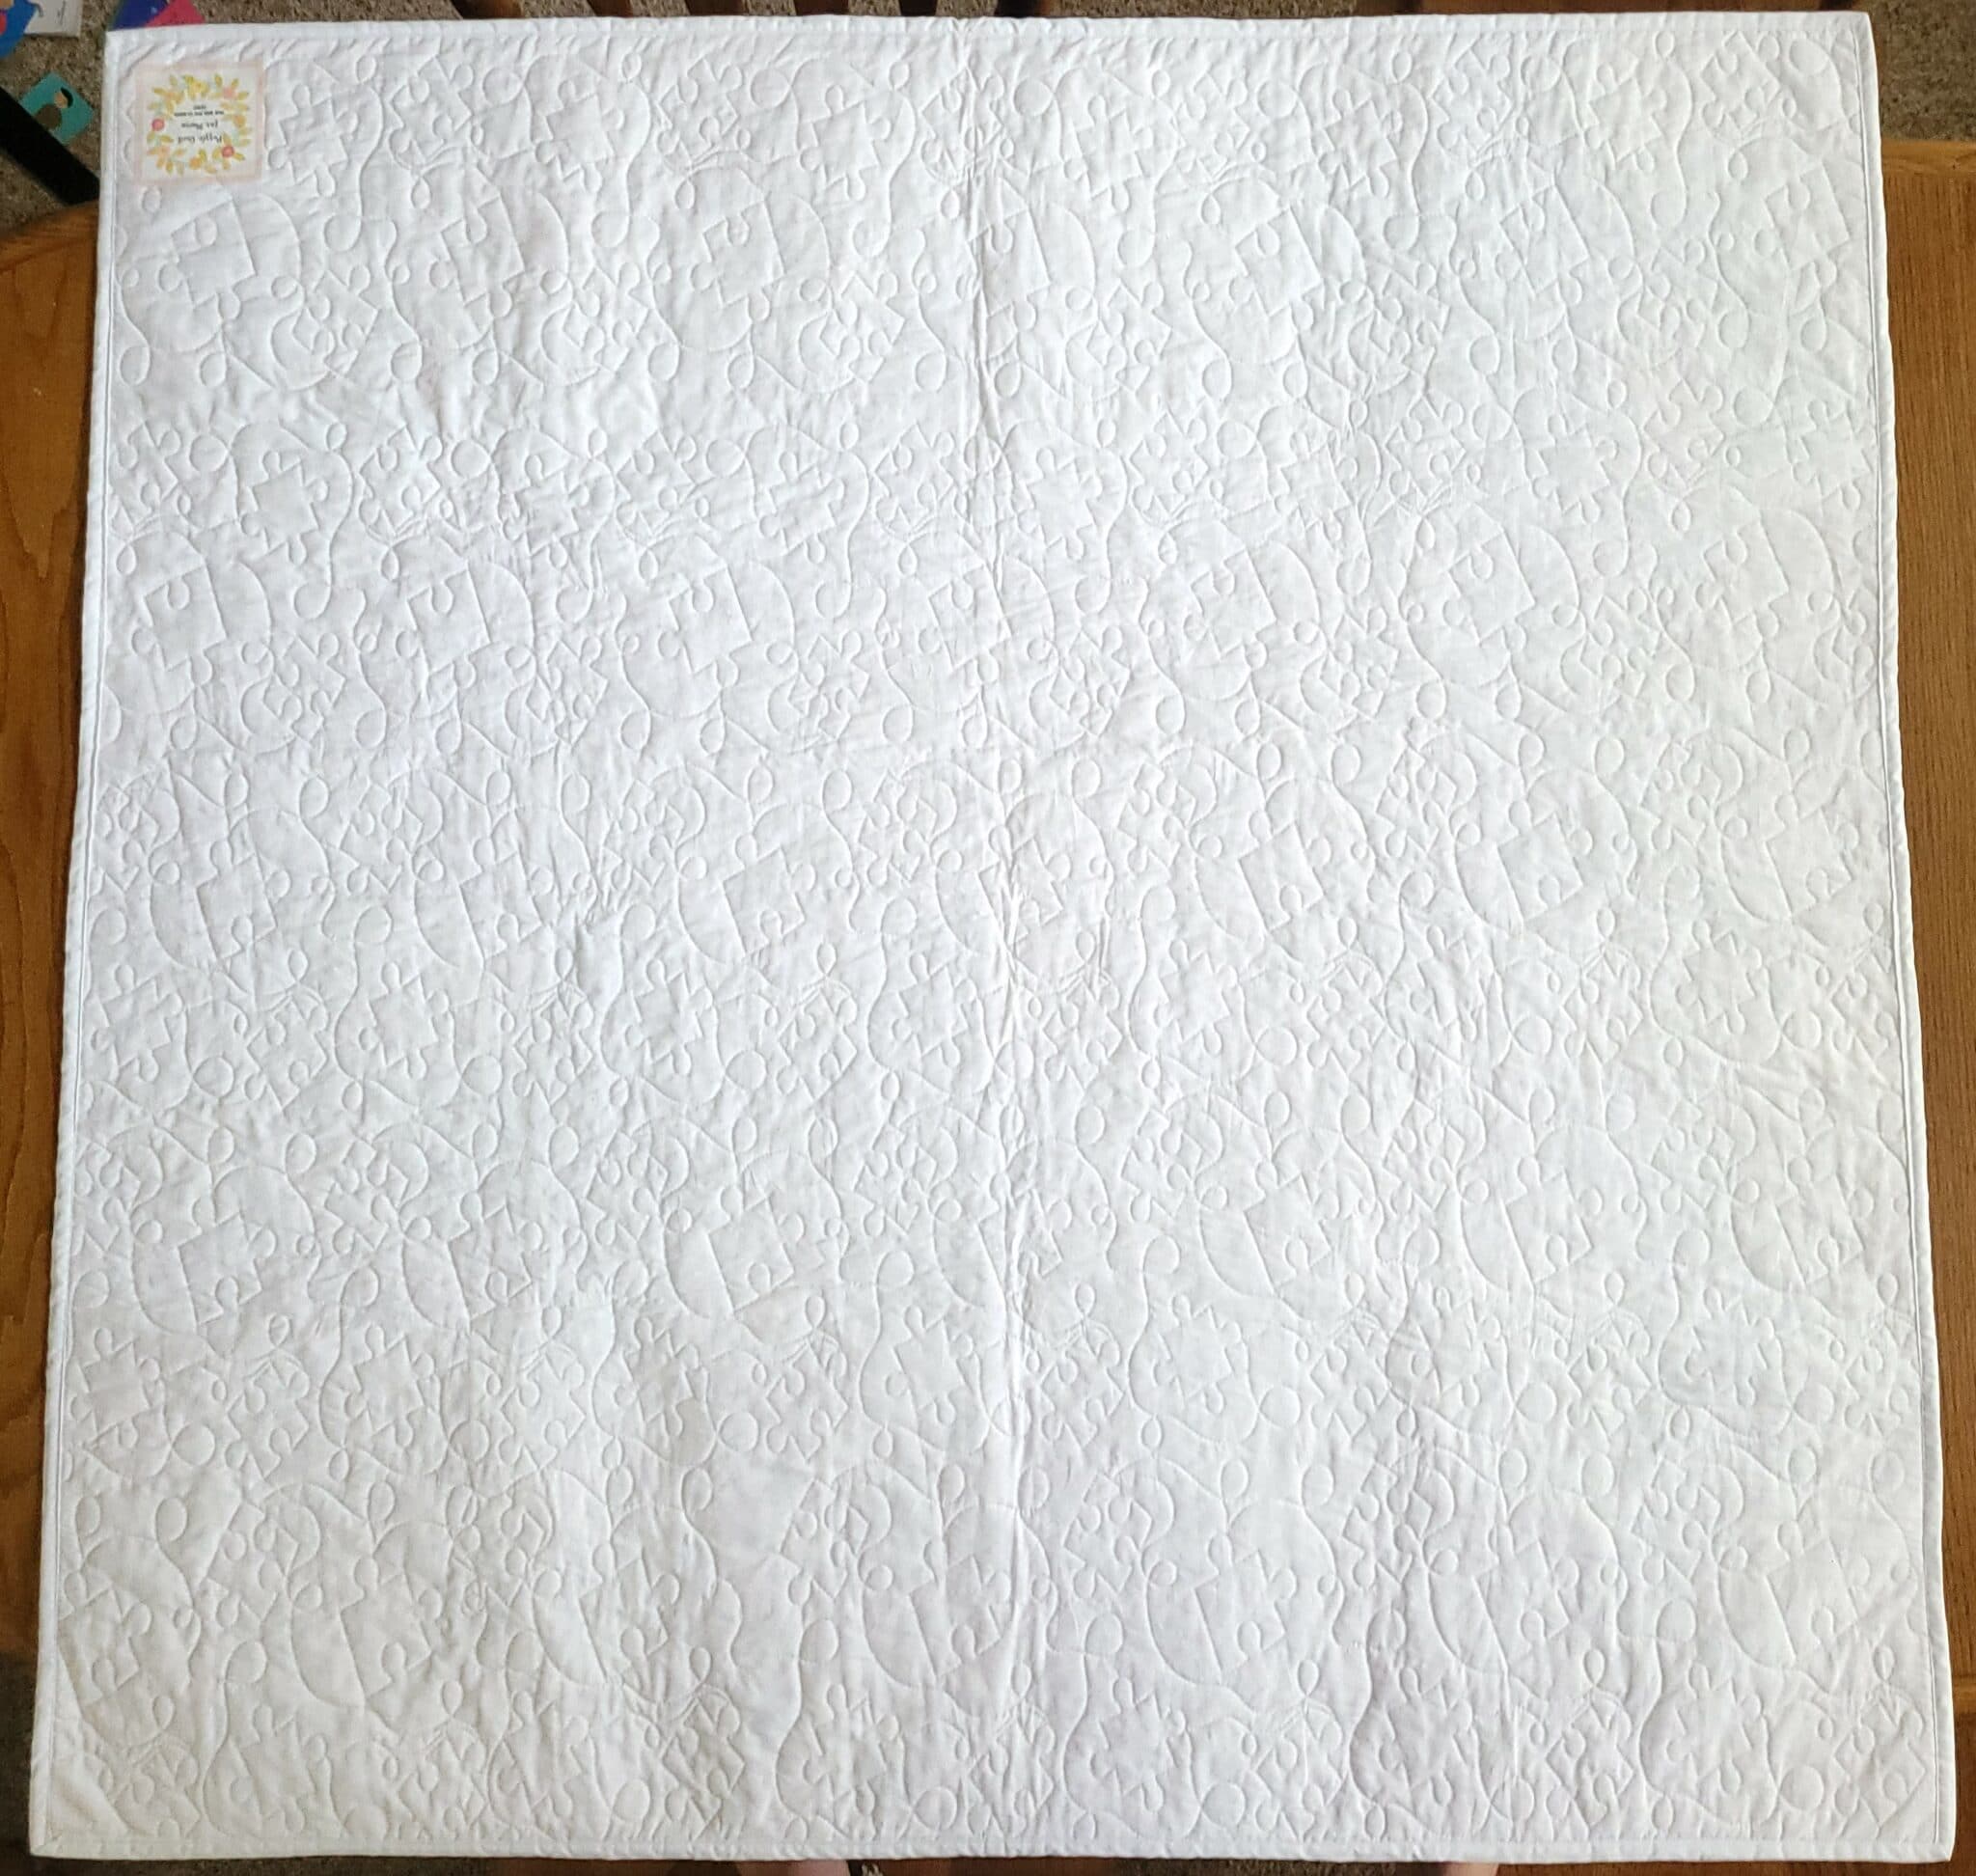
I used a little over 1 1/2 yards of 60″ wide white quilting cotton for the quilt backing. It’s the same fabric I used for the binding.
For batting, I used 80/20 cotton/poly batting. This is my favorite type; my embroidery machine loves it, and it gives the perfect feel and look to my finished quilts.
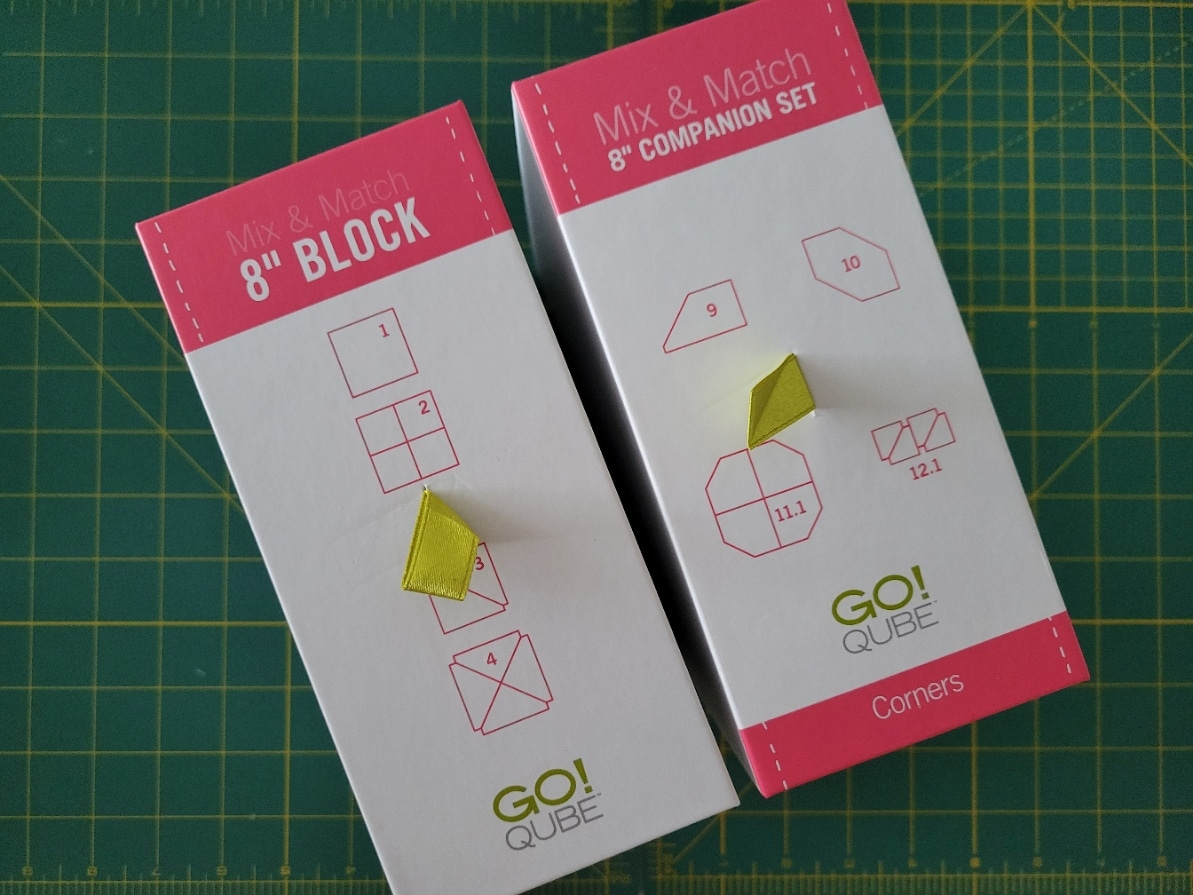
AccuQuilt Go! Dies Used (And Piece Sizes for Non-AccuQuilt Users)
I have the 8″ AccuQuilt Qube and the accessories sets and picked my quilt dimensions with that in mind.
If you don’t have an AccuQuilt and are an avid quilter who hates cutting (me, me!), I definitely recommend my AccuQuilt Go!
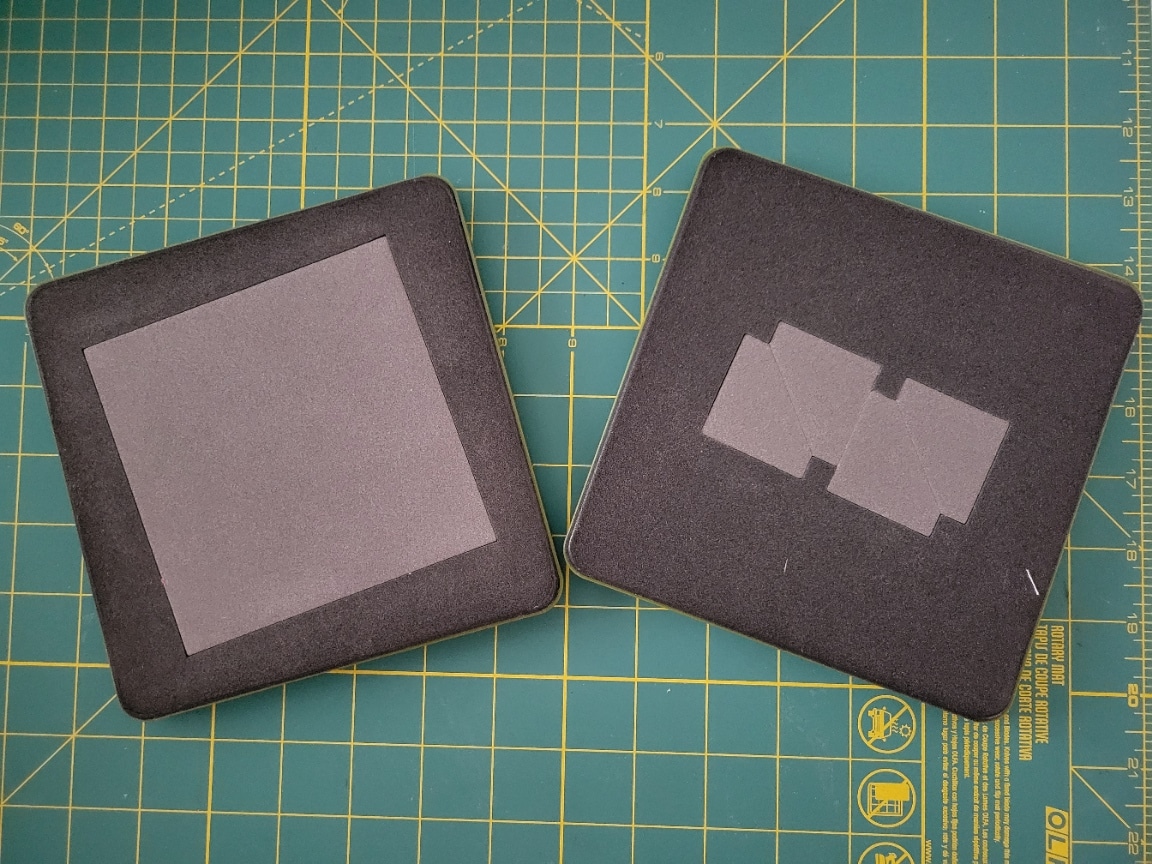
This pattern took 3 AccuQuilt dies:
- 4″ finished square (#1 in 8″ Qube Mix & Match Block Set, or you can get it by itself)
- 1″ finished square half-square triangles (#12.1 in 8″ Qube Companion Set-Corners or get it by itself)
- 2 1/2″ strip cutter for binding
Here are pictures of the die boxes for reference. As mentioned, dies 1 and 12.1. (Strip cutter not shown.)
If you aren’t using an AccuQuilt, make sure to factor in seam allowances.
So, cut your squares to be 4.5,” and add 1/4″ to each of the HSTs; you can cut the dog ears off your corners, too, if you’d like.
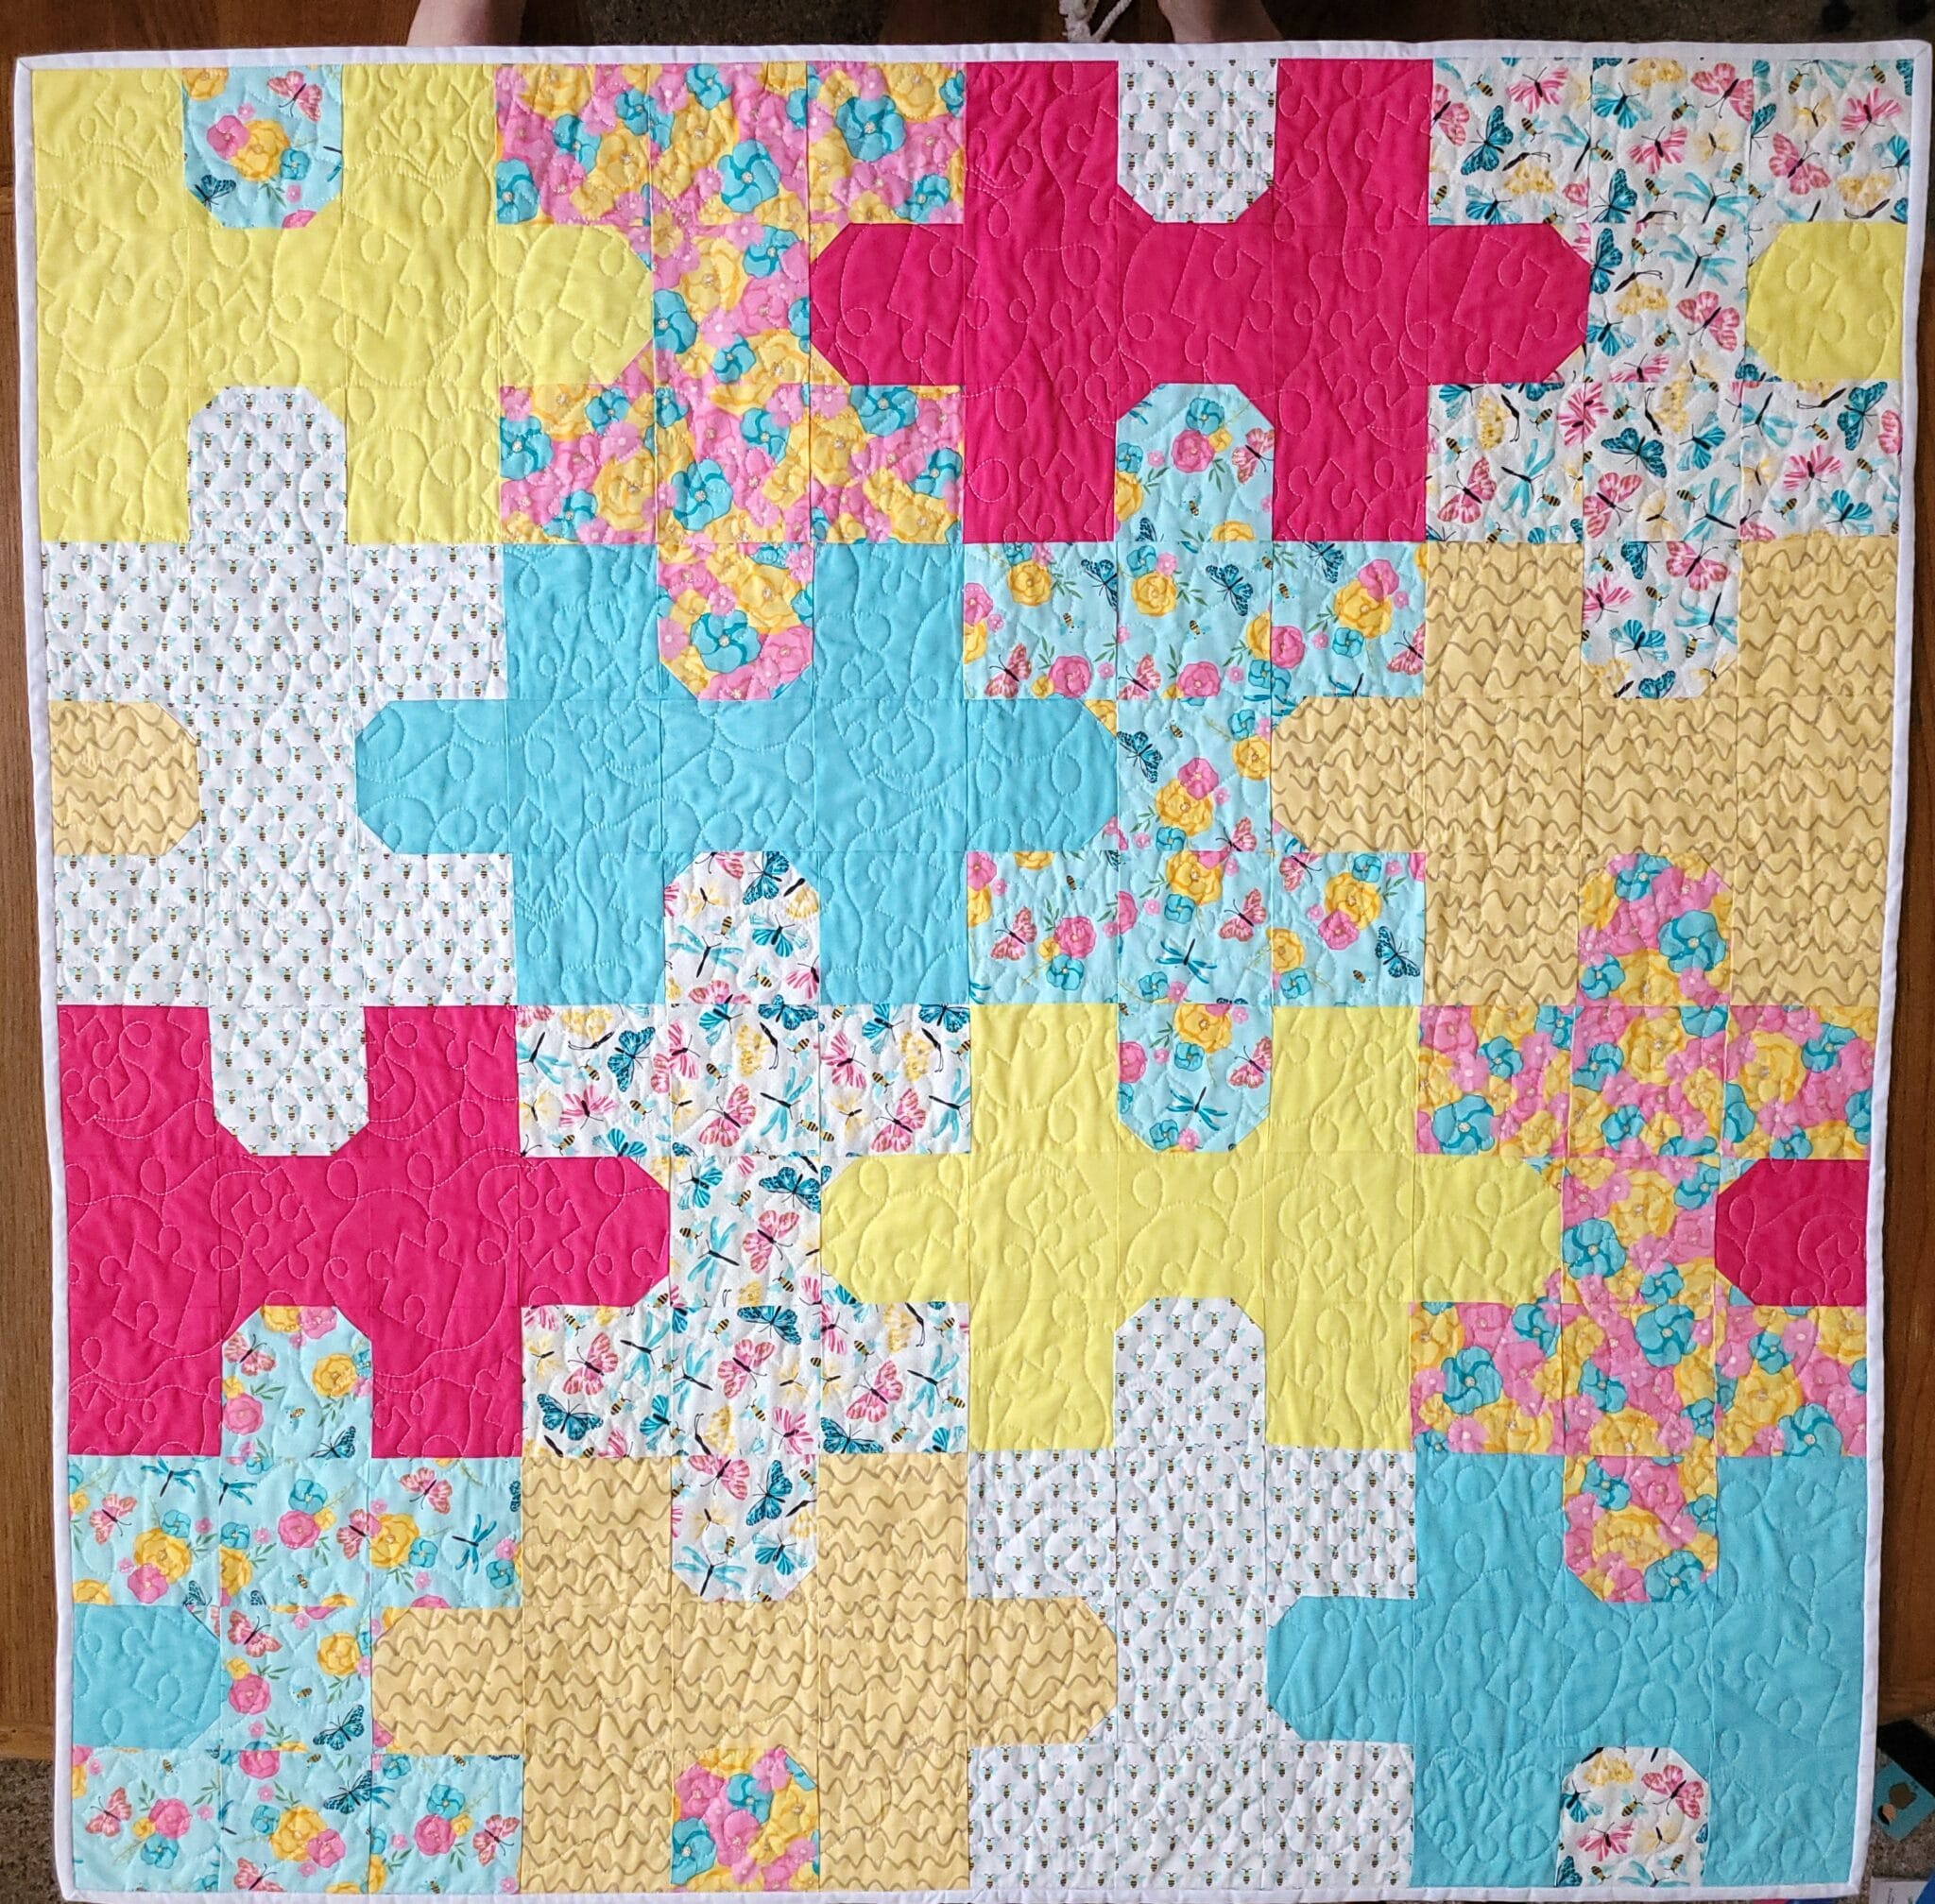
Free Jigsaw Puzzle Quilt Pattern & Layout
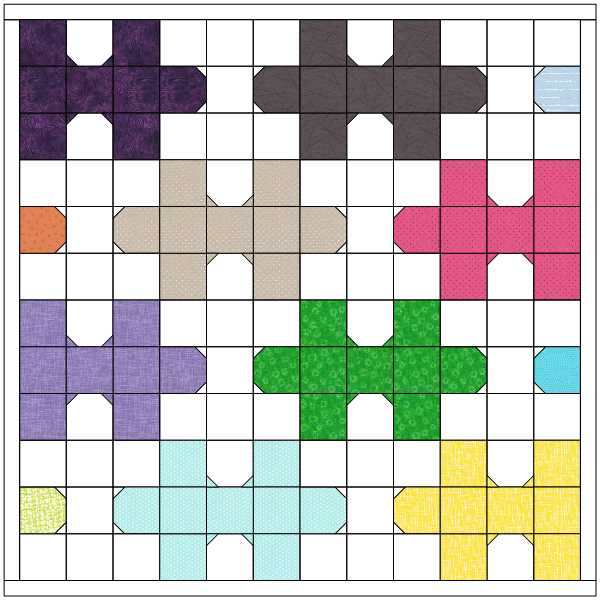
Above is the EQ8 pattern I designed to show the general layout. Obviously, the colors are ridiculous, but I needed to see how they would all fit together when designing. (If you want to use scrap fabric pieces, though, you could do each puzzle piece in a different color, and it might look fun!)
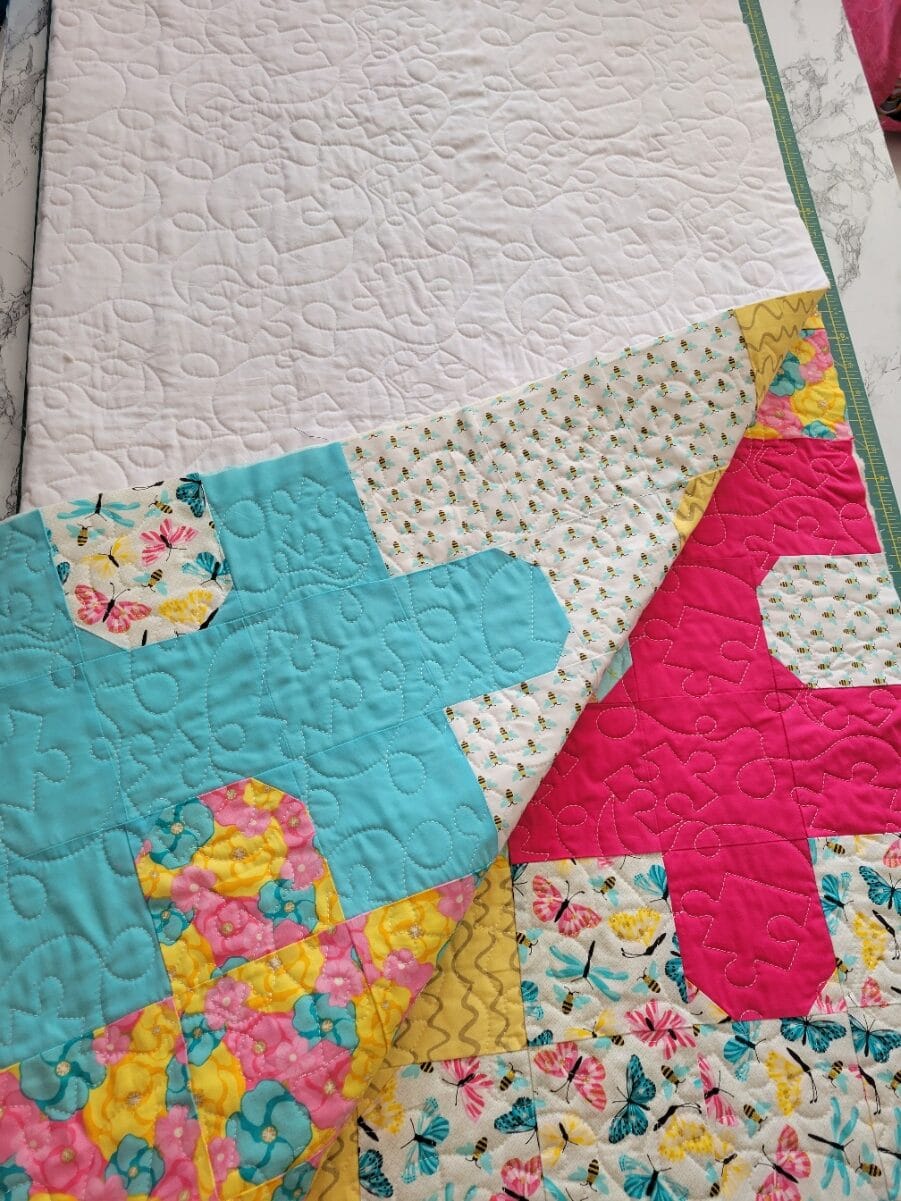
As mentioned earlier, each block is a 12″ square block composed of nine 4″ squares. Thus, the finished dimensions of the quilt before binding or adding any borders are 48″x48″. You can add more blocks as needed to make a larger quilt.
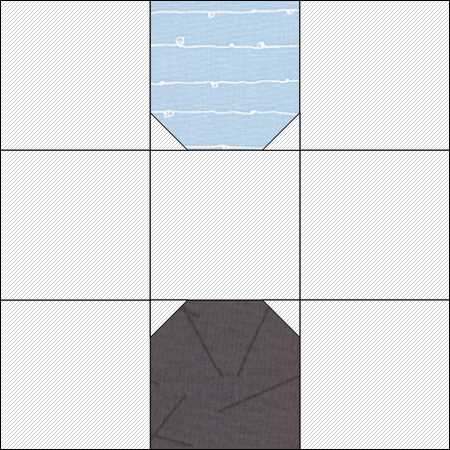
Here’s what each puzzle quilt block looks like up close with dimensions to help you understand the pattern better.
And, here’s a rendered version using color. The blocks next to this square quilt block are the same but rotated 90 degrees.
How to Sew a Puzzle Quilt

Here’s a brief tutorial of how I constructed my jigsaw puzzle quilt! Let me know if anything is unclear.
Also, the cutting process took one evening, the piecing process took another, and the quilting part took one more. Quick, easy, and fun to make!
1. Cut Pieces
First, cut all quilt pieces needed in the fabrics you’ve selected. I used my AccuQuilt to do all of this for me (while watching Hallmark movies!)
2. Layout Fabric Pieces
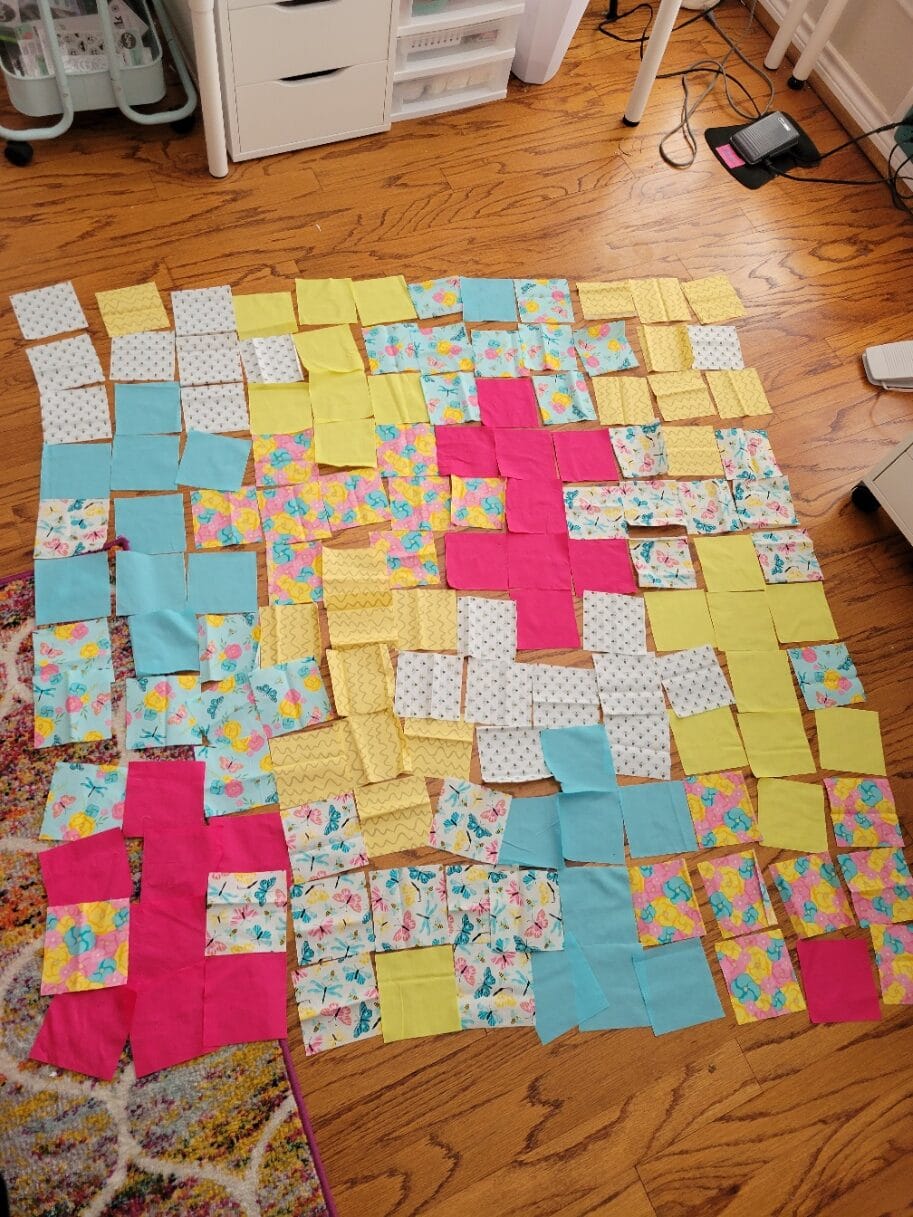
Next, I used my craft room floor to lay out the block pieces and visualize color combinations.
3. Sew HSTs on Squares
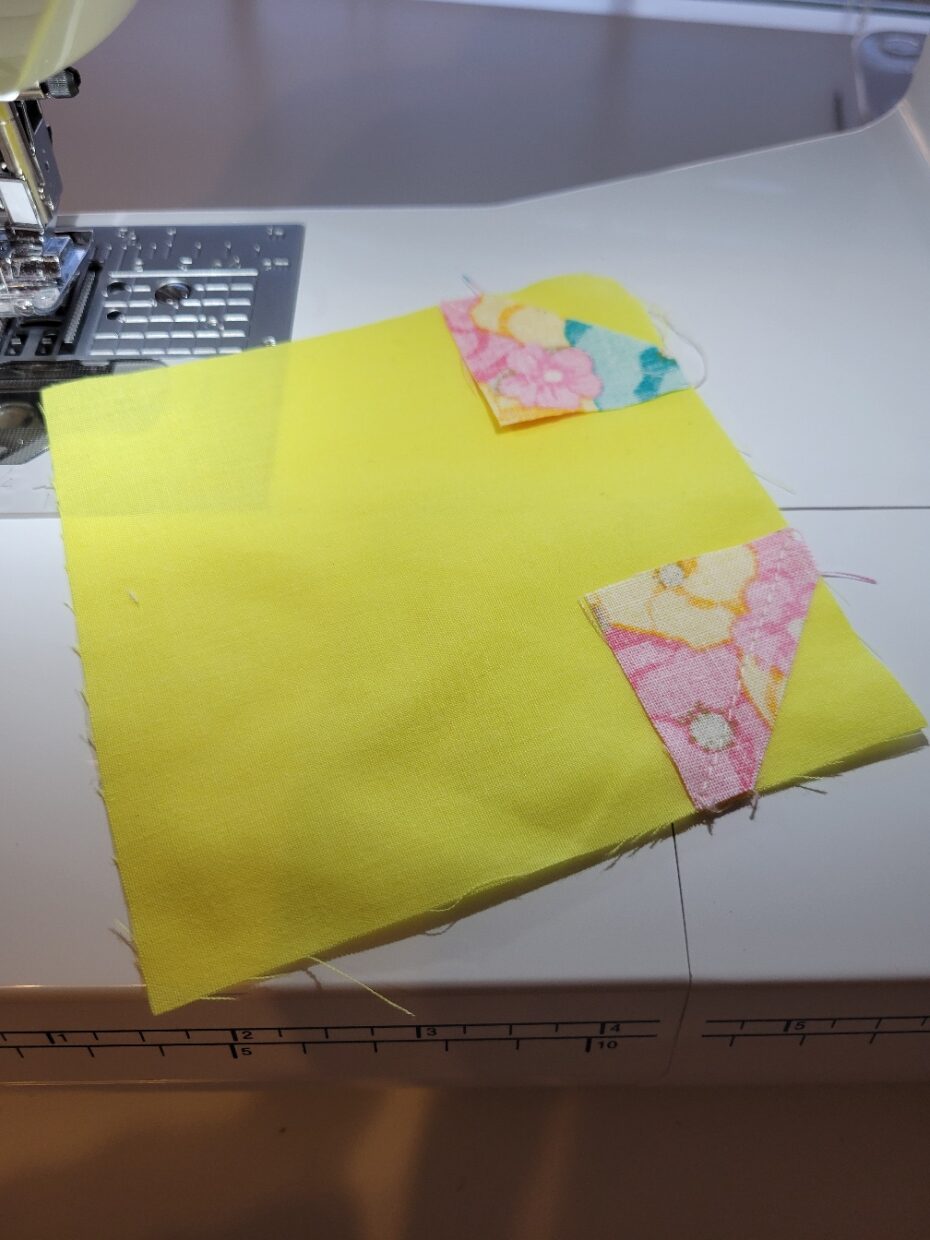
To make my assembly line piecing go faster later on, I next sewed the 1″ HSTs on the corners of the squares using a 1/4″ seam allowance.
Thanks to the HST die having dog-eared corners, this was so easy to line up without measuring and marking my squares.
Sew with right sides together as shown, clip the excess fabric from the square, and press the HST back where the clipped fabric used to be.
4. Sew Row By Row
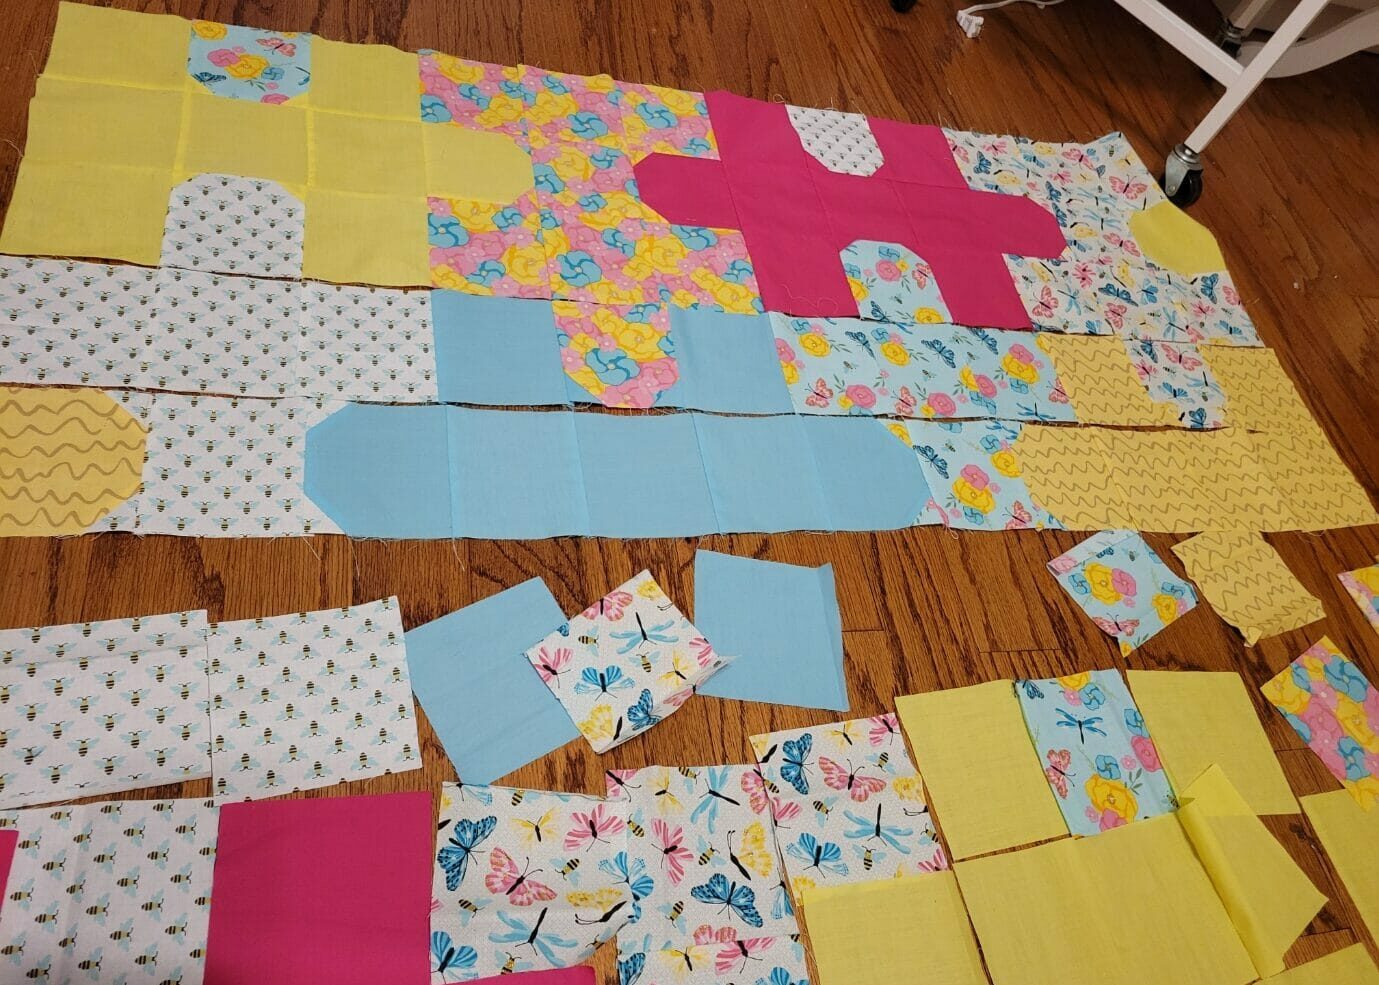
I thought I might sew block by block (each block being nine squares), but that got tricky with the color combinations.
Instead, I recommend sewing row by row using a 1/4″ seam allowance.
After each row, press seams as desired. (Sometimes I press open, but because my yellow fabric was sheerer than I liked, I pressed to the sides to avoid show-through when possible.)
4. Sew Rows Together
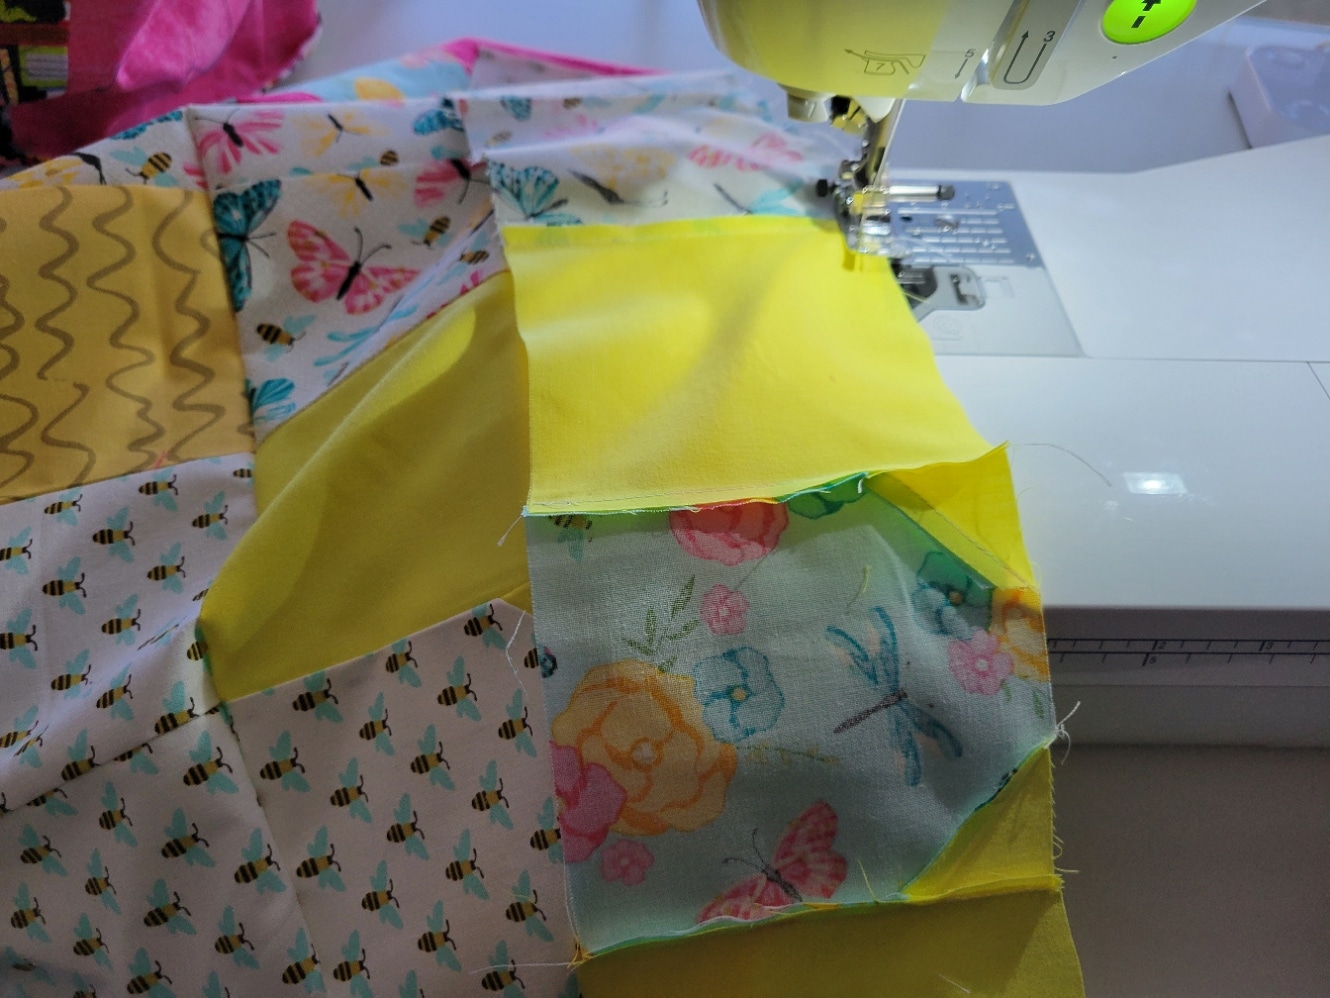
Next, sew the rows together using a 1/4″ seam allowance. Press seams.
5. Prepare the Quilt Sandwich
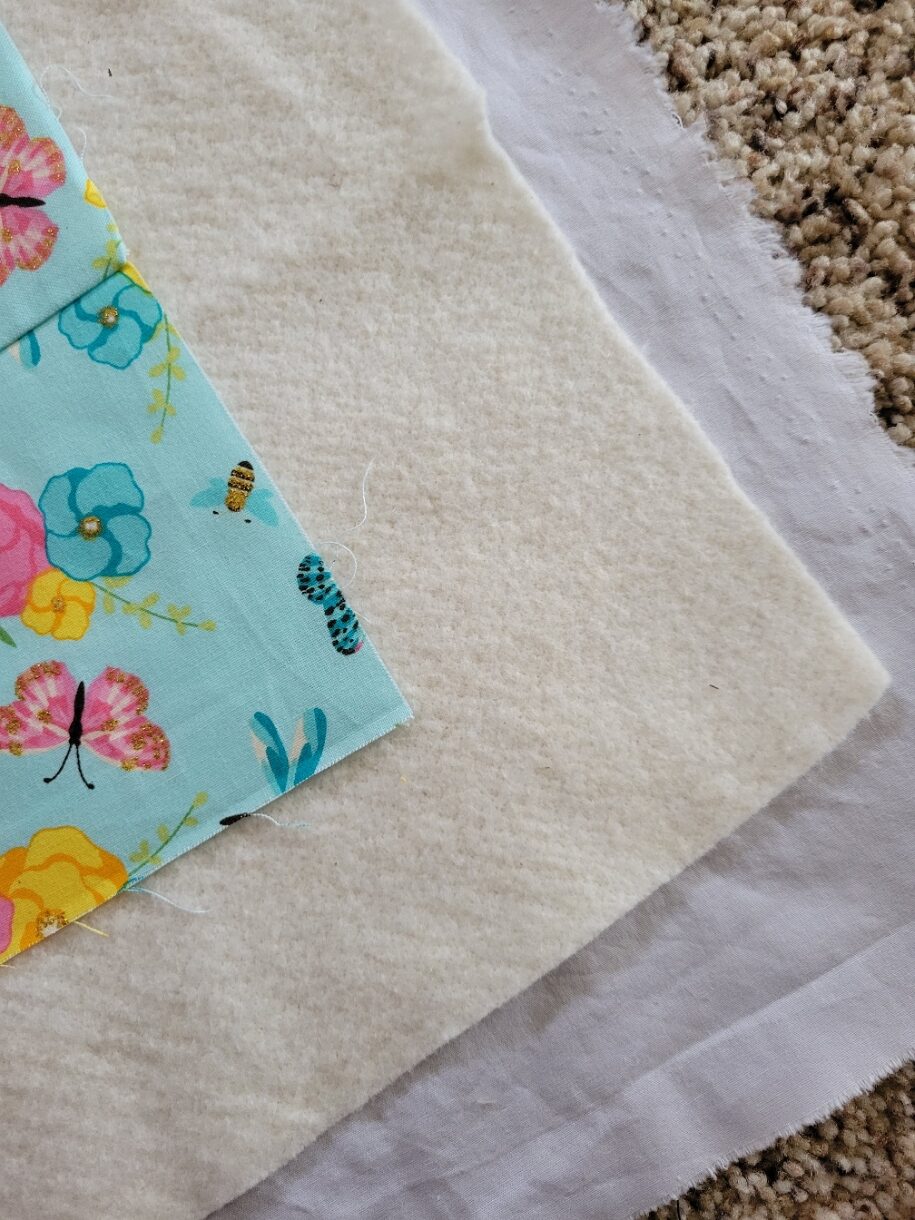
Now, the quilt top is done! Give it a final press, if needed, and prepare the quilt sandwich.
The quilt sandwich will be the backing fabric with the right side on the floor, the layer of batting, and then the quilt top with the right side facing up.
Since I was embroidering the top, I needed the two other layers to be much larger than the quilt top itself to help with securely hooping sides and corners.
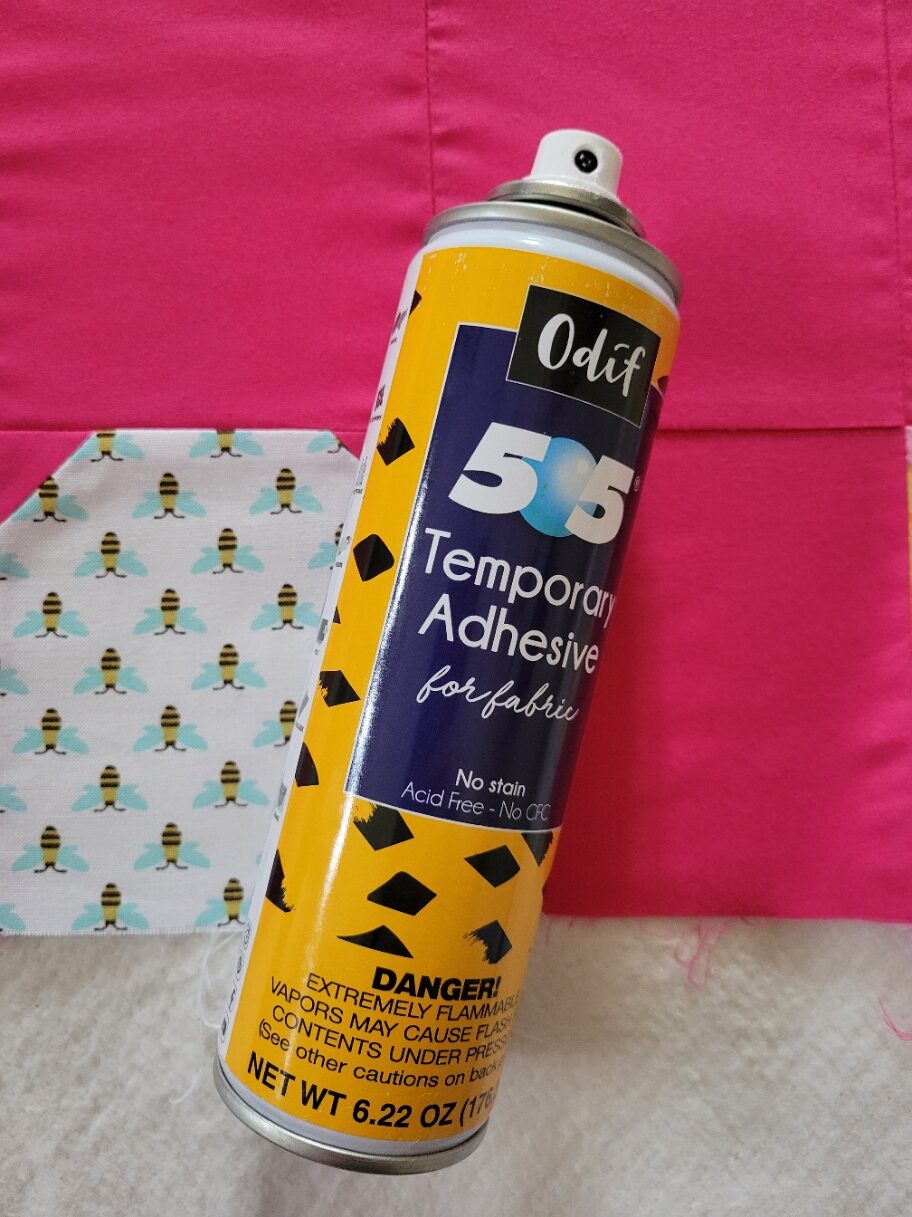
I usually use curved safety pins for basting the sandwich when I free-motion quilt, but I prefer temporary fabric adhesive spray (like Odif 505) when using my embroidery machine.
6. Quilt the Top
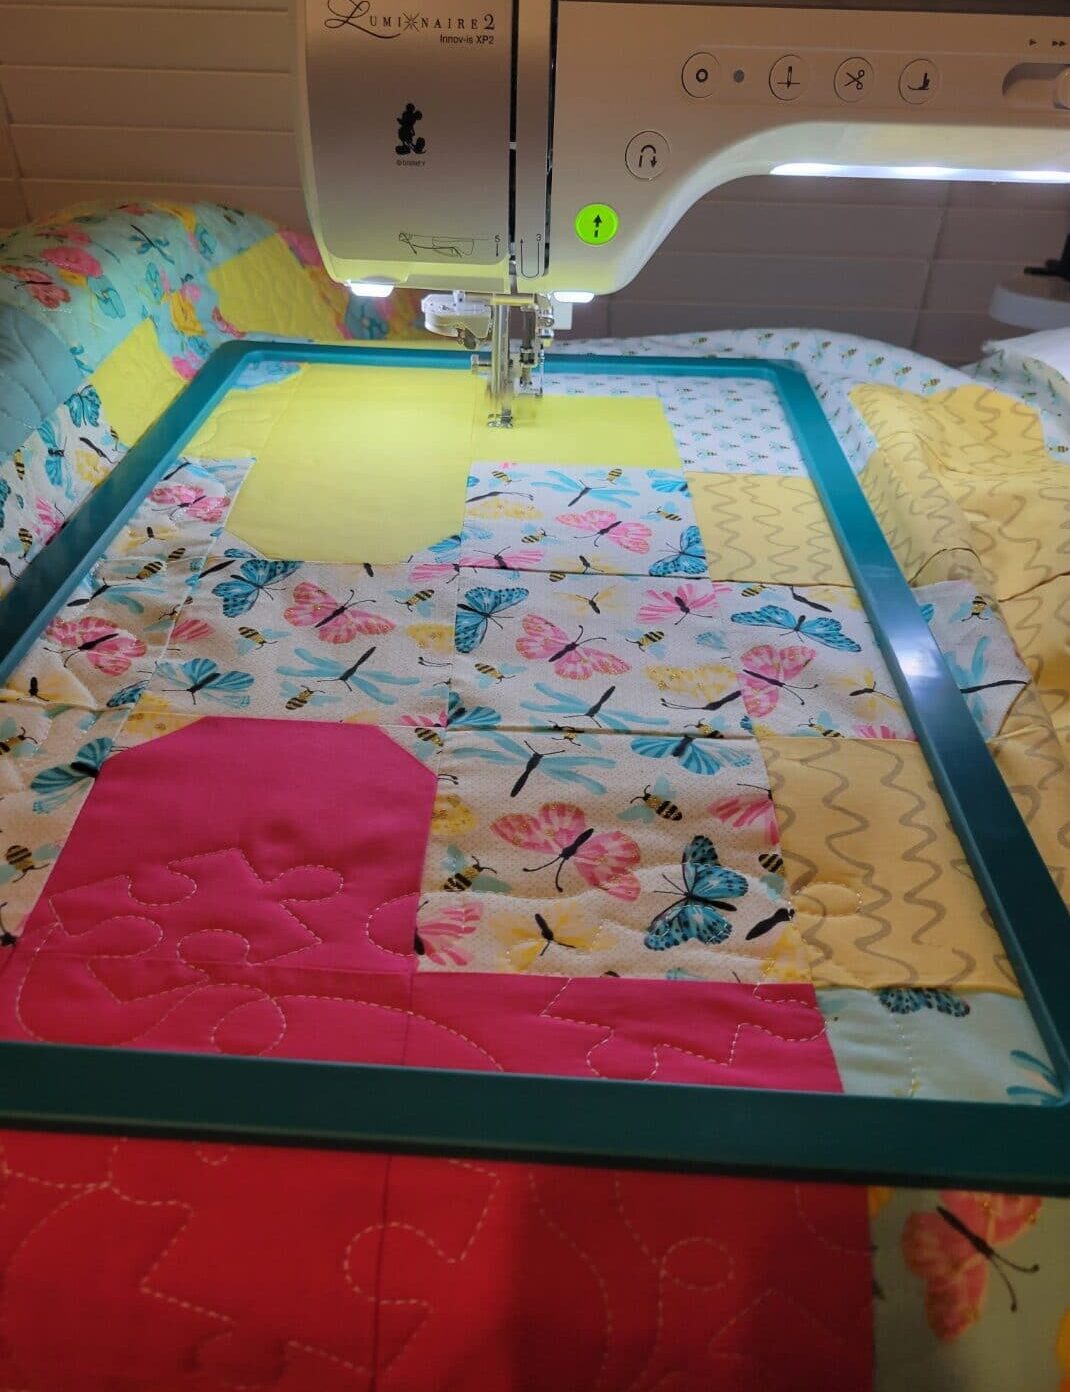
Finish the quilt with your preferred method (free-motion quilting with your sewing machine, long-arm quilting, sewing straight lines, embroidering, etc.)
I used a puzzle machine embroidery design for quilting my sandwich.
Machine embroidering quilts provides a much better result for me and hurts less than free-motion quilting (even when I use my library’s longarm machine). And, it takes less time, too! (I recommend the biggest magnetic hoop available for your machine if quilting with this method.)
7. Square Up and Add Binding
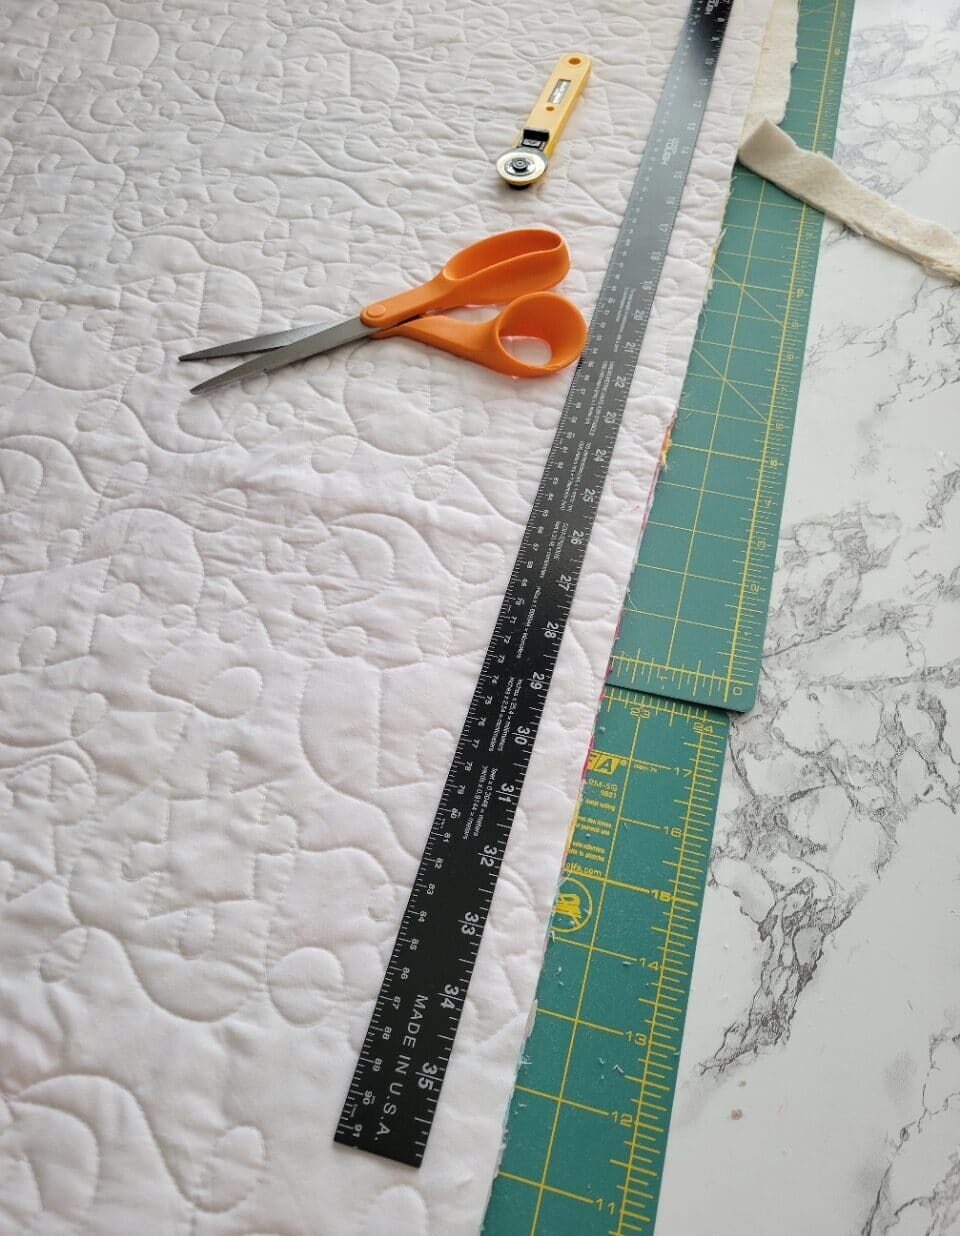
After quilting the top, make sure that your quilt is still actually square and won’t look ridiculous when folded. Cut off any excess batting and backing fabric also.
Then, create the binding! I sew my bindings 100% with my sewing machine and use my walking foot (or the MuVit foot on my Luminaire XP2.)
8. Add Quilt Label
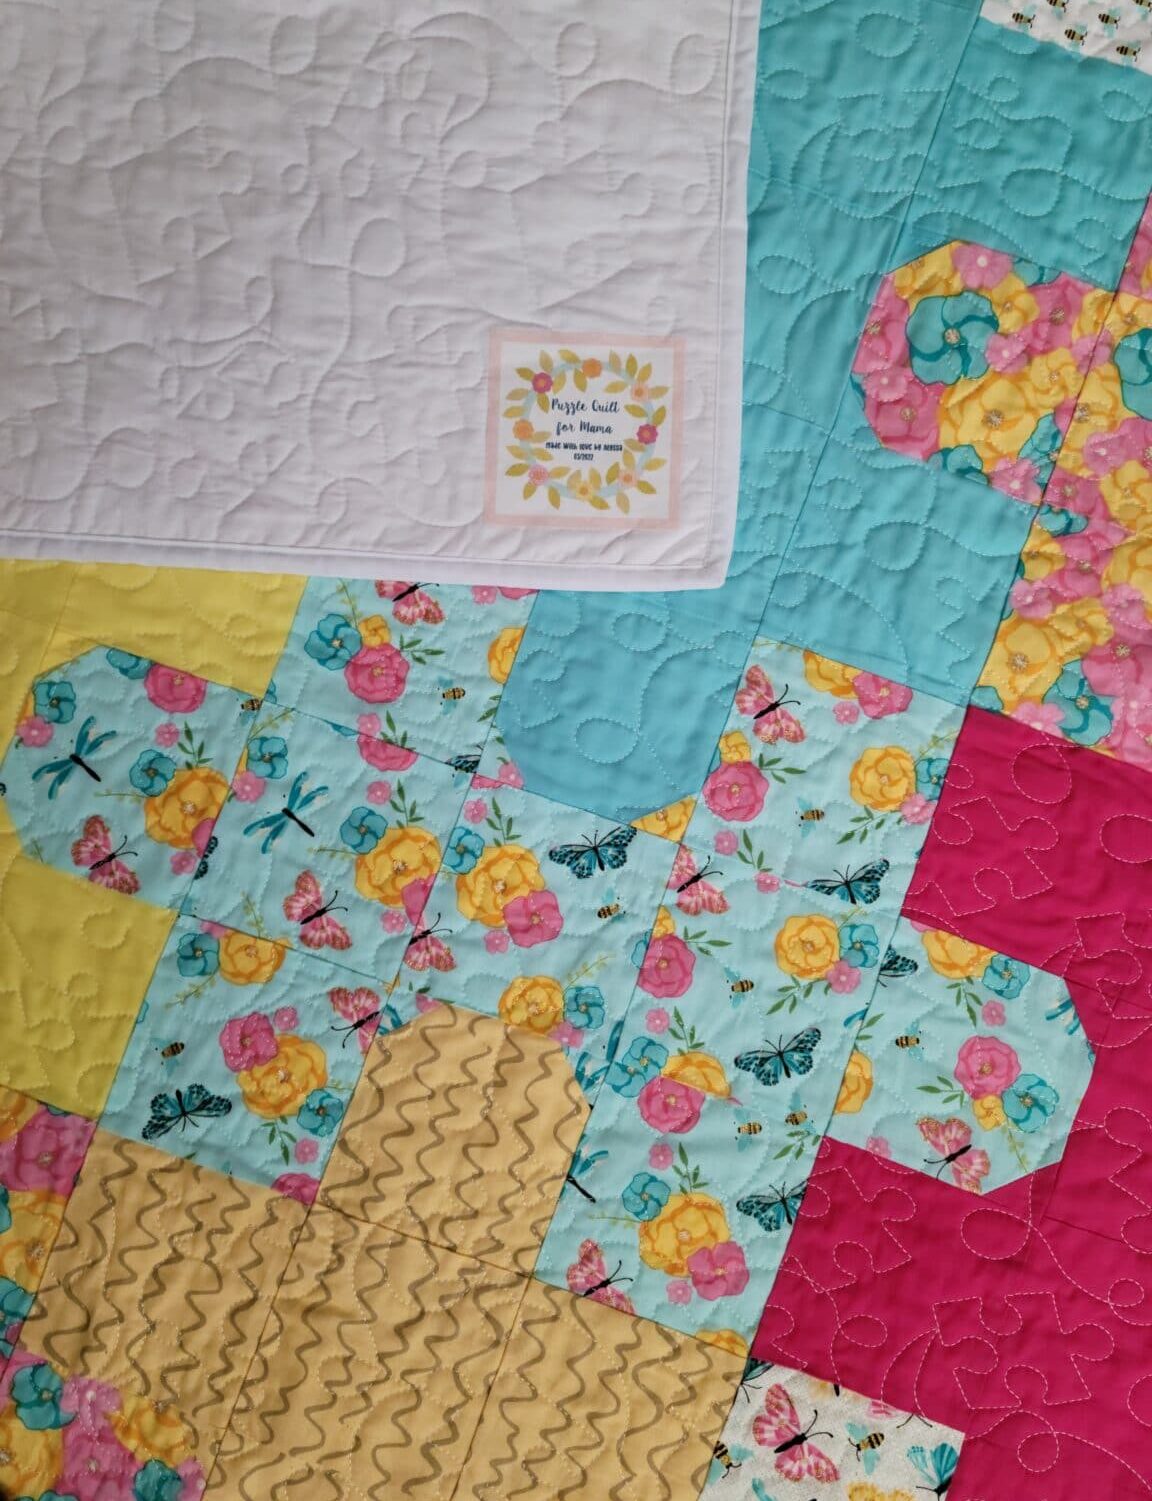
No quilt to be gifted is complete without a label, so add one using your preferred method!
Mine was made with EQ8 and printed on fusible, printable fabric sheets. I cut the fabric quilt label with my Cricut Maker to make sure it was perfect.
Easy Jigsaw Puzzle Quilt Tutorial – Final Notes
This puzzle quilt involved no applique, was cut 100% with my AccuQuilt, and could easily be completed in a weekend.
My grandmother loved her quilt, and I hope you enjoyed this jigsaw quilt pattern and tutorial! Free quilt patterns are always fun to find, right?!
I may or may not have gone and bought the Accuquilt Ready set go complete starter kit, that includes the 8″ inch Qube after reading this tutorial. Who knew such a thing existed?!?!?! I am just starting quilting and the thing I was dreading most was the cutting out of pieces. (Problem solved!)
When I found this tutorial, I was trying to decide which size Snap Hoop Monster hoop to start out with. I had pretty much decided on the 8X8 and block maker to go with it…. and had just ordered it when I stumbled on this and you recommended the biggest size that would fit my machine…. I will wait until I get the other one and try it out (and save up some more money) before splurging on more.
THANK YOU!
I hope you love your AccuQuilt, too! (I love efficiency and perfection and cutting fabric while mindlessly watching TV, so it’s my go-to cutter for most projects and worth every penny to me.) Also, the only reason I like and recommend my humongous 10 5/8″ x 16″ magnetic hoop is because I have to rehoop fewer times when doing edge-edge quilting, and again, I’m all about efficiency. I have no doubt you’ll love your 8″x8″ one, though. It’s the perfect size for doing fill patterns on 8″ blocks, and it will work great for non-quilt projects, too!
I love the pattern but I don’t have any of the AccuQuilt goodies. I’m a ruler and rotary cutter quilter. Do you have the dimensions for the quilt somewhere – like how many square to cut of each size, etc? I think I can “take apart” your fabulous tutorial but if the info is in a pattern set-up that is much easier for my “check list” brain to follow.
Thanks for sharing all of your hard work!
Each square needs to be cut at 4.5″ for a finished size of 4.” All squares are the same size.
The final dimension of the quilt is 48″x48″ before adding bindings. Each 12″ block is basically composed of nine 4″ squares, and there are 16 of these 12″ blocks.
I didn’t list the number of squares to cut simply because it depends on how many different fabrics you have and how many puzzle pieces you want to create using each specific fabric.
Hope that helps!
How clever! I have had my Accuquilt Studio system for over 12 years and it is one of my top tools in my studio. The puzzle quilt is adorable! Thank you for sharing your talent.
Great pattern — thank you so much for creating it, and sharing. This pattern as now #1 for my next project … I have an accuquilt and love it! After a few projects, I began watching for sales on BIG, and now have the GO as well as the electric version. So worth it for projects. Expect the GO will be used by my grandchildren as they help with many projects (including the dinosaur, frog, cat, dog and other shapes).
How great to have two AccuQuilts and interested grandchildren! I one day want to get the Studio 2, but right now, my craft room is all out of space…