How to Sew Ruffles on Leggings and Pants for Longer Length
This post may contain affiliate links, which means I’ll receive a commission if you purchase through my links, at no extra cost to you. I sometimes receive free products for review. Please read disclosure for more information.
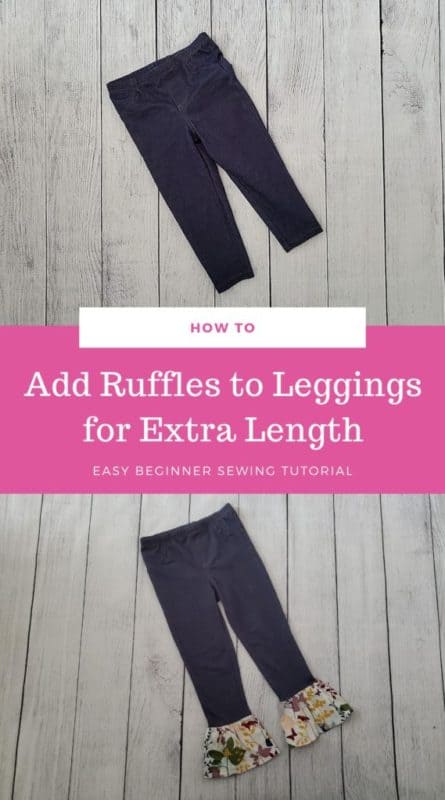
Today I want to show you how to sew ruffles on leggings to increase length. It’s a great way to prolong the life of toddlers’ and kids’ leggings while simultaneously adding a little personality to their wardrobe.
With fall and winter upon us, we’ve been cleaning out my daughters’ winter clothes from last year and replacing the ones that don’t fit. For better or worse, my toddler daughter is just so tall and skinny that we never have to get rid of clothes because they are too tight. It’s always because they are too short! I have to get very creative with inserting buttonhole elastic in bigger pants or adding ruffles or lace to the bottom of existing leggings to make her not look like a ragamuffin at preschool with pants that don’t fit.
So, if you, too, have old leggings that still fit around the waist but are highwaters, here’s a tutorial for how to add a ruffle for added length. My toddler will be rocking several pairs of ruffle leggings this year now!
Materials
- Girls’ leggings that still fit around the waist but are too short
- Two pieces of ruffle fabric (see how to calculate length below), pressed
- Sewing machine with compatible needle and thread
- Scissors or rotary cutter and self-healing mat
- Pins or sewing clips
- Iron
Measuring and Cutting the Ruffle Fabric
Since you’ll be wanting to add length to fit your child specifically, you’ll have to do a little measuring and some math here.
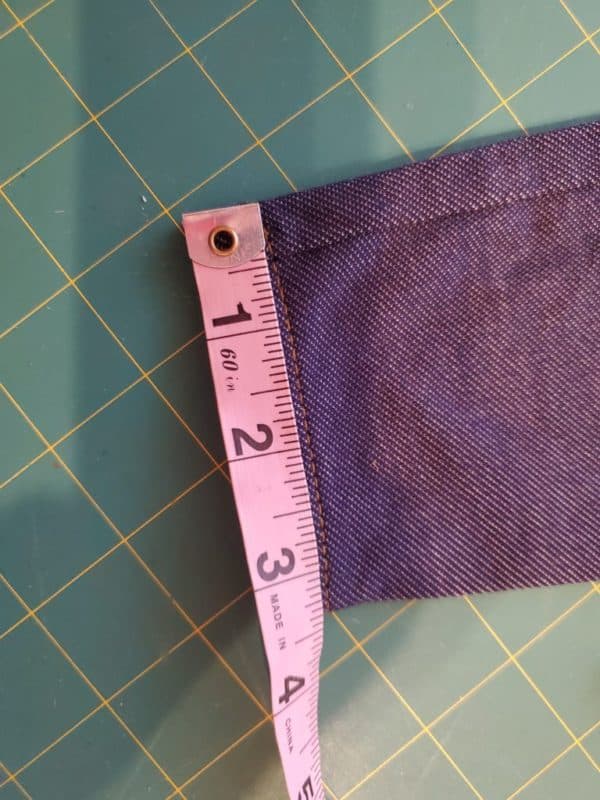
First, measure the size of the leg opening. Multiply that number by 4. Add 1/2″ to that number to account for a 1/4″ seam allowance. This will be the length of the ruffle you need to cut. My leg opening was roughly 3 1/2″, so this meant I needed to cut two pieces that were 14 1/2″ long.
Now, for the height. Measure how much added fabric you will need on the base of the leggings to make them long enough. I also did not want the original hem of the leggings to show on the new ruffle leggings, so I needed to add an extra 1/2″ of fabric to compensate for the lost hem to this measurement. The added necessary length to reach my daughter’s ankles I measured to be 4 1/2.”
Then, to find the size of fabric needed to add this size of ruffle, consider that you will need to add seam allowances for both sides. Determine what hem seam allowance you will use. (I used 3/8″ since I used my serger to finish edges.) Add this to your height measurement. Then, determine your seam allowance when stitching the ruffle to the leggings. I used a 1/4″ seam allowance for this, so I also added it to my height measurement.
Thus, I needed to cut a piece of fabric that was 5 1/8″ in height. (This is 4 1/2″ + 1/4″ + 3/8″).
Cut two pieces of your fabric with the dimension you just calculated.
Ruffle Fabric Choices
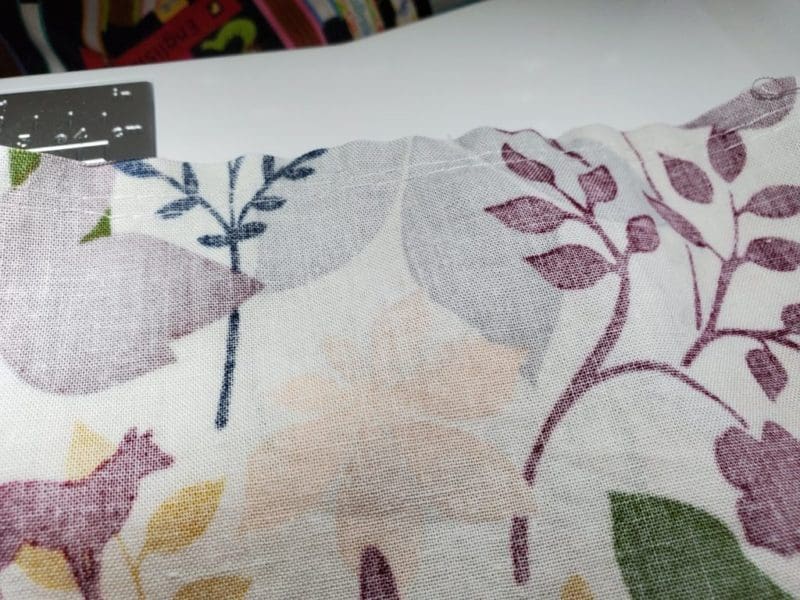
I used a woven, cotton fabric. You can use knit if you want a bit more drape. I didn’t have any knit fabric on hand that matched the denim color of these leggings, so cotton it was! Make sure if you do choose a non-stretchy fabric (like cotton) for adding to the hem that your child will still be able to get their feet through the leg holes. These leggings had a larger leg opening with only a minimally stretchy hem anyway. The cotton ruffle was thus no big deal.
How to Sew Ruffles on Leggings – Tutorial
First, create the hem of the ruffles. For me, this meant finishing the raw edges with a serger, turning a 3/8″ hem, and sewing with a 1/4″ seam allowance. If you don’t have a serger, you can use pinking shears, a zigzag stitch, or overcasting stitch (learn more about overcasting stitches here) to neaten the fabric edges instead to prevent fraying.
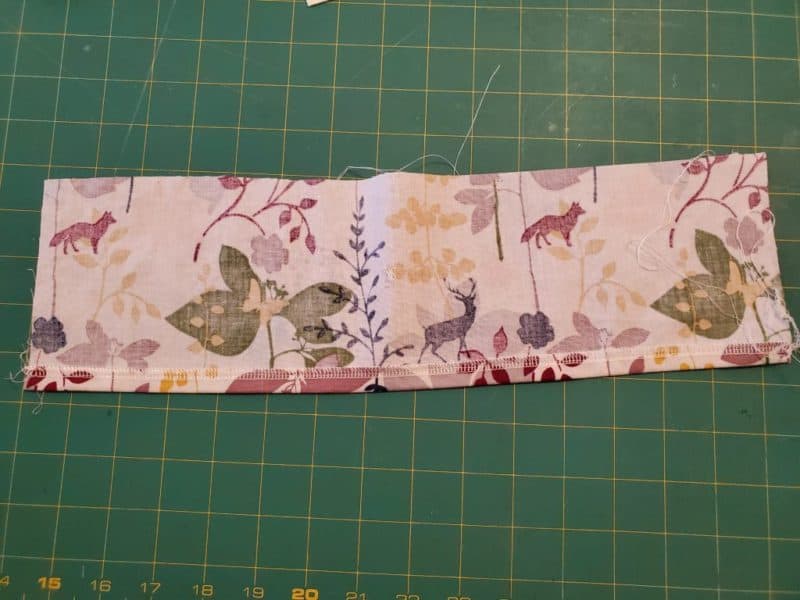
If your fabric is directional, make sure to pay attention to which side is up and down!
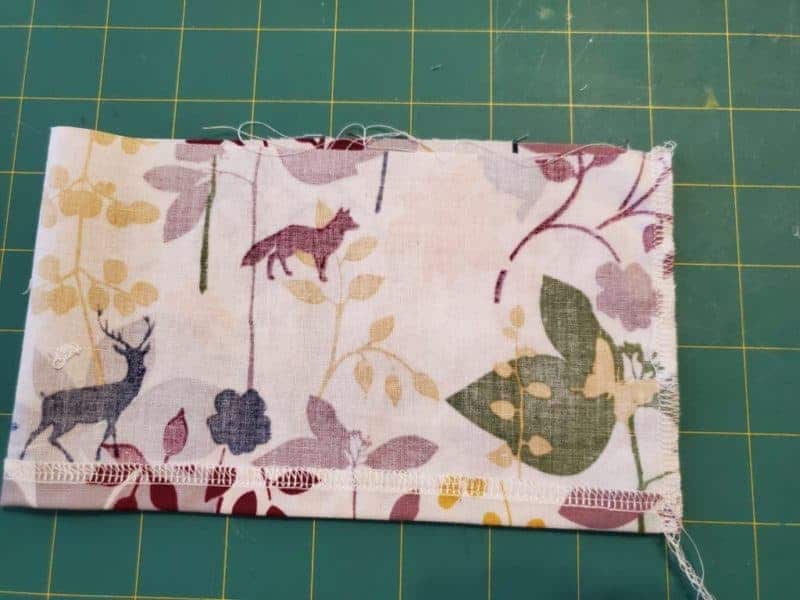
Next, fold your fabric right sides together as shown below. Stitch a 1/4″ seam down the side, and neaten the fabric edges. Press seam open or to the side, whichever you prefer. I used my serger for this part, also.
Now, it’s time to gather the ruffles. Sew two rows of parallel basting stitches (use your longest straight stitch length with no reverse stitching) at the top of the ruffles.
Then, pull the bobbin threads (on the bottom of the fabric) to evenly gather the fabric. You want the fabric to be gathered enough to make the ruffle the same size as the leghole opening.
Then, pin or clip the ruffled edge of the fabric to the base of the leggings. See below. You want the right side of the ruffle to be facing the right side of the fabric. If you want to fully cover any original hem stitching from the leggings, make sure to pin your ruffle high enough to do so. That’s why there’s a 1/4″ or so of the denim leggings showing.
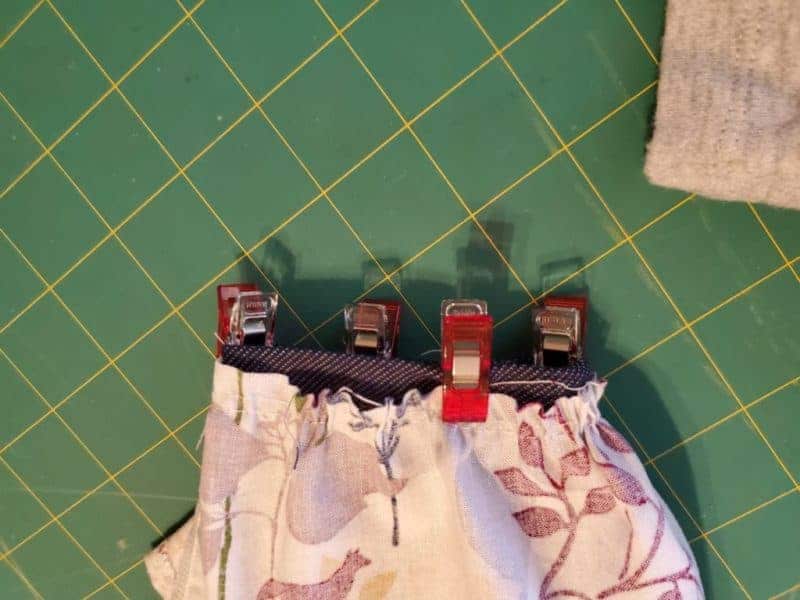
Sew the ruffle fabric to the leggings with 1/4″ (or whatever you chose) seam allowance.
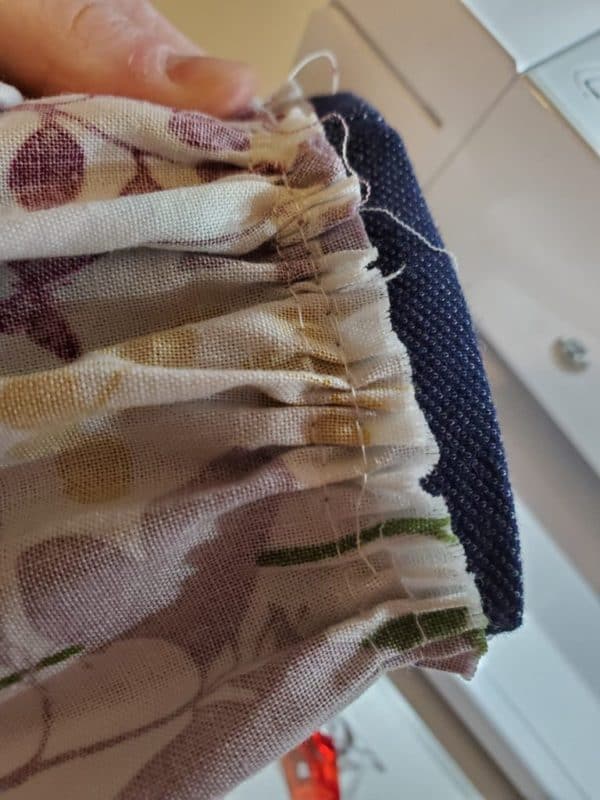
Go back and neaten the fabric edges once more. If you used a larger seam allowance, you may need to trim away some bulk before finishing the edges. If your ruffle basting stitches are showing, also pull these out with your fingers or use a seam ripper.
Give the seams a good press from the inside and then the outside after you pull the ruffle down. And that’s it!

Conclusion
I hope you’ve been able to repurpose your own toddler leggings into toddler ruffle leggings. This is such an easy and inexpensive way to get more life out of old clothes!
If you’re also looking to add length to sweats, check out how to turn sweatpants into joggers by adding a cuff.
Thank you for these wonderful instructions. ❤
How can make the ruffle so it can stretch with the leg opening?
Use stretchy knit fabric for the ruffle fabric, then sew with a serger or a stretch stitch on your sewing machine.