Embroidery on Burlap Tutorial: Easy Peasy
This post may contain affiliate links, which means I’ll receive a commission if you purchase through my links, at no extra cost to you. I sometimes receive free products for review. Please read disclosure for more information.
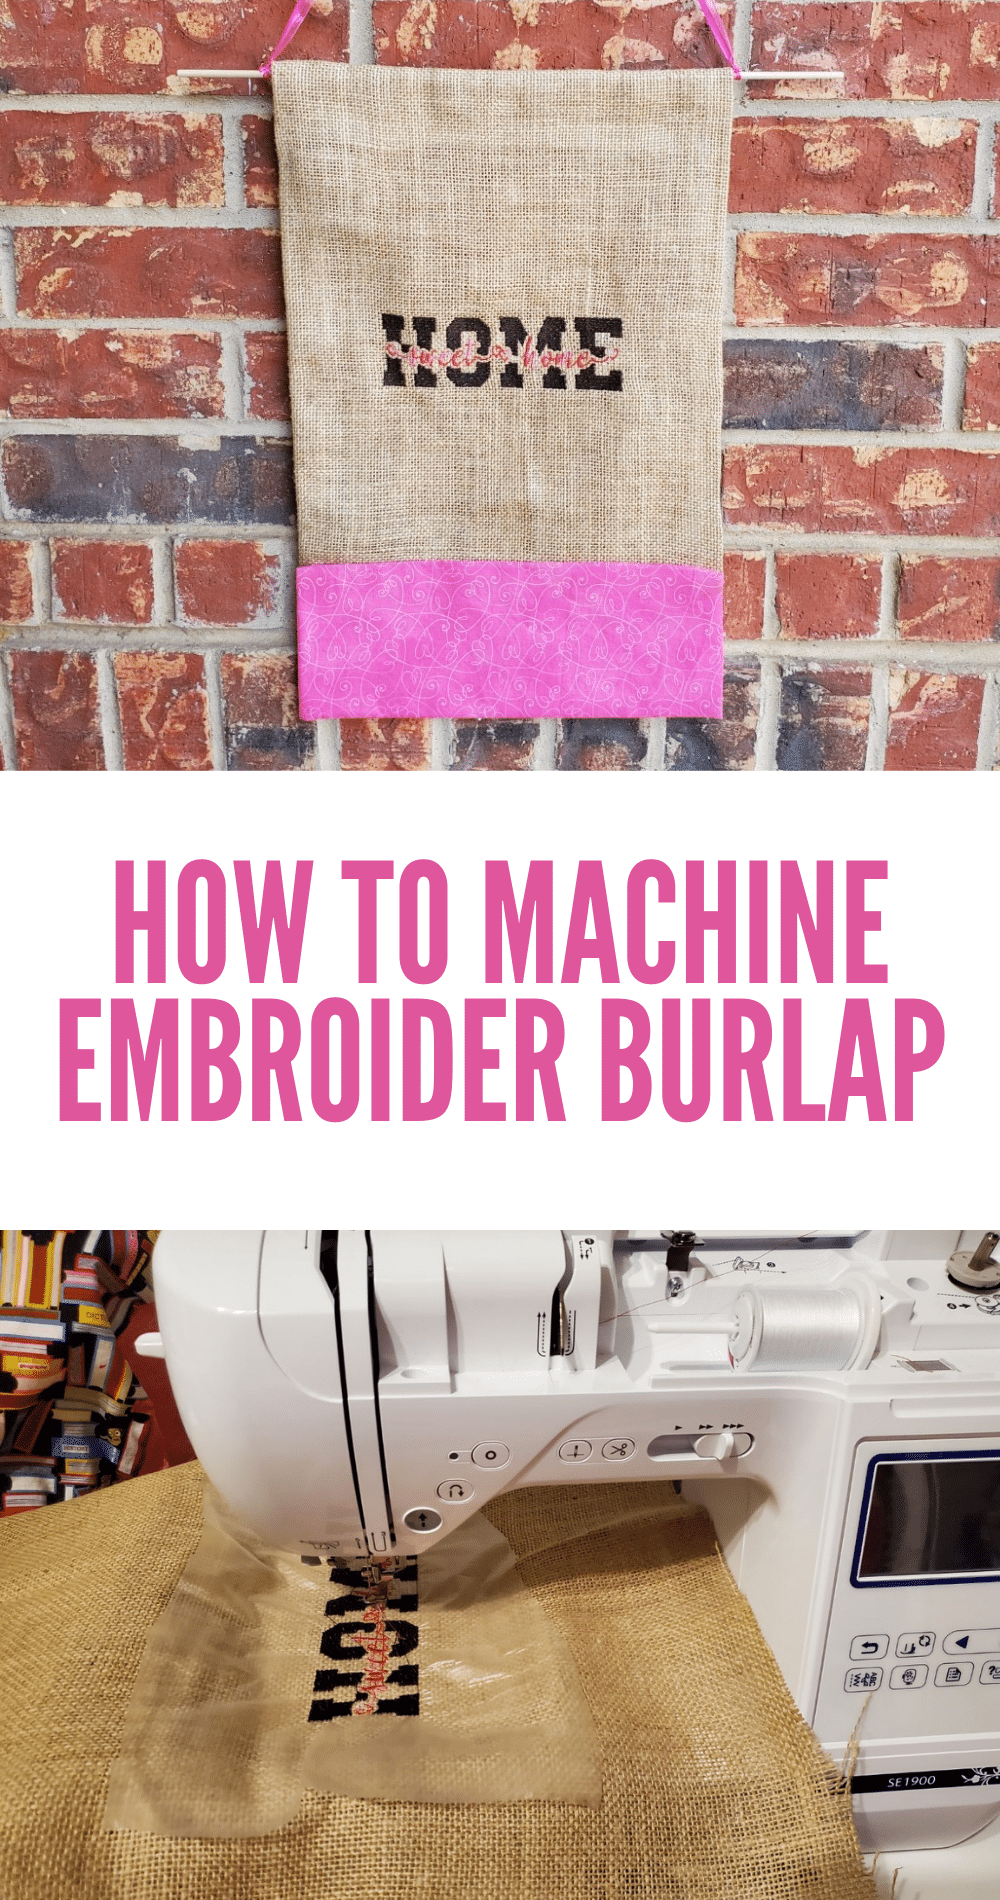
Embroidered burlap flags are all the rage, so I decided I urgently needed one for my house.
I’d embroidered on burlap in the past when making Christmas coasters, but this was my first foray into using large pieces of burlap.
With a little troubleshooting, I perfected my embroidery on burlap and made the perfect burlap flag. Here’s how to embroider on burlap with an embroidery machine!
Necessary Supplies
Here’s what I used when machine embroidering on burlap.
- Embroidery machine (Brother SE1900)
- Good-quality burlap fabric
- Stabilizer: sticky, self-adhesive tear-away stabilizer and water-soluble topper like Sulky Solvy
- Needle: 75/11 machine embroidery needle
- Thread: your choice of embroidery thread; I like 100% polyester best. If you want more coverage when stitching, choose a thread thicker than the usual 40wt.
- For the sign: ribbon, glue gun, serger, iron-on hem tape, small dowel, and ribbon
- My design was from Creative Fabrica: “Home Sweet Home” digitized by Embroidery Shelter for my 5″x7″ hoop.
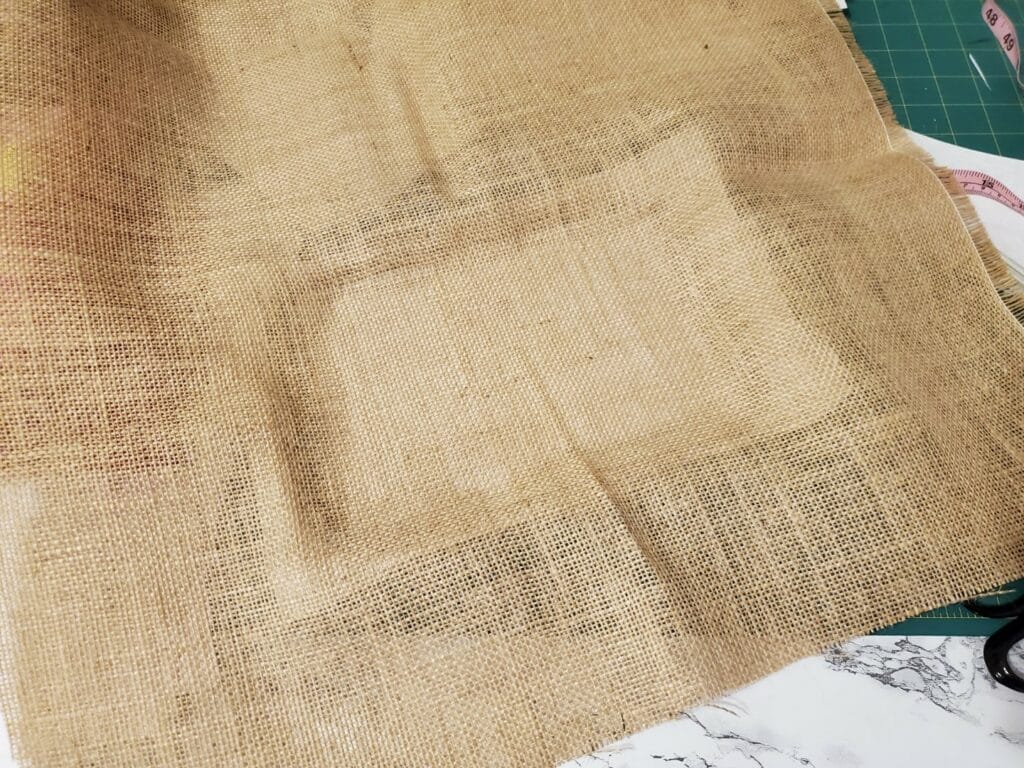
Choosing Good-Quality Burlap
As your machine embroiders, the stitches need to be able to “catch” on the burlap if you want the stitch integrity to remain after the stabilizer is gone.
As such, choose a more densely woven burlap. Burlap with huge gaping holes won’t work.
My burlap was a heavy-weight jute burlap from Hobby Lobby, but there are a lot of options that will work!
Best Stabilizer for Burlap
The best stabilizer for burlap in my experience was sticky, self-adhesive tear-away stabilizer.
The adhesive held the burlap threads in place, keeping them from moving during the stitching process. It also made floating the burlap super simple.
The issue with wash-away stabilizer or regular tear-away and a temporary fabric adhesive was the adhesive here didn’t hold the burlap well enough. This caused distortion of the fibers during stitching.
And, while sticky cut-away stabilizer might have given a better stitch-out, the residual stabilizer remains on the back after stitching. I just didn’t like the show-through.
I also found adding a film-like water-soluble topping over the burlap gave a better end product. The stitches sunk less into the burlap and sticky stabilizer.
Embroidery on Burlap – Tutorial
1. Marking the Design
One great feature of burlap is it already has perpendicular fibers that make lining up the burlap very easy.
Because of this simplicity, you really only need to mark the center of where you want the design to go.
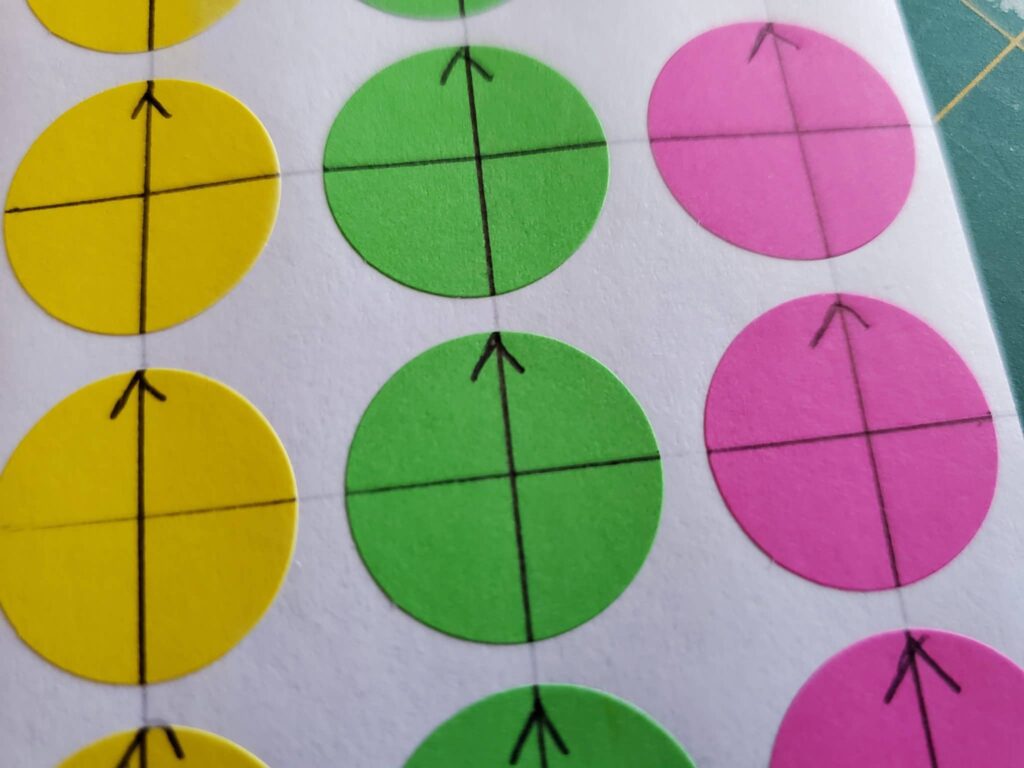
While I usually mark with a water-soluble marking pen or chalk wheel, placement stickers do the trick for this project!
I make them myself by using color coding labels and a pen. More info here: how to make and embroidery placement stickers.
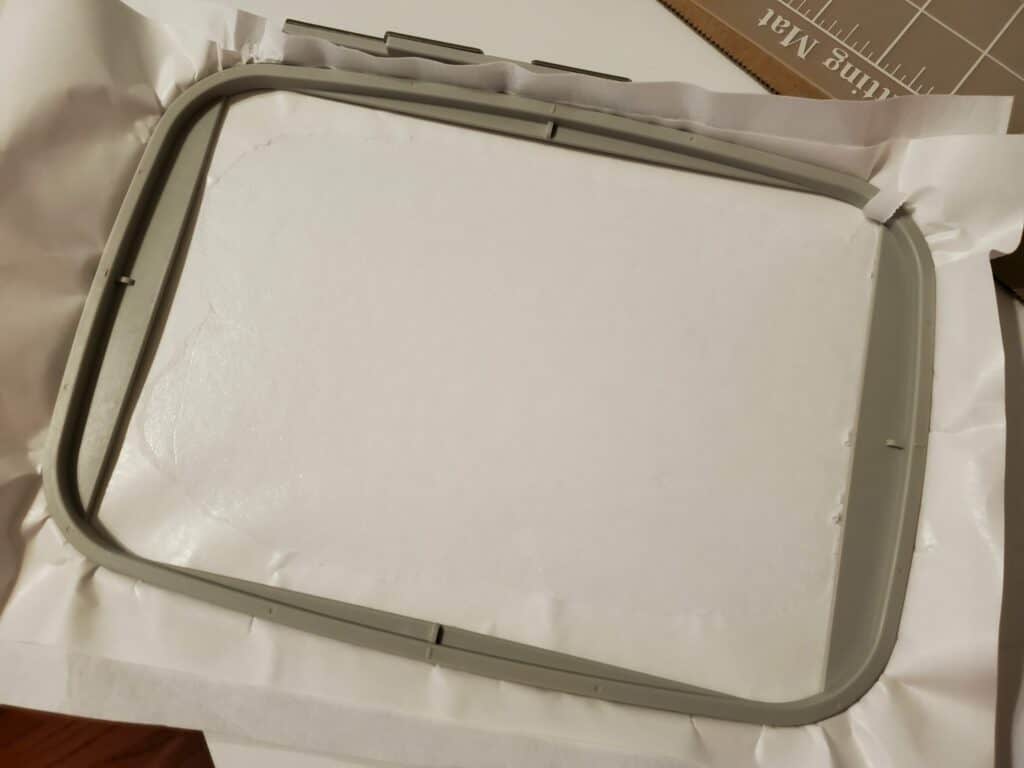
2. Floating the Burlap
Hooping burlap will put creases in it and distort the weave. It’s best to float the burlap, which means placing it over a hooped piece of stabilizer.
In this case of embroidering on burlap, first, hoop a piece of sticky self-adhesive stabilizer. Then, use a pin to score off the paper-backed top of the stabilizer.
Place the piece of burlap over the stabilizer and press it down, smoothing out any wrinkles. Make sure that the burlap’s fibers are perpendicular to each other and match up with the hoop well. The placement sticker will need to be in the center of the hoop.
3. Setting Up the Machine
Next, place the hoop into your embroidery machine.
Load your design and line up the center of the needle with the center of your marked burlap.
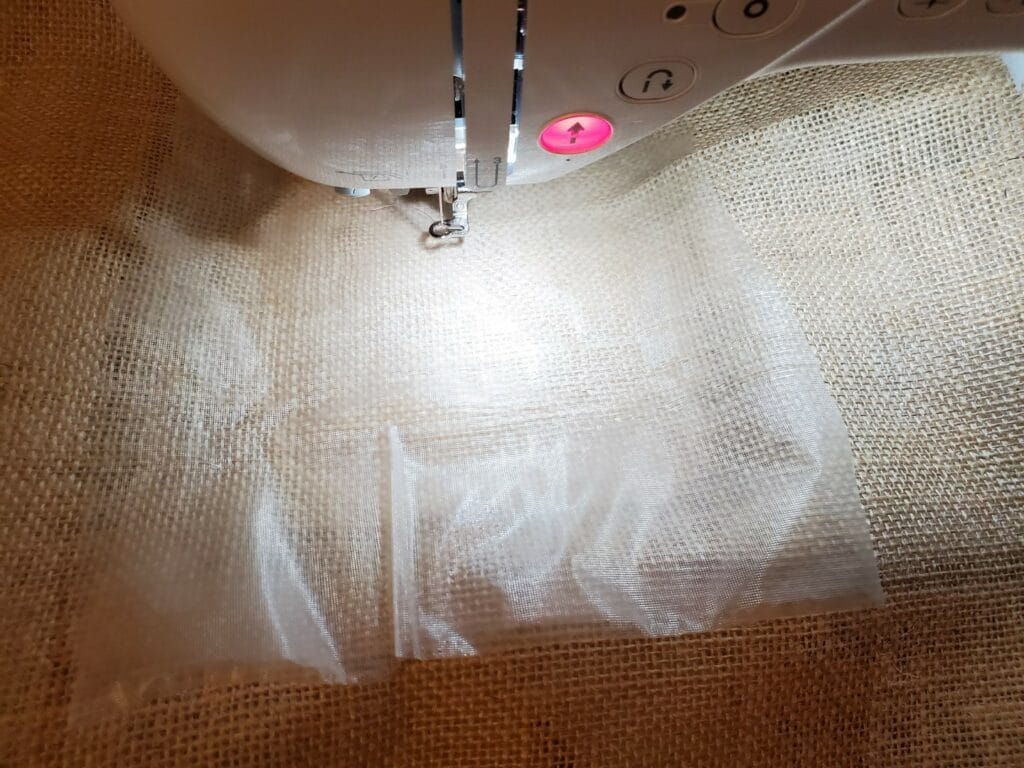
Then, place a layer of water-soluble topper over the burlap. You can secure it with the slightest amount of Odif 505 spray or a little bit of water around the edges if desired.
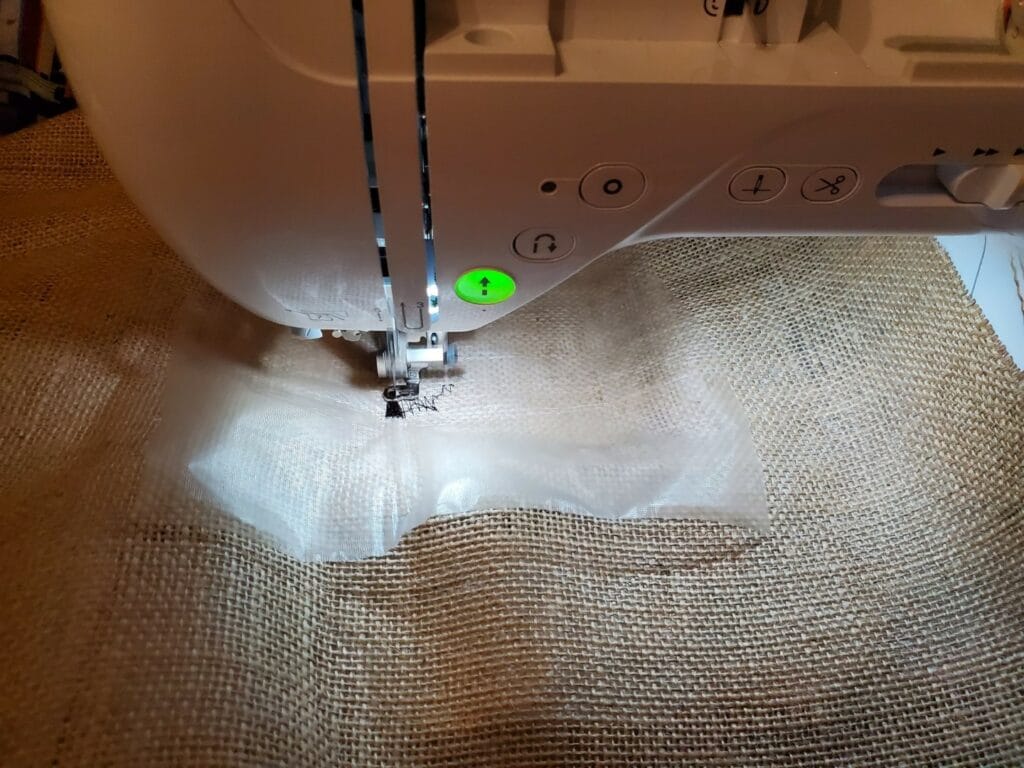
Lower your presser foot, press start, and watch your machine embroider on the burlap!
4. Tidying Up
Once your machine is done stitching, remove the stabilizer from the hoop.
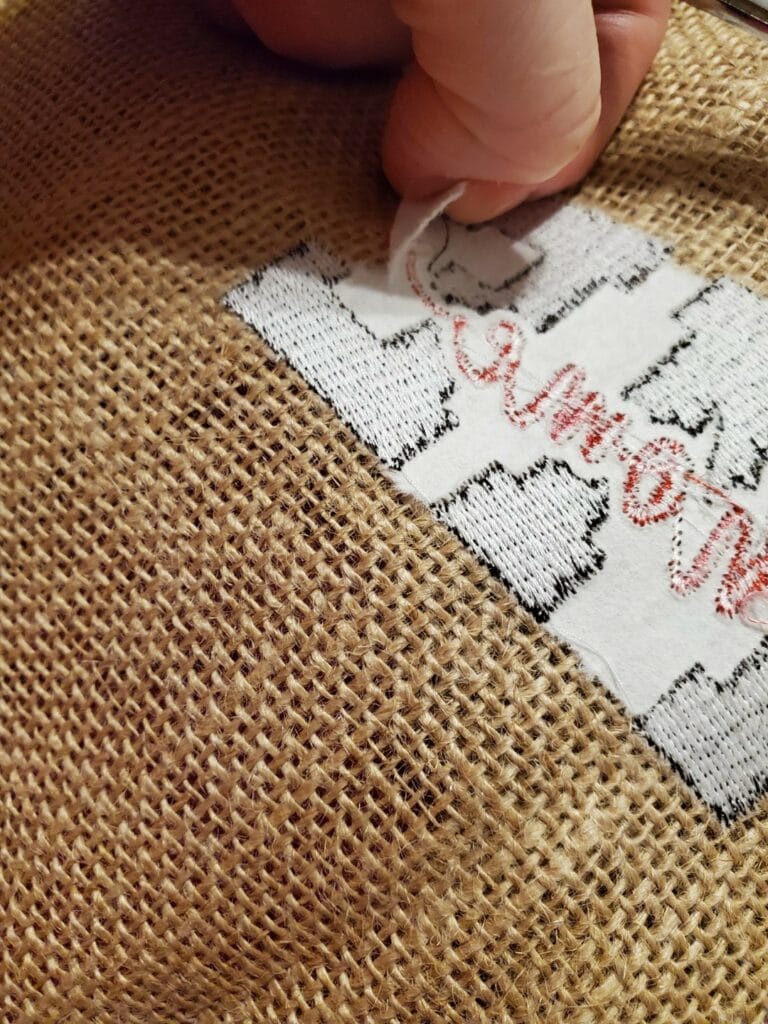
Tear away the residual stabilizer from the design very carefully! You don’t want to distort the fibers.
Trim any jump stitches.
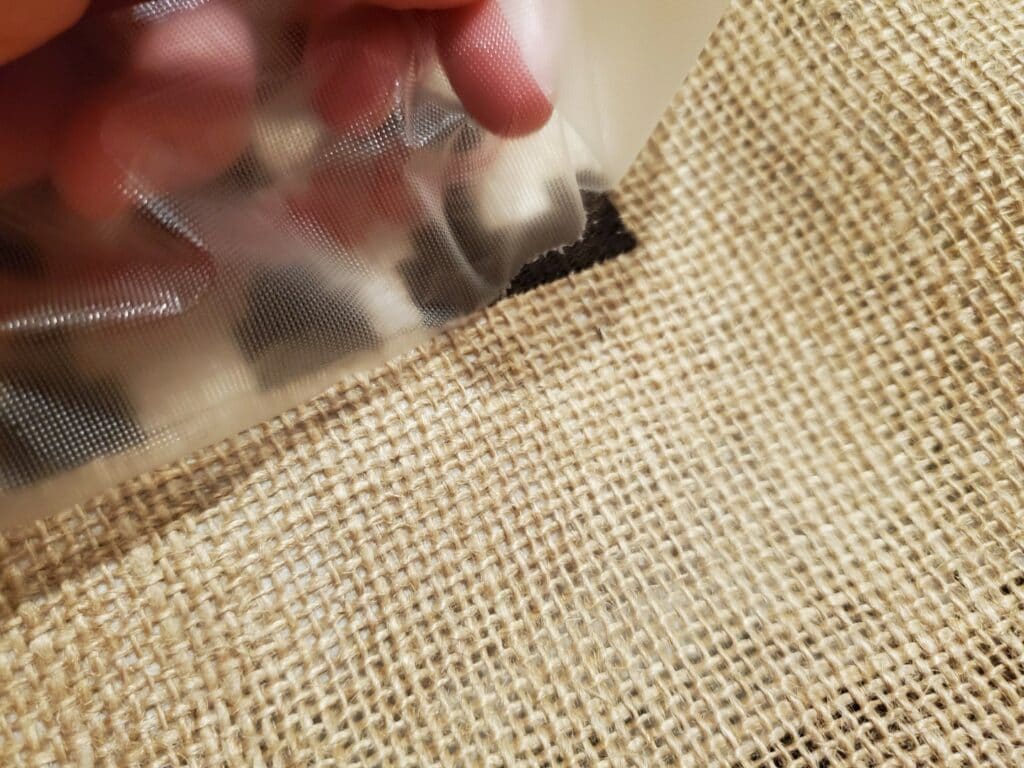
Then, tear away the water-soluble topping from the front of the burlap. Any residual topping can be removed with a dab of water.
Burlap can also make a mess when sewing, serging, or embroidering. Thus, make sure to give your machine a good inspection and cleaning after this embroidery project!
Making the Embroidered Burlap Flag
My embroidered burlap flag has withstood several rainstorms, and it even survived the biggest freeze Texas has seen in over 100 years! So far, so good.
Here’s a quick tutorial on how I made the banner.
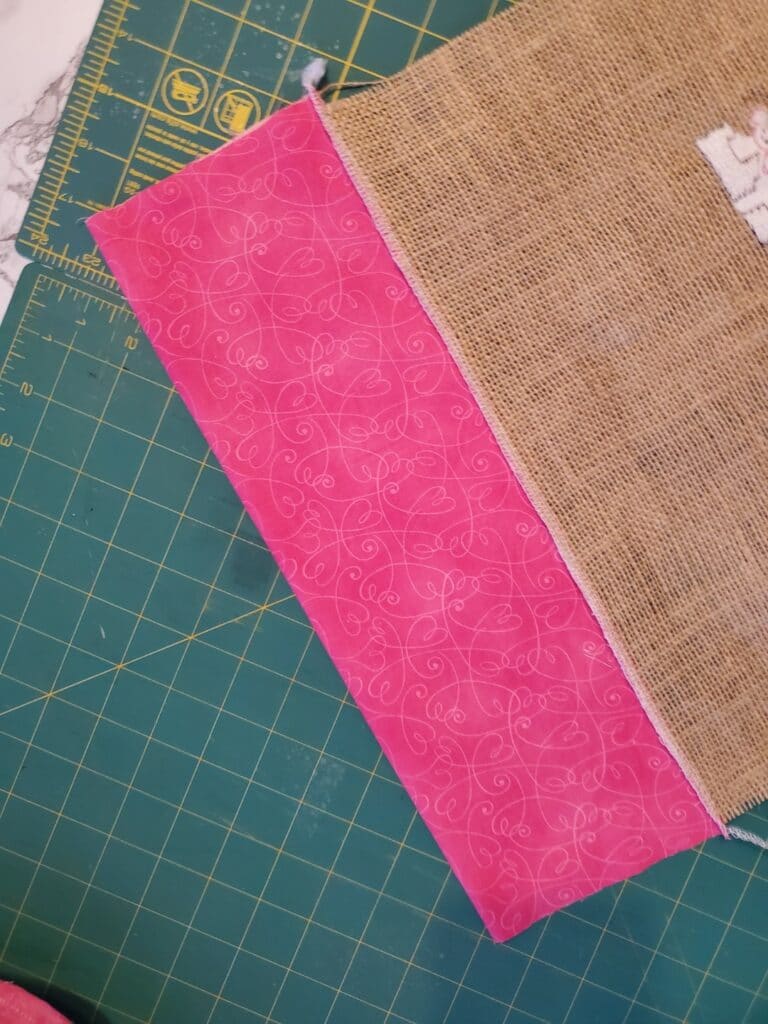
To make the bottom, I folded a piece of quilting cotton wrong sides together and serged the raw edge to the right side of the banner. I pressed the seam away from the burlap.
To make it a little more stable, I added some hot glue to the intersection to keep the burlap from fraying where it was serged.
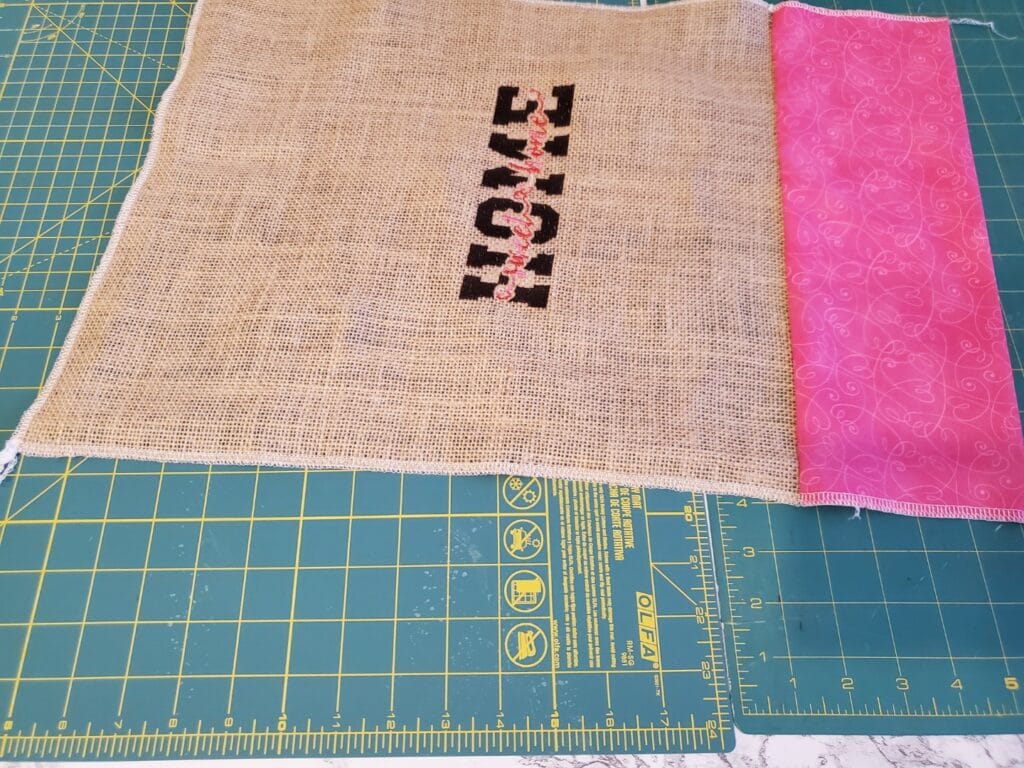
Then, I serged along the other 3 edges to keep the burlap from fraying. I avoided using my sewing machine. I really didn’t want to have a messy clean-up there.
And, behold the wonders of hem tape! This worked perfectly to permanently fold back the sides of the fabric to pretty things up.
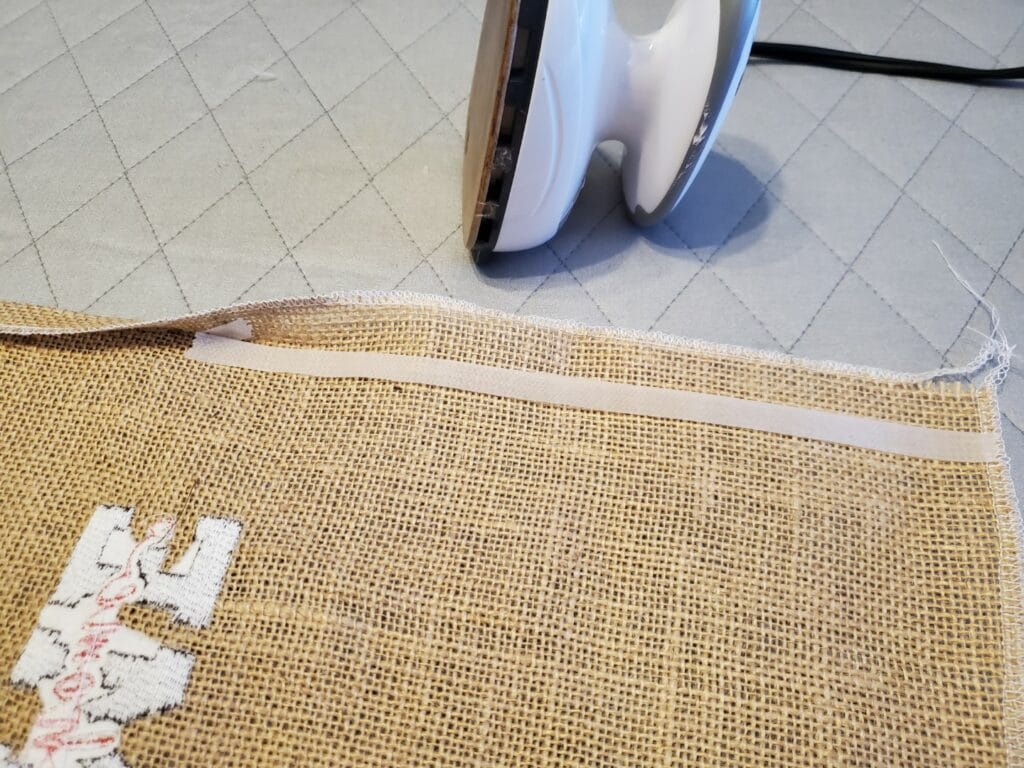
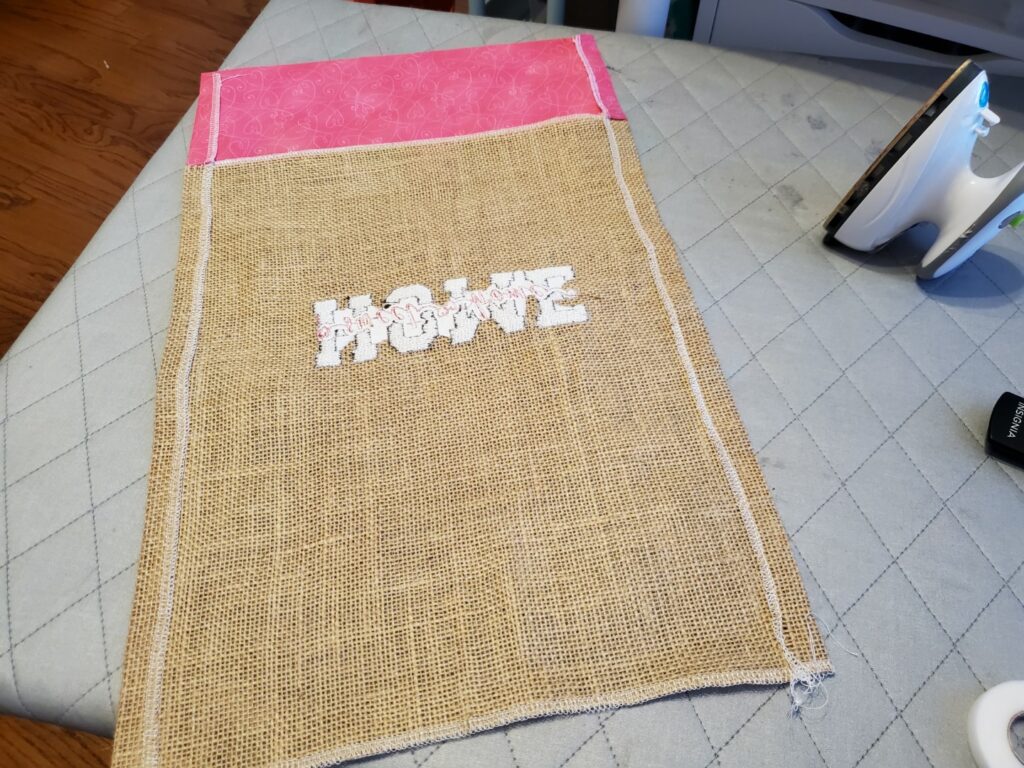
I then folded the top down and used more hem tape. For the big overlap on the corners, I used hot glue.
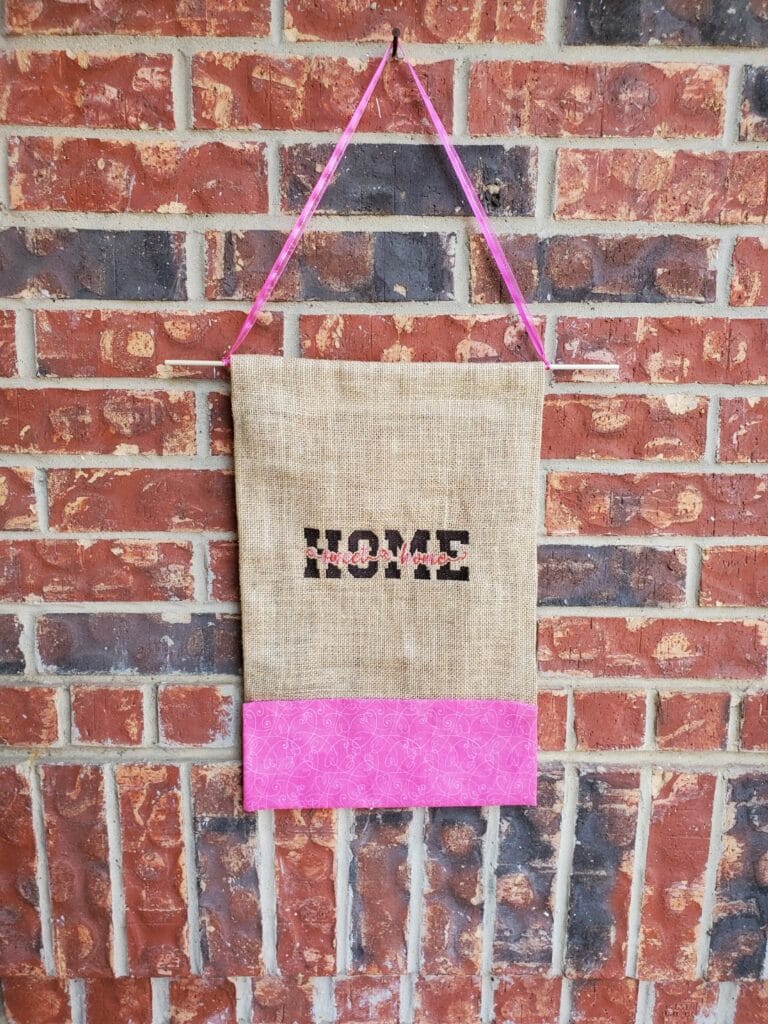
All that was left was to place a dowel through the top and tie on some ribbon!
I think this is a great idea. I am going to try this for seasonal flags.