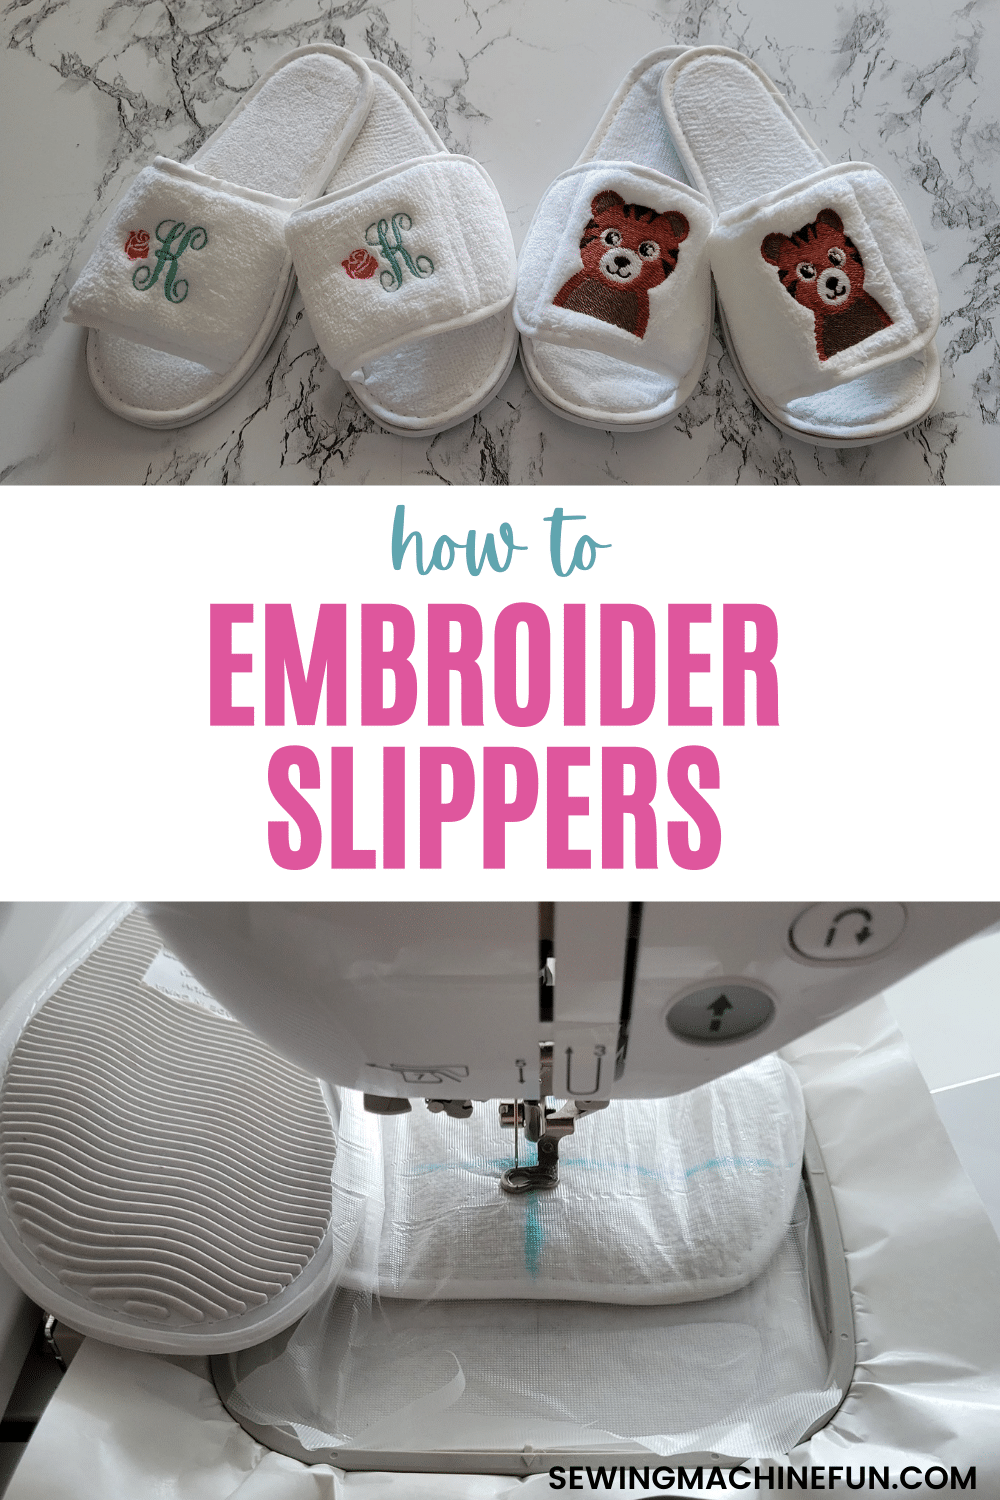
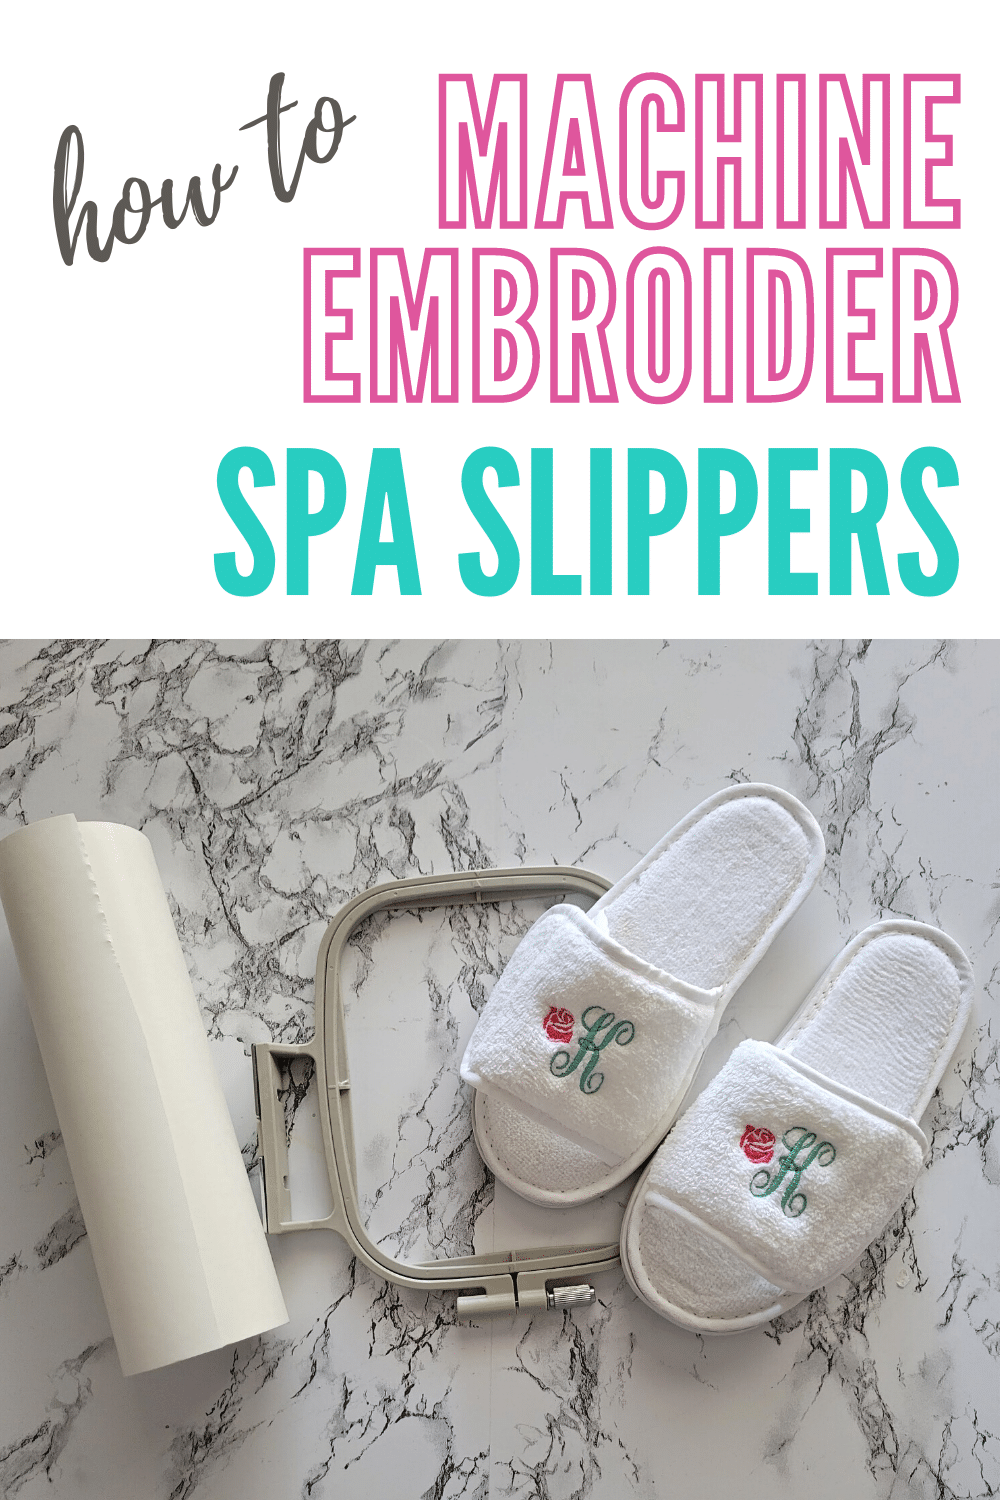
How to Embroider Custom Slippers With a Machine
This post may contain affiliate links, which means I’ll receive a commission if you purchase through my links, at no extra cost to you. I sometimes receive free products for review. Please read disclosure for more information.
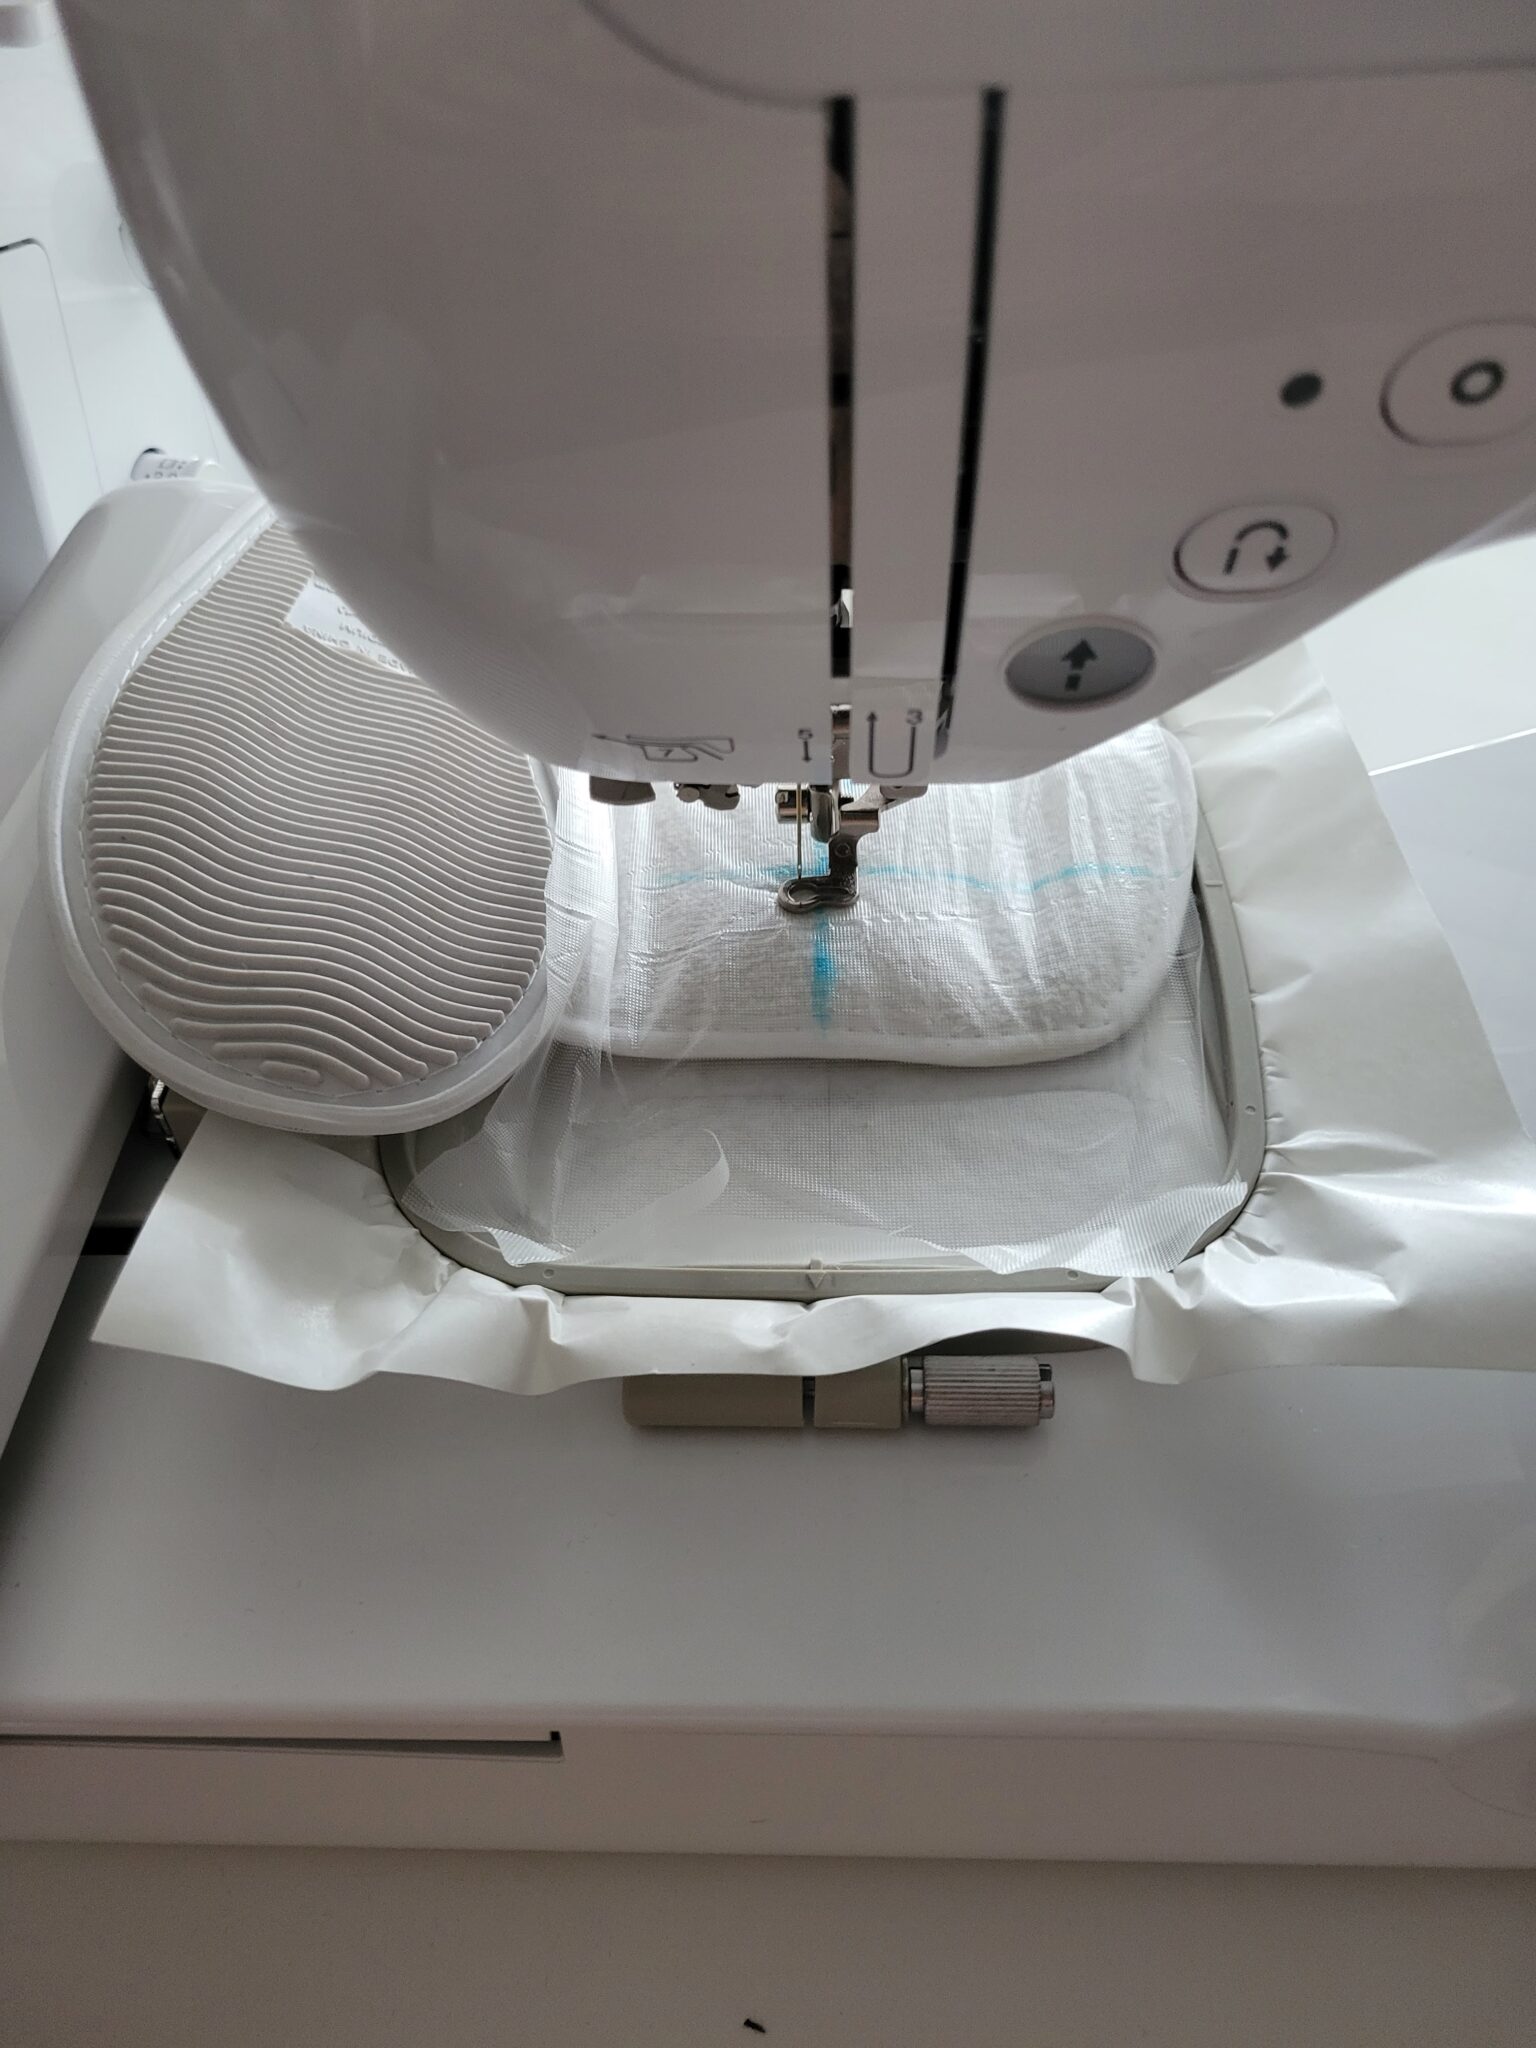
I only have a 5″x7″ embroidery machine without a free arm, so anything I embroider has to be laid flat under the machine head.
Thus, finding unique blanks that unzip, unroll, or can be unfastened in some manner makes me so happy!
When I found that specialized slipper blanks exist for single-needle embroidery machines, I was thrilled to buy some and write this tutorial on how to embroider slippers.
Embroidered Slippers Supplies
Here’s more information about choosing supplies such as stabilizer and which house slippers work!
1. Slippers
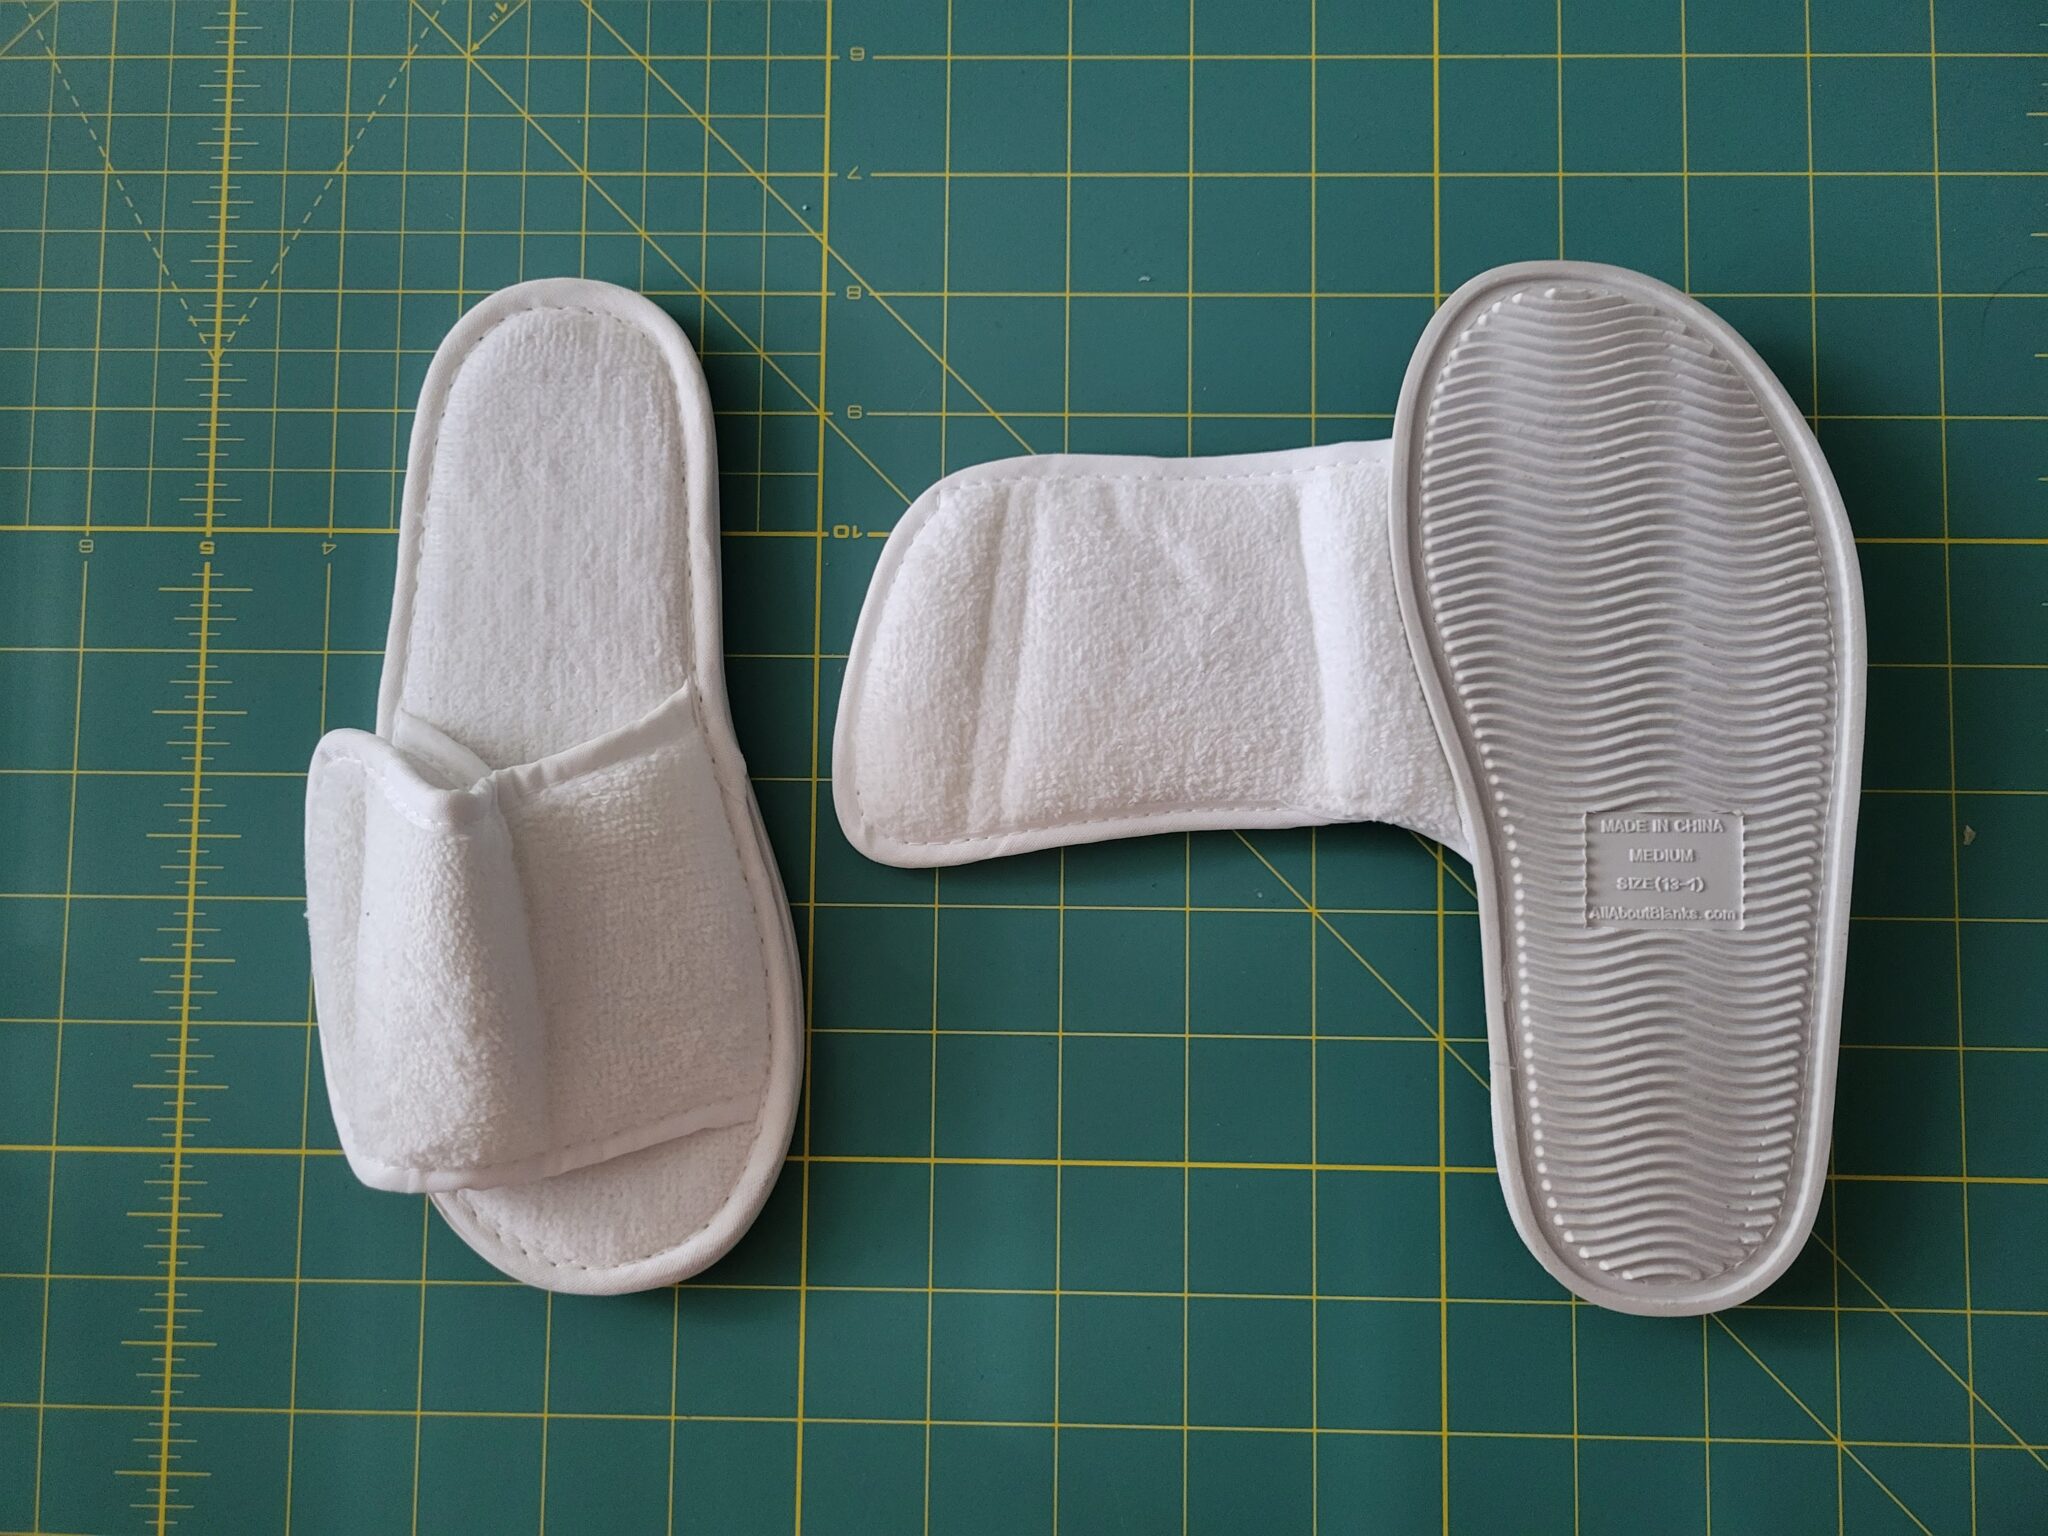
If you have a multi-needle embroidery machine with a free arm, you can use any slippers that fit over the arm. However, I rely on house slippers with hook and loop fasteners since I have a single-needle machine without a free arm.
I got my soft, terry-cloth spa slippers from All About Blanks.
Now, if you want to shop Amazon or other embroidery blanks suppliers, you can find more options like microsuede slippers, velvet slippers, actual hotel shoes, and even spa slippers with Memory Foam.
Just make sure anything you purchase opens at the strap and doesn’t have hook and loop fastener underneath the area to be embroidered.
2. Stabilizer
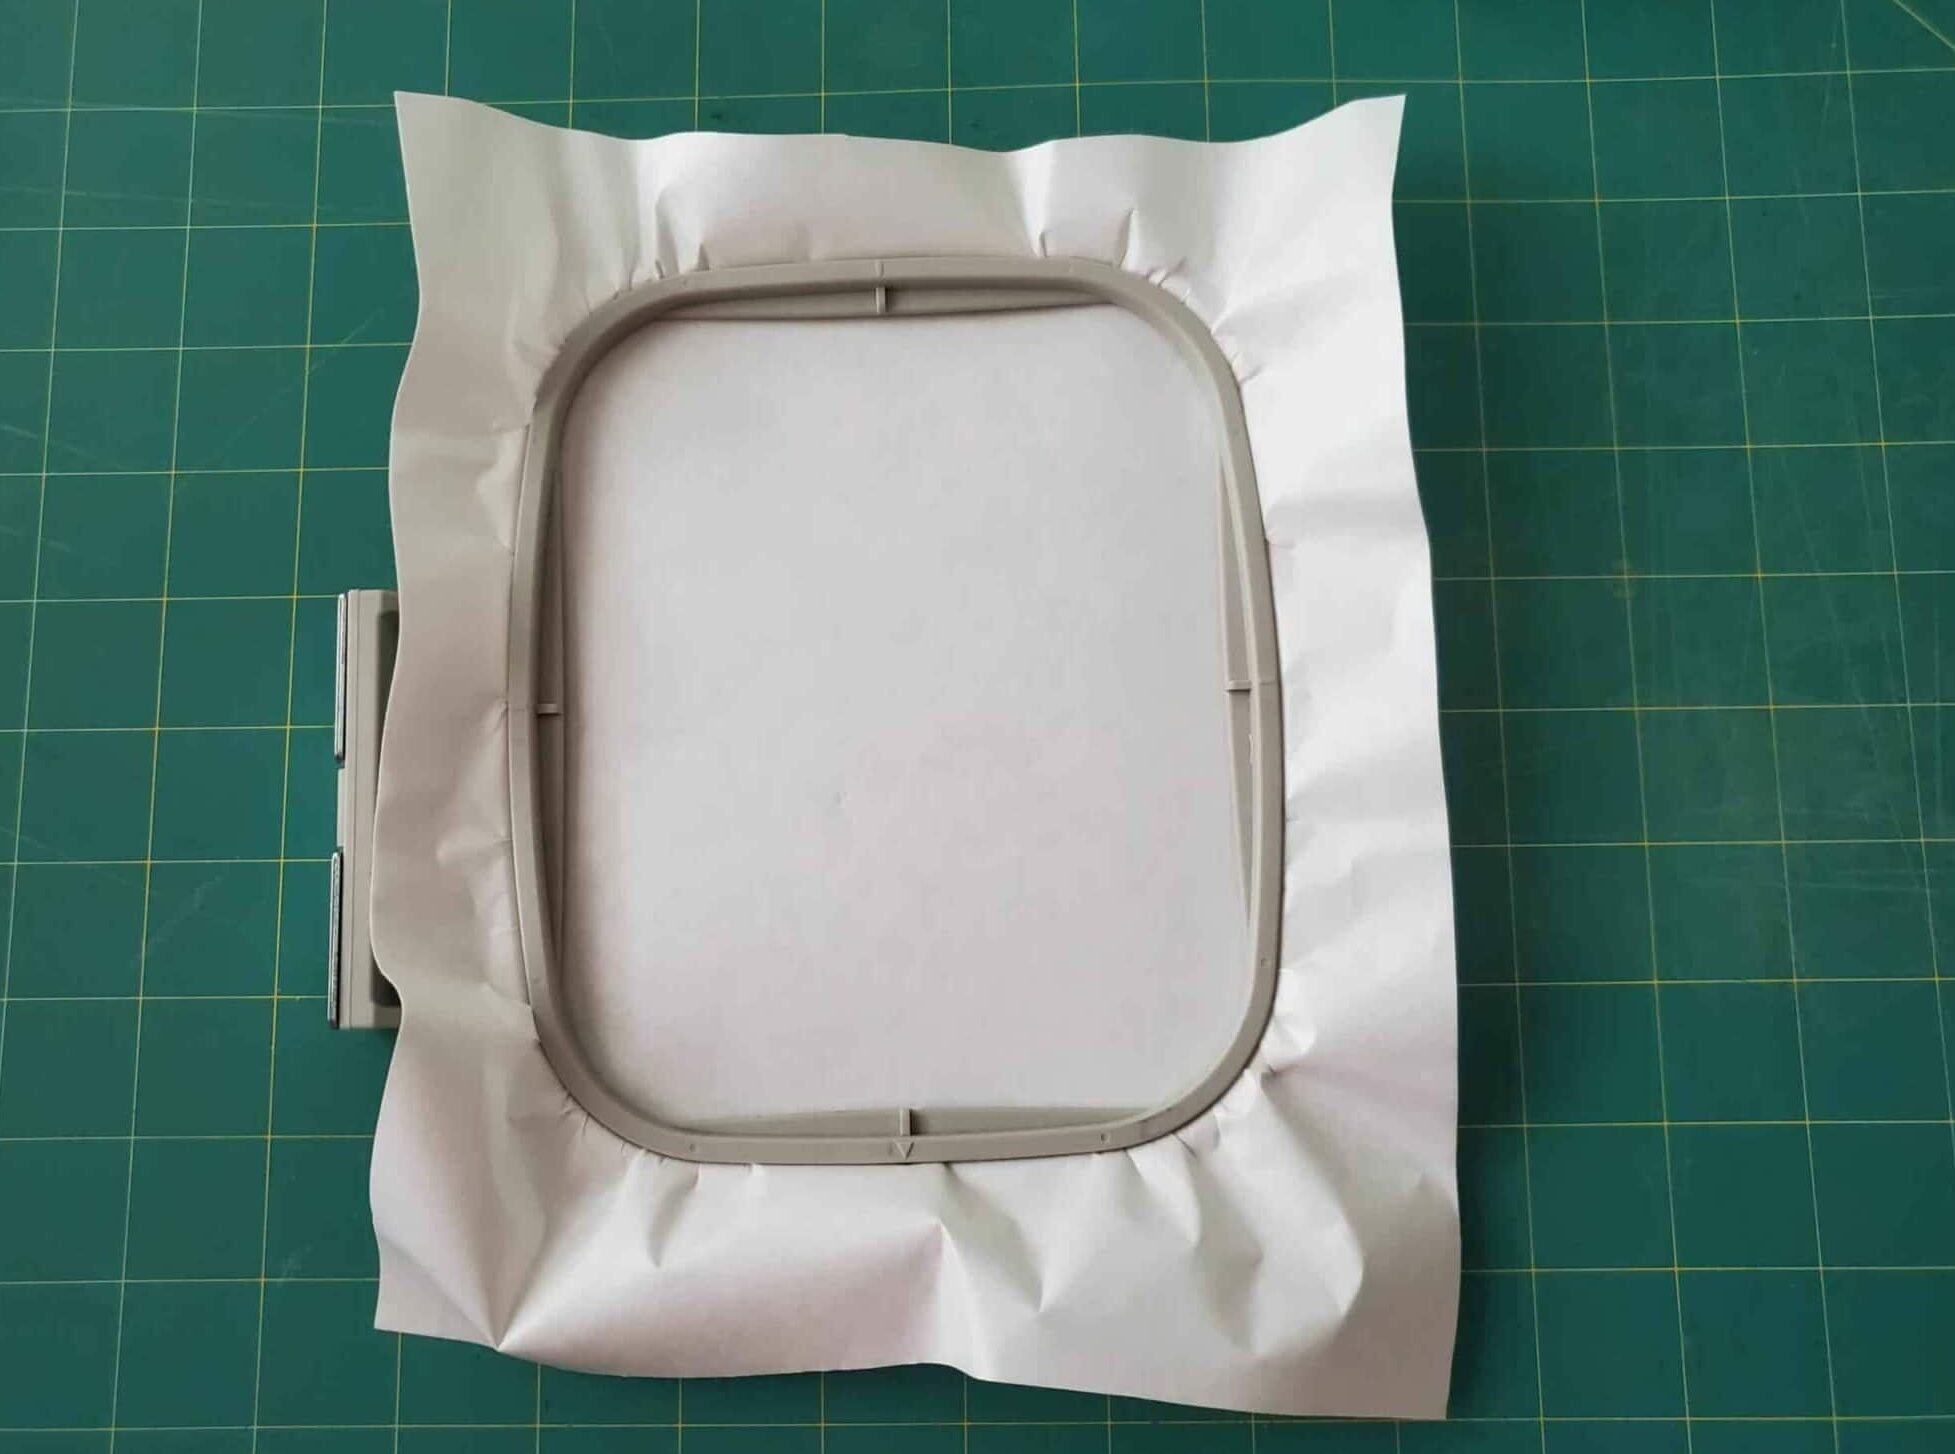
It’s difficult, if not impossible, to hoop slipper straps, so you must find a secure way to keep them from moving around during embroidery.
My solution was to use a sticky, self-adhesive tear-away stabilizer. However, if your slippers are made from delicate fabric with loops, this may damage the underside when removed. So, test first in a small area!
If you think sticky tear-away will damage your blank, another option is sticky wash-away. That or using stabilizer with a light layer of Odif 505 and securing the slipper with a basting box or pins.
Also, remember to add a top layer of water-soluble topping like Sulky Solvy for any slippers with texture in the fabric!
3. Thread
While I love the look of cotton thread, small slippers require small designs, so a 30wt thread wouldn’t provide the cleanest design on a tiny toddler shoe.
I decided to use 40wt polyester embroidery thread. (Love my new DIME Exquisite threads!) However, you can also choose rayon or a thinner cotton thread if you prefer.
4. Needle
A 75/11 embroidery machine needle (mine was a gold Schmetz) worked great for piercing through the topper and the shoe. If you are troubleshooting issues, try switching to a different-sized needle or using a sharp needle.
5. Marking Supplies
Also, grab your favorite marking and measuring tools and embroidery scissors for finishing up the project once you’re done stitching.
How to Embroider Slippers with an Embroidery Machine
Now, here’s the step-by-step tutorial!
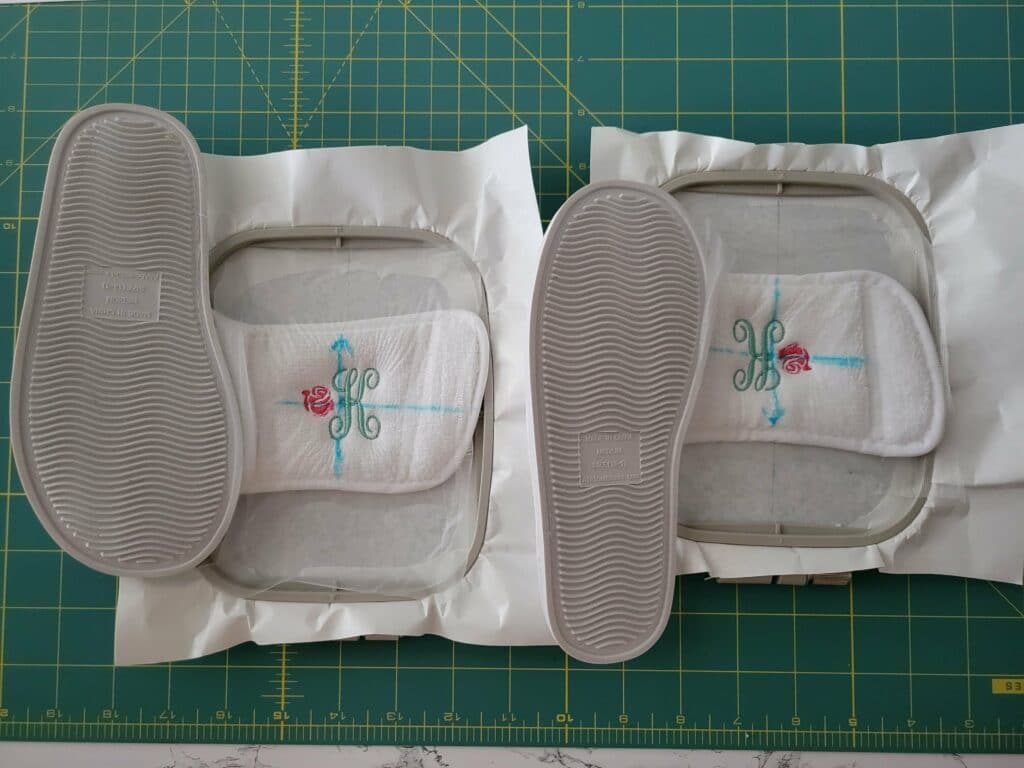
Step 1: Mark the slipper for embroidery.
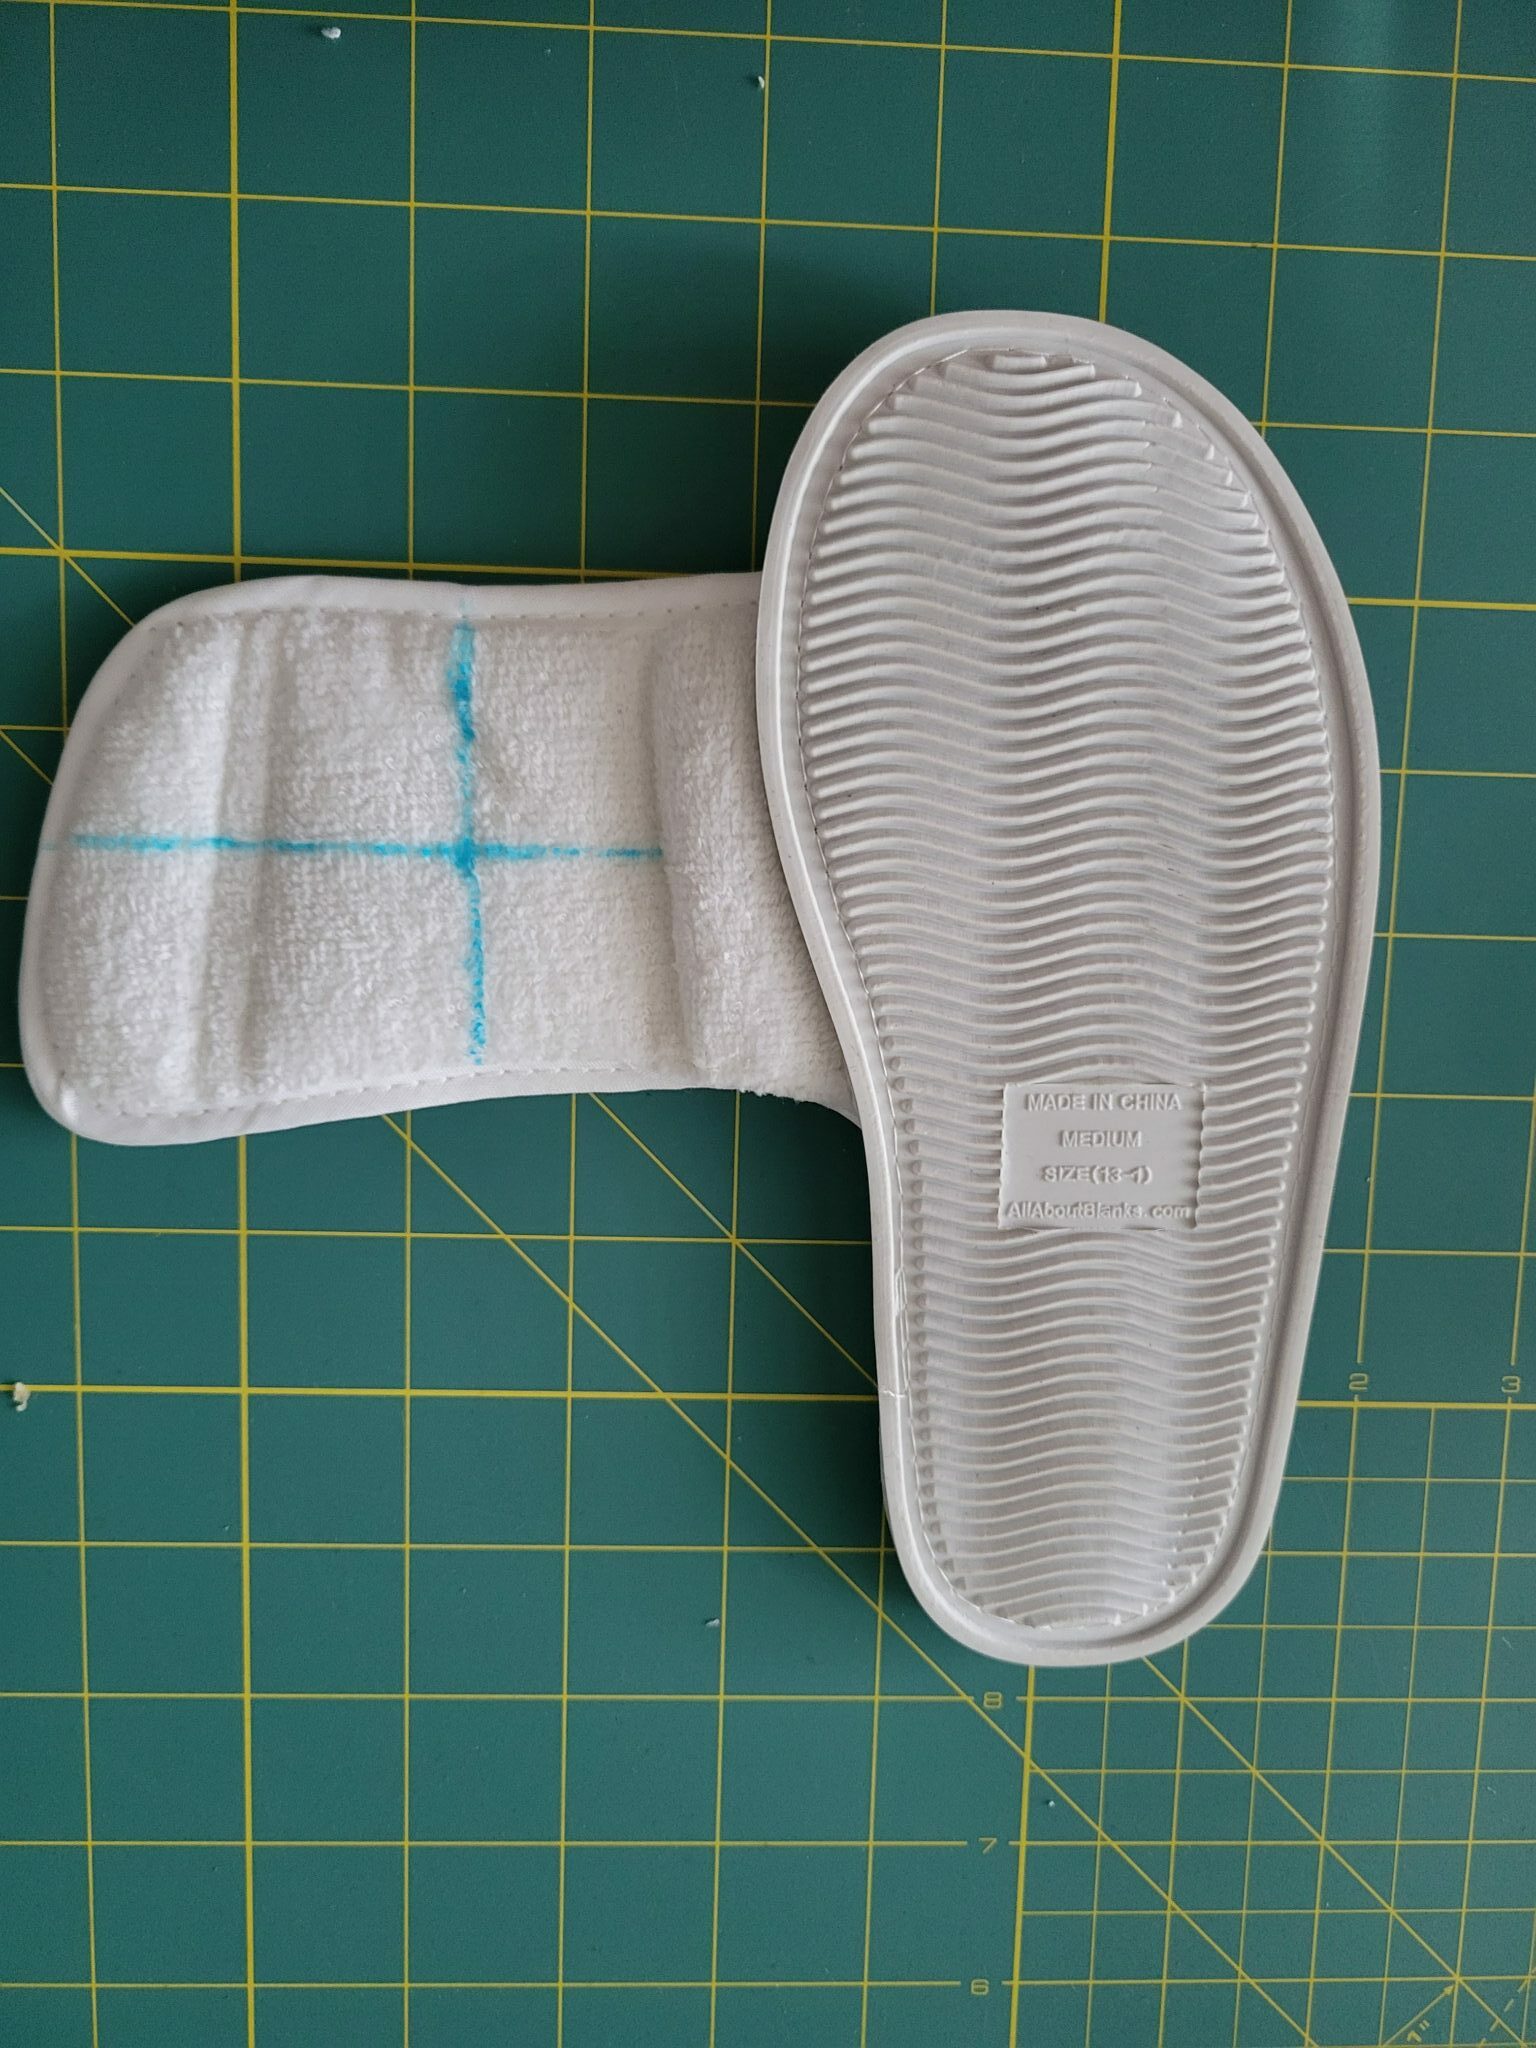
Use a water-soluble marking pen or target sticker to mark the center of where you want the embroidery design to go.
I had to do a bit of “guestimation” of how tight the slippers would be worn on my daughter when choosing the horizontal center. As for the vertical center, I preferred my design to line up with the top of the slipper rather than follow the curve of the toe portion.
One thing to remember when marking is your slipper needs to clear the machine head and the presser foot at all times. Thus, a design that cover a wide area may not work.
Step 2: Attach the slipper to the stabilizer.
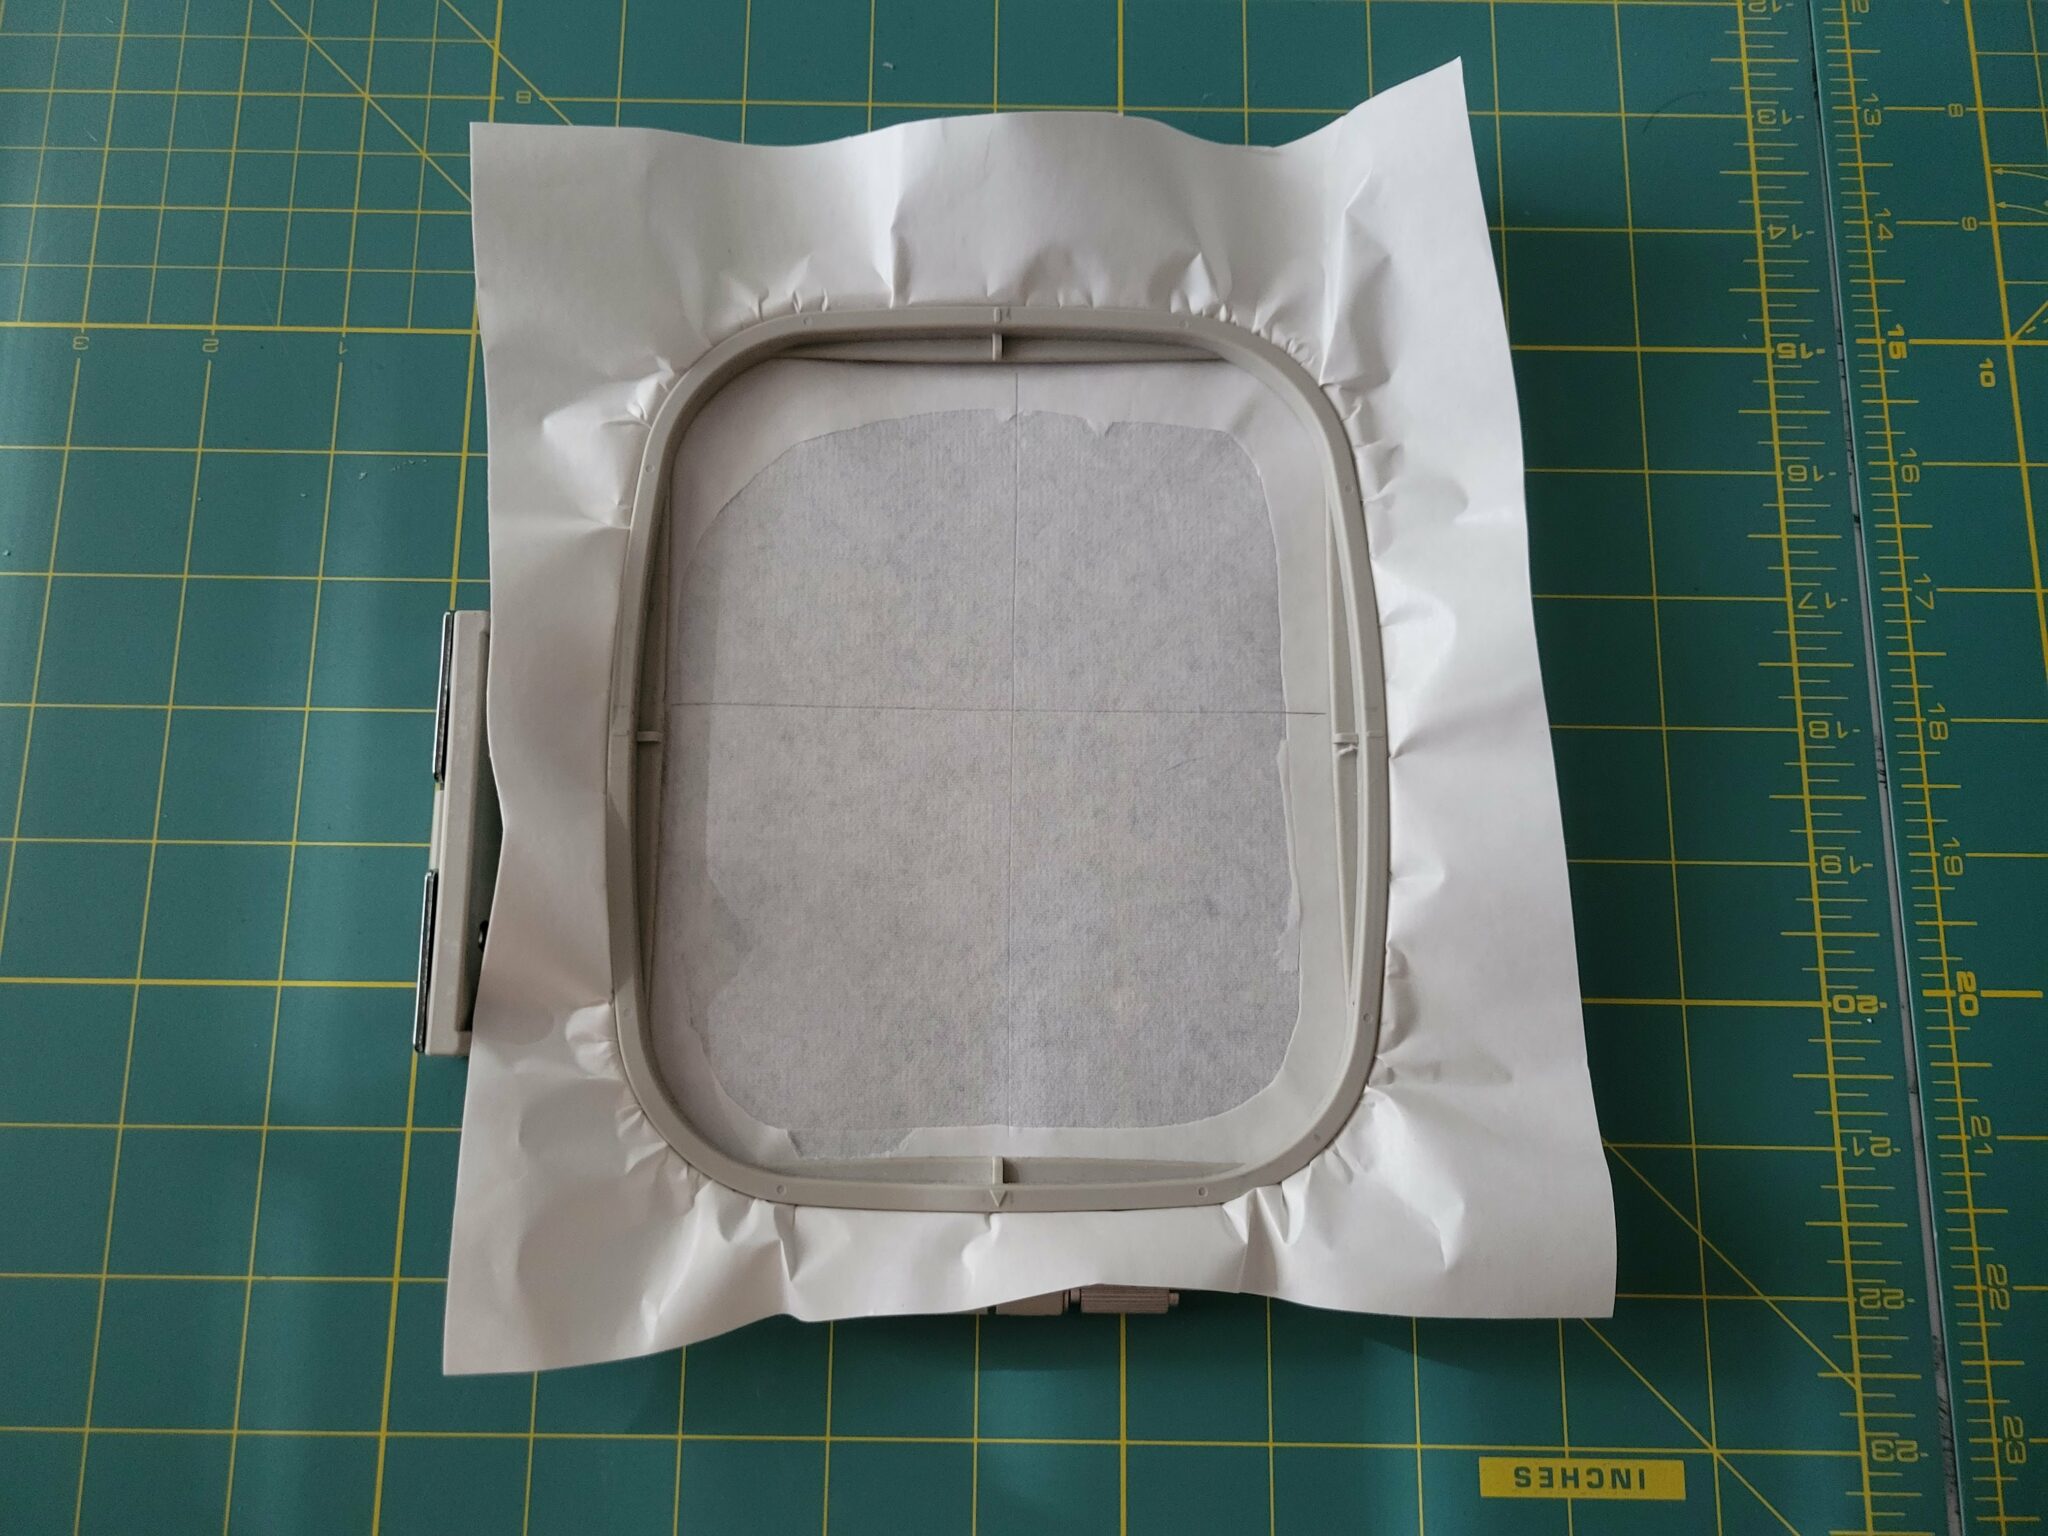
Next, hoop a layer of sticky, self-adhesive stabilizer (or the stabilizer of your choice) and remove the paper layer.
Adding a pencil line to the center will help line up the slippers. (I also went back to my shoe and made an arrow where I wanted the top of the design to save me stitching errors later!)
Now, my machine works best when the bulk of an embroidery blank is placed toward the outside of the machine, so I planned my slippers to orient that direction.
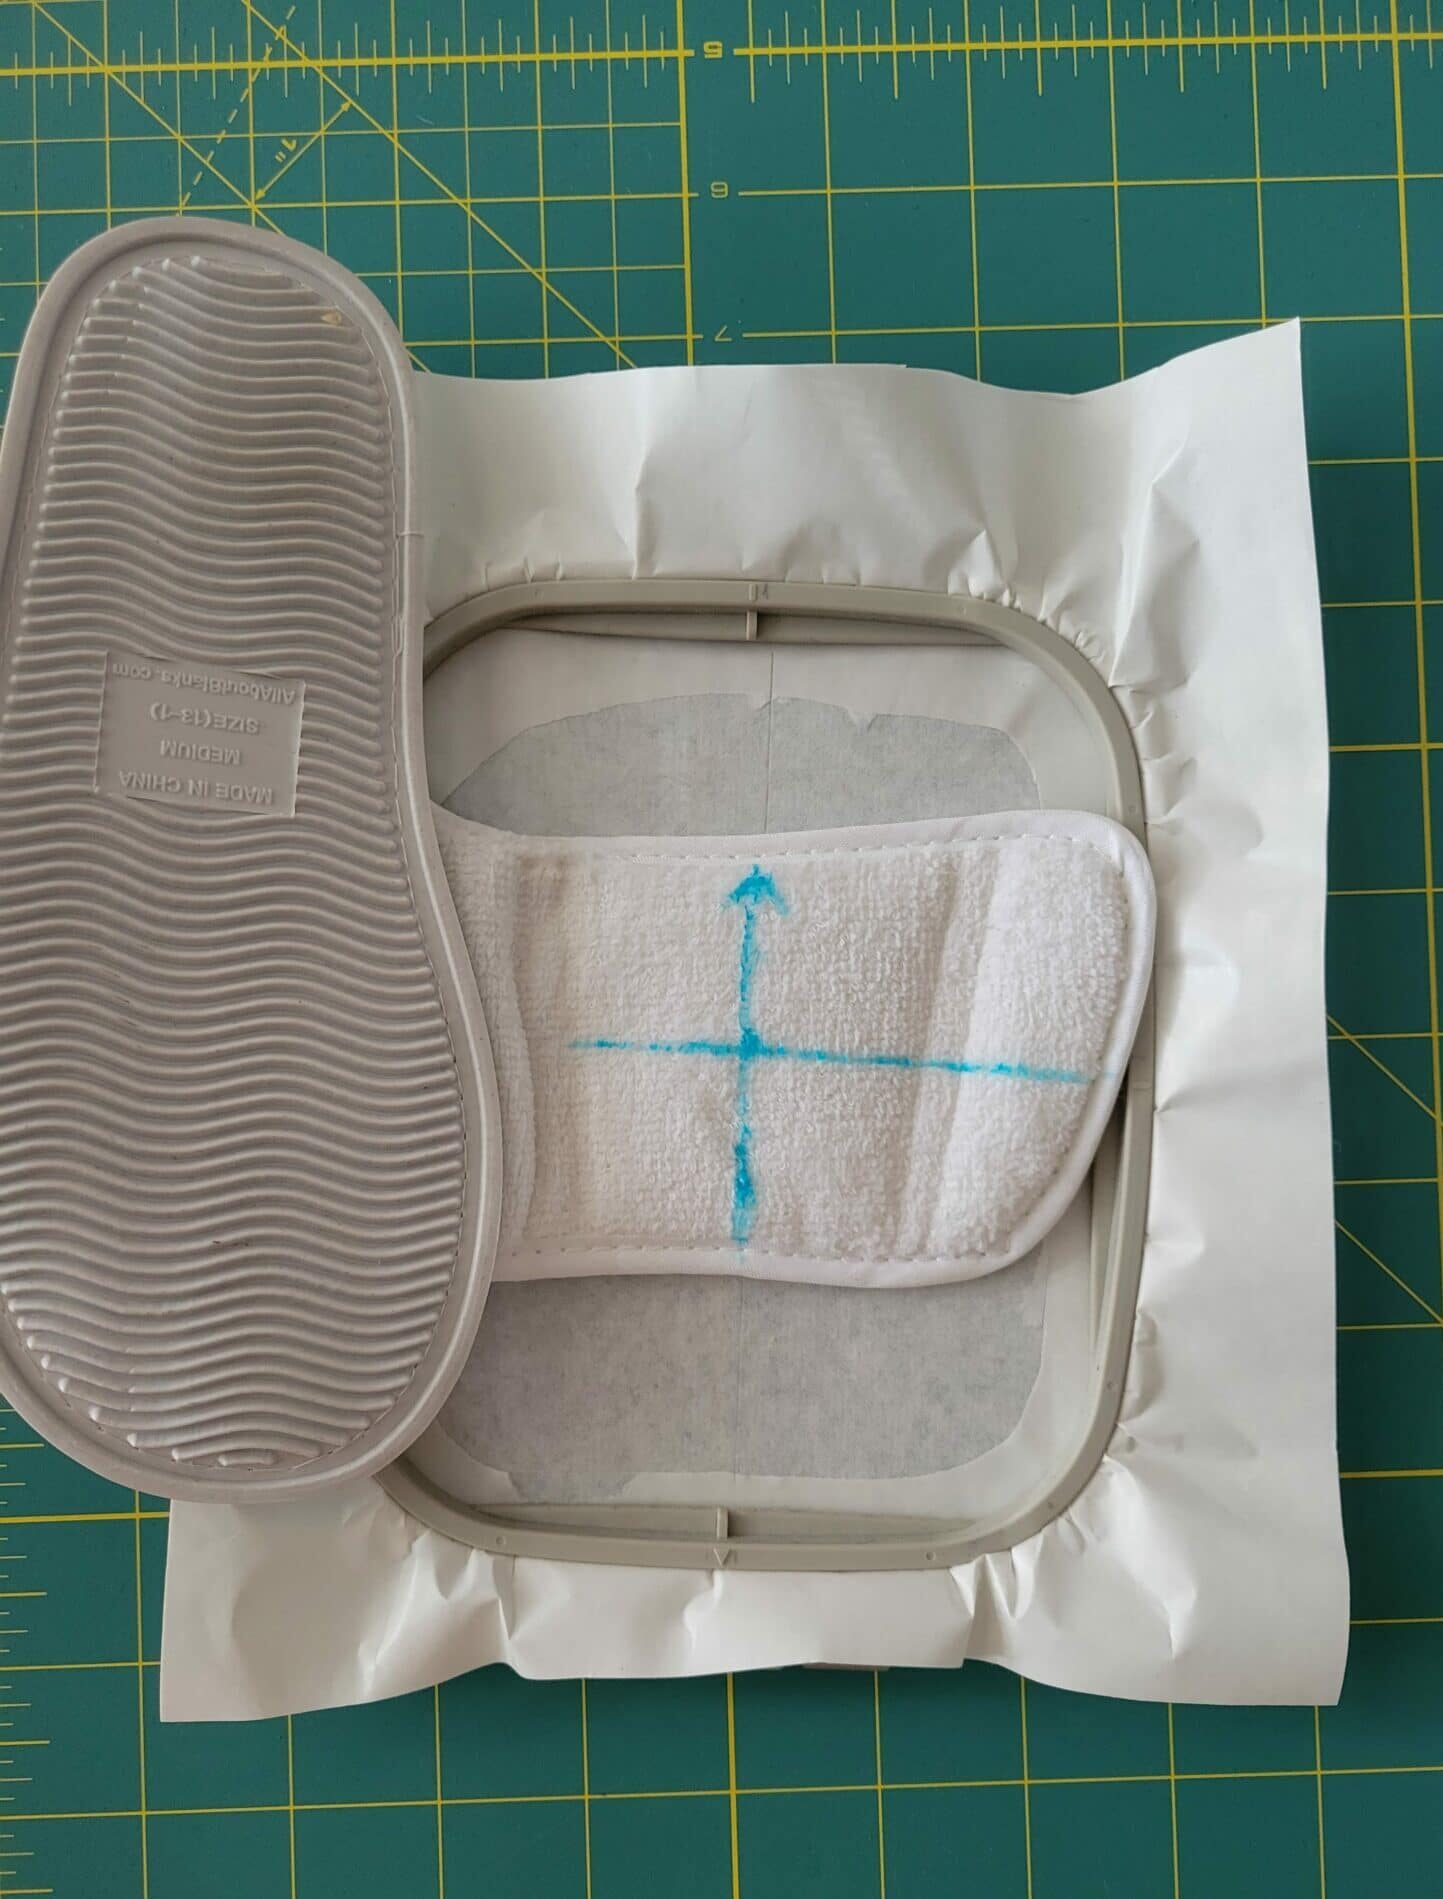
Then, place the center of the marked slipper on the center of the marked stabilizer.
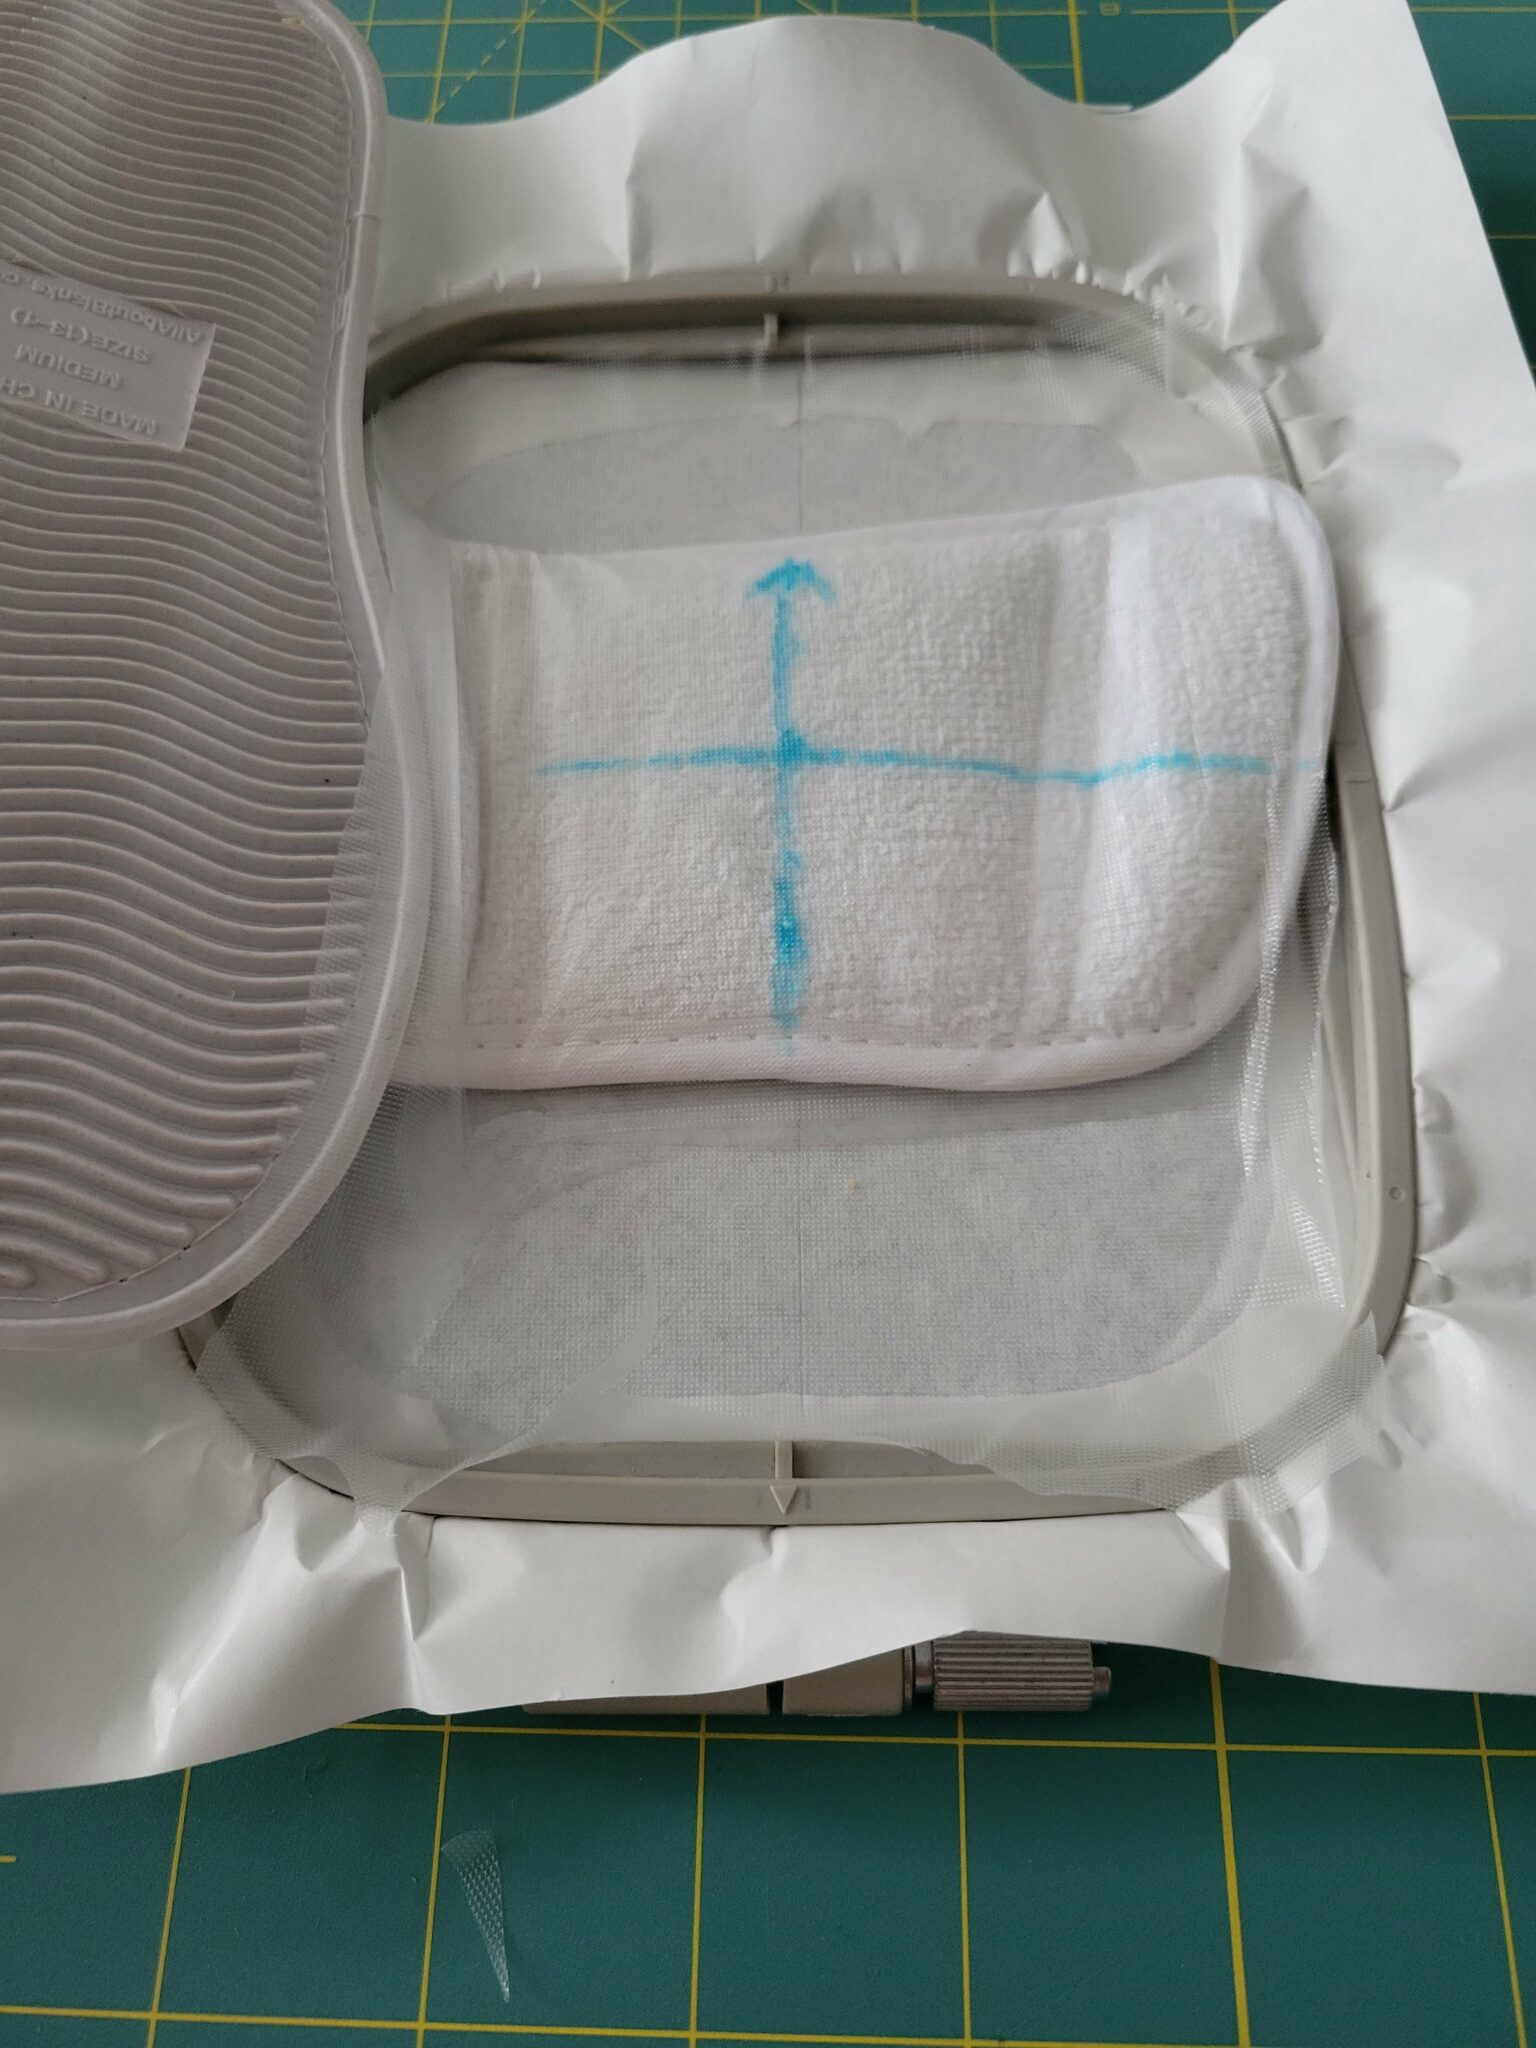
Cut a small piece of water-soluble topping, and place this over the top of the slipper. If the amount is large enough, it will adhere to the sticky stabilizer.
Lastly, tape the slipper itself to the side of the hoop if you think it will cause havoc when the machine arm starts moving.
Step 3: Set up the machine and embroider!
Place your hoop into your machine, and load your embroidery design. (Mine were both from Blasto Stitch.) Rotate the design to match the orientation you hooped the slipper, and line up the needle when the center of the design.
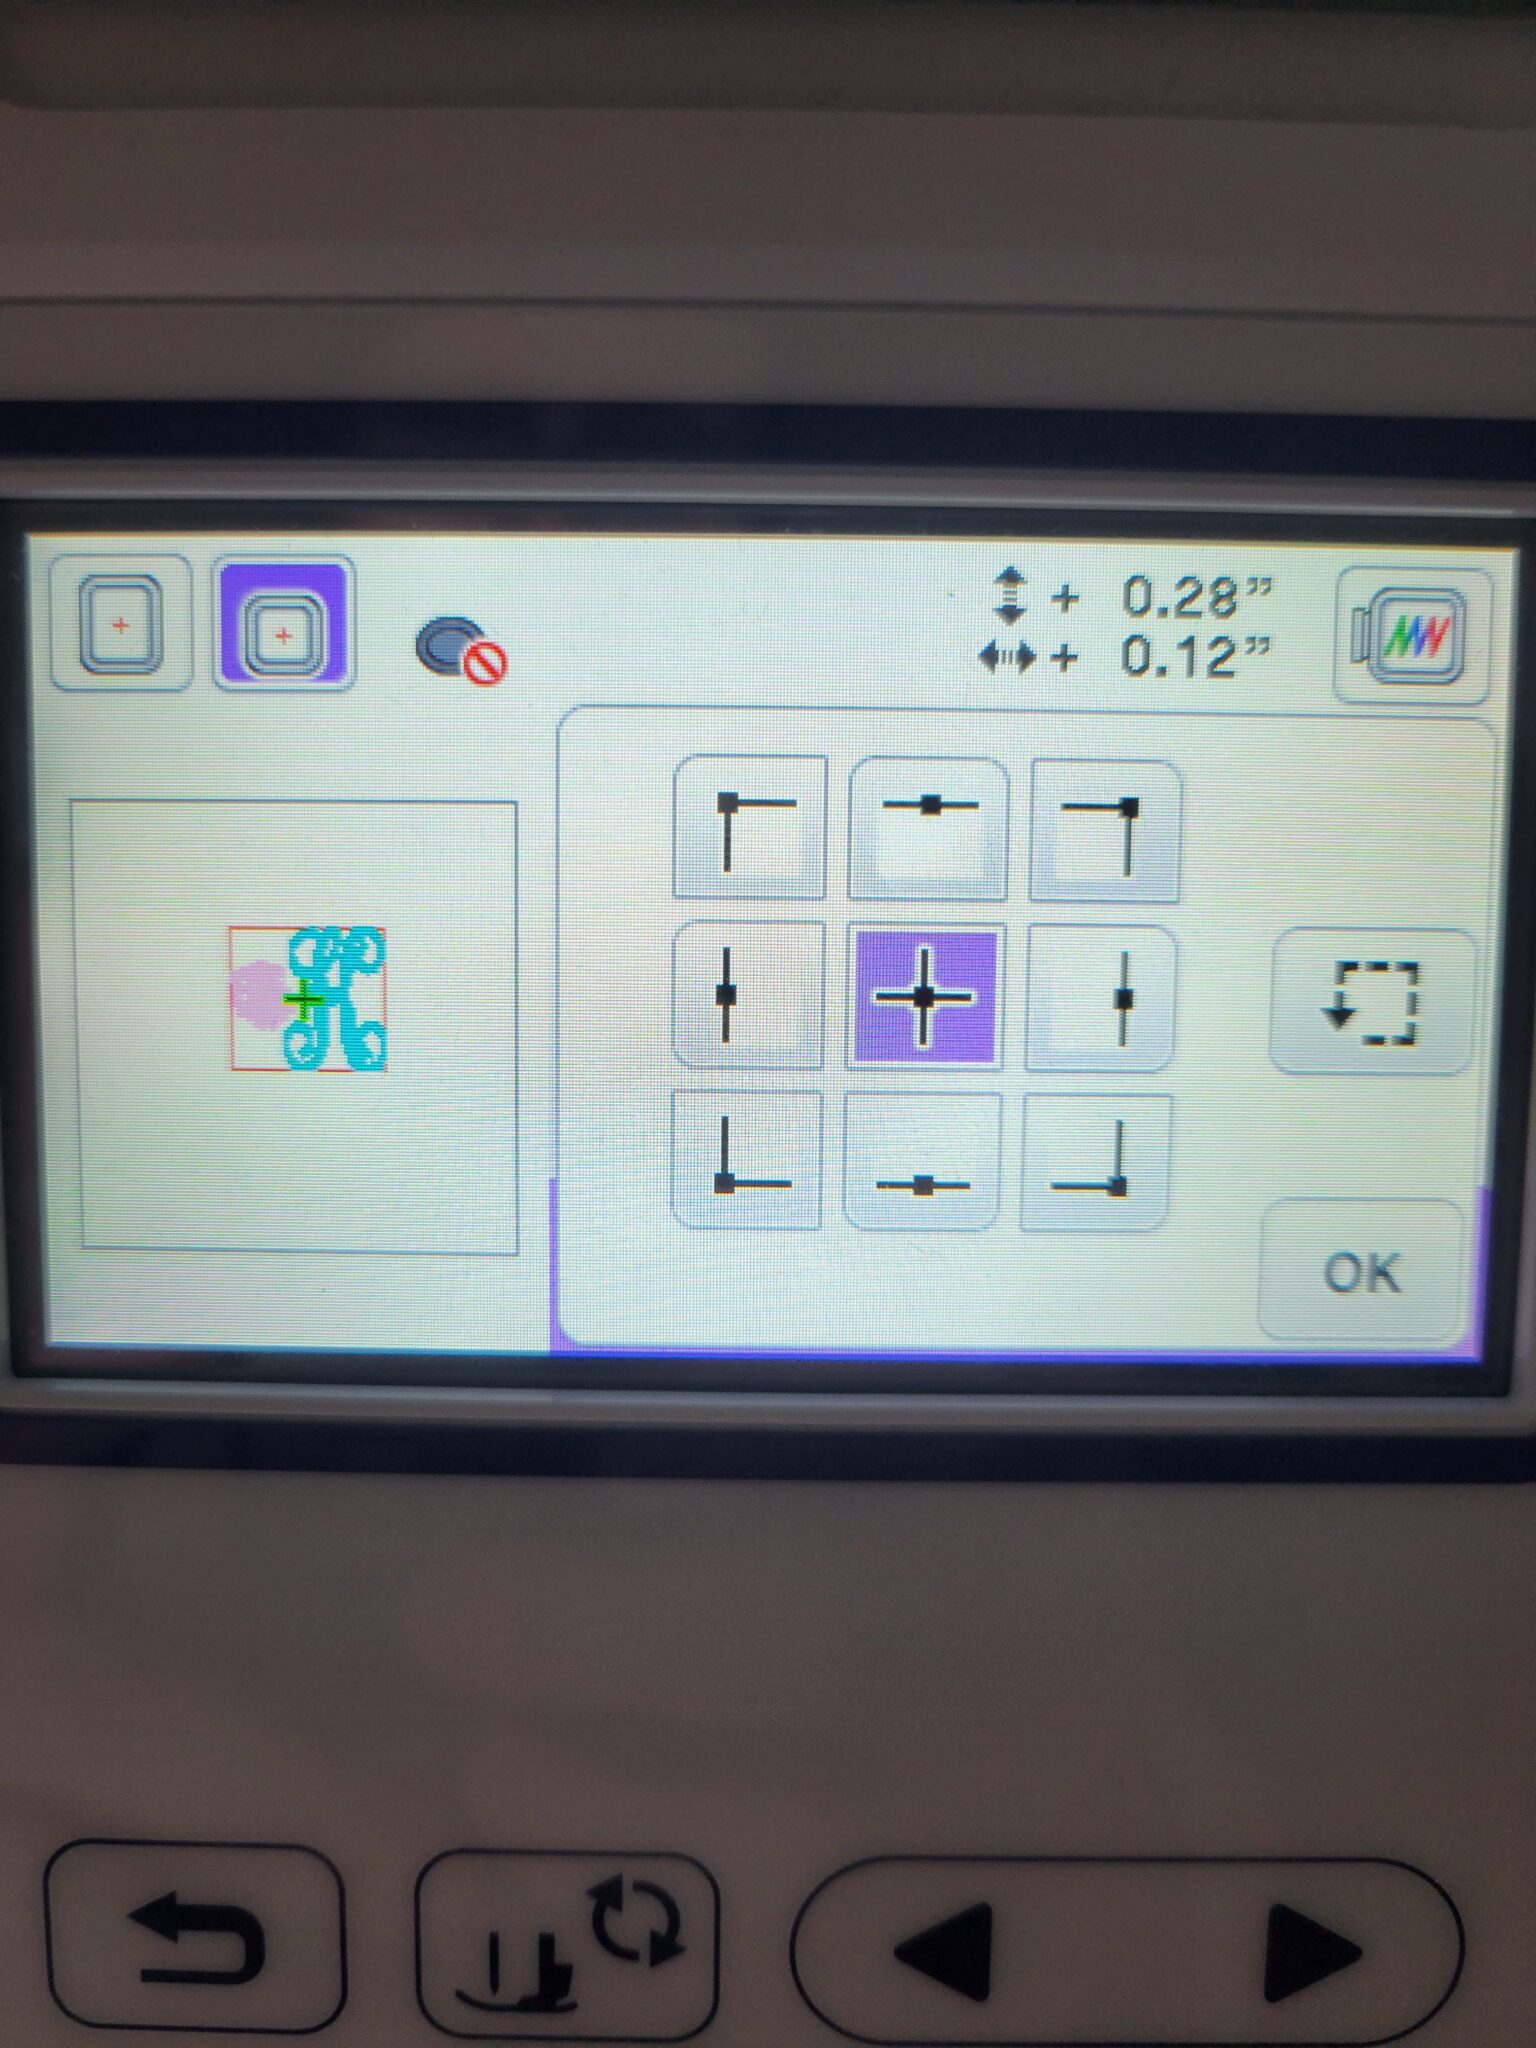
Then, make sure to preview the design area to ensure you will not run into the sole of the slipper itself during embroidery!
Press start, and watch the machine carefully as the rubber sole of a shoe is one thing you don’t want to get stuck under the presser foot. (Trust me, this happened once when I was troubleshooting how to embroider on a shoe!)
During the embroidery process, one last thing to consider is clearance for the needle threader. There was one thread color in my tiger design that started too close to the shoe’s sole that I had to thread by hand instead.
Step 4: Put on the Finishing Touches.
Remove the hoop from the machine and gently tear off the adhesive stabilizer. The rougher you pull the stabilizer, the more likely you are to damage any delicate loops on the slipper’s interior.
Then, trim threads on the back of the design and any remaining jump stitches on the front.
Lastly, tear off the water-soluble topping. Running the slipper underwater will remove any residual topping and eliminate the embroidery marking pen.
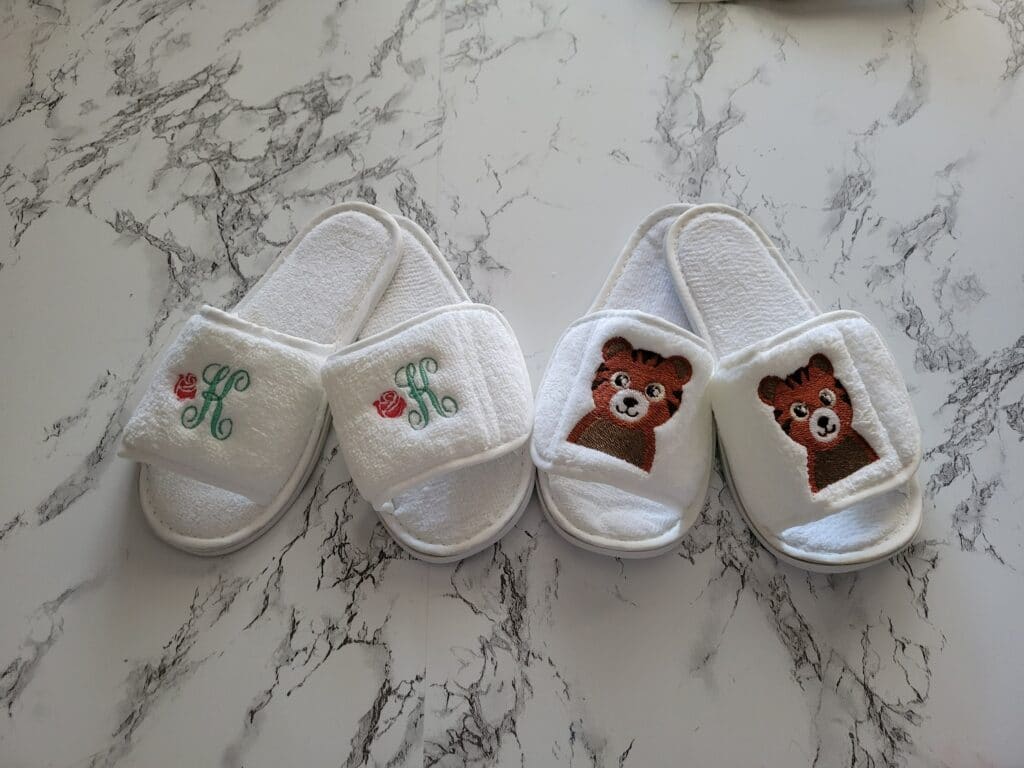
Let dry and marvel at your masterpiece! And, that’s it! I hope you enjoyed learning how to make custom embroidered slippers with an embroidery machine!
tis is so neat. I have got to try it. I have a se2000 Brother. I am new at this machine and you gave me hope. I had Janome and I miss it, but something broke on inside and couldn’t be fixed.
have read and went by some other teaching for a while.
Thank you for explaining this clear. Charlotte